If you have the latest version of Snap XMP Desktop, these should already be available in your installation folder. This tutorial shows how to add a rating scale to your survey.
Before starting, download and un-zip the Rating Scale you’d like to use. We’ll be using the Gold star rating scale for this guide.
Adding rating scales to your survey
1. Add a question to your survey
In the Survey Overview window, open your survey.
Click New Question (+) and set the question style as Single Choice. This adds a new Single Choice question.
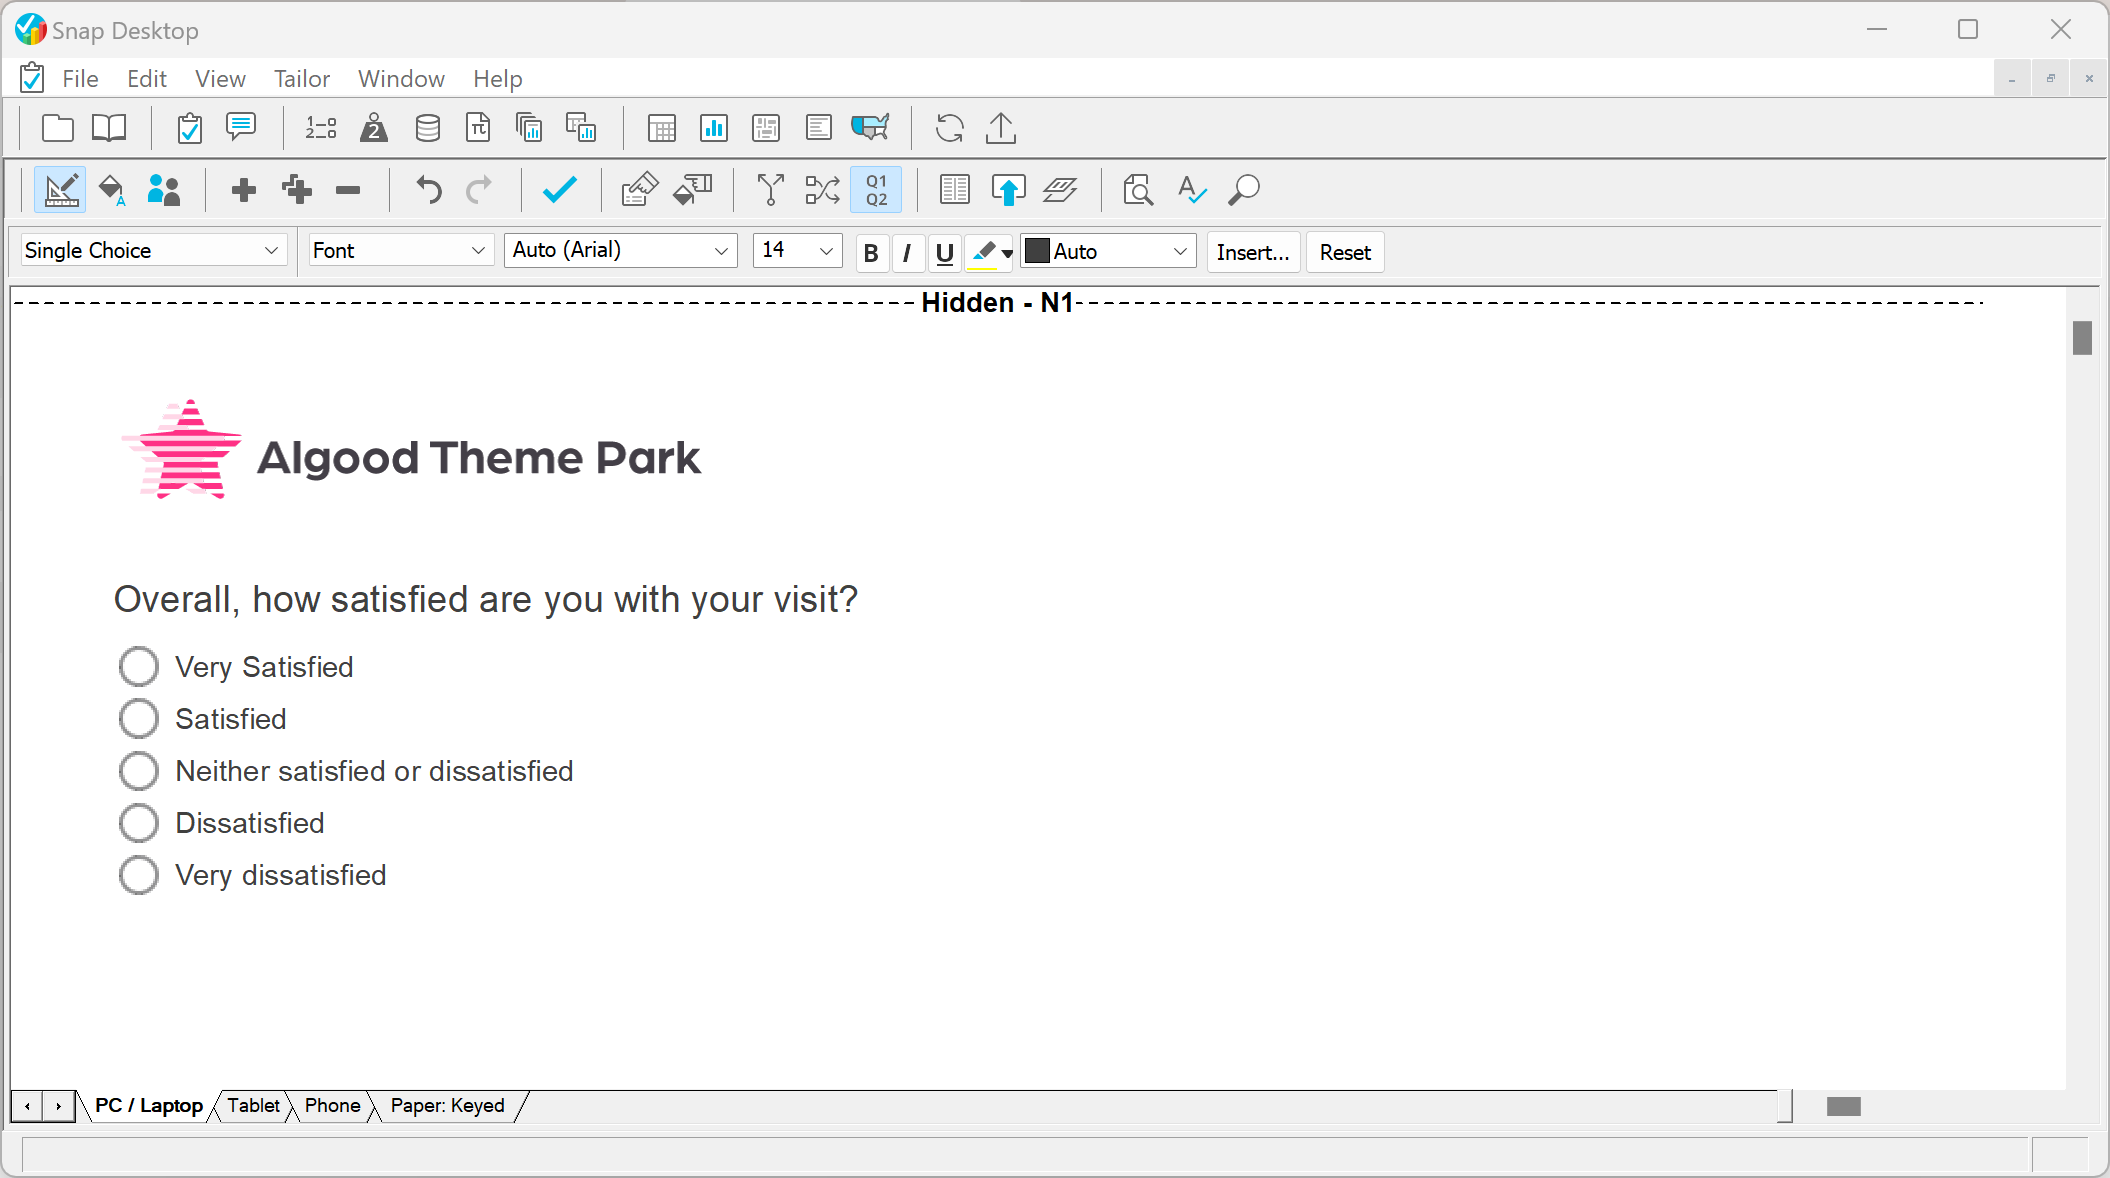
Enter your question. In this example, “Overall, how satisfied are you with your visit?”
Add 5 responses, hitting the Tab key to add a response.
2. Add the Map Control
Select the question you want to convert to a Map Control.
Choose Show and As Map Control in the drop-down menus, then click the Show checkbox.
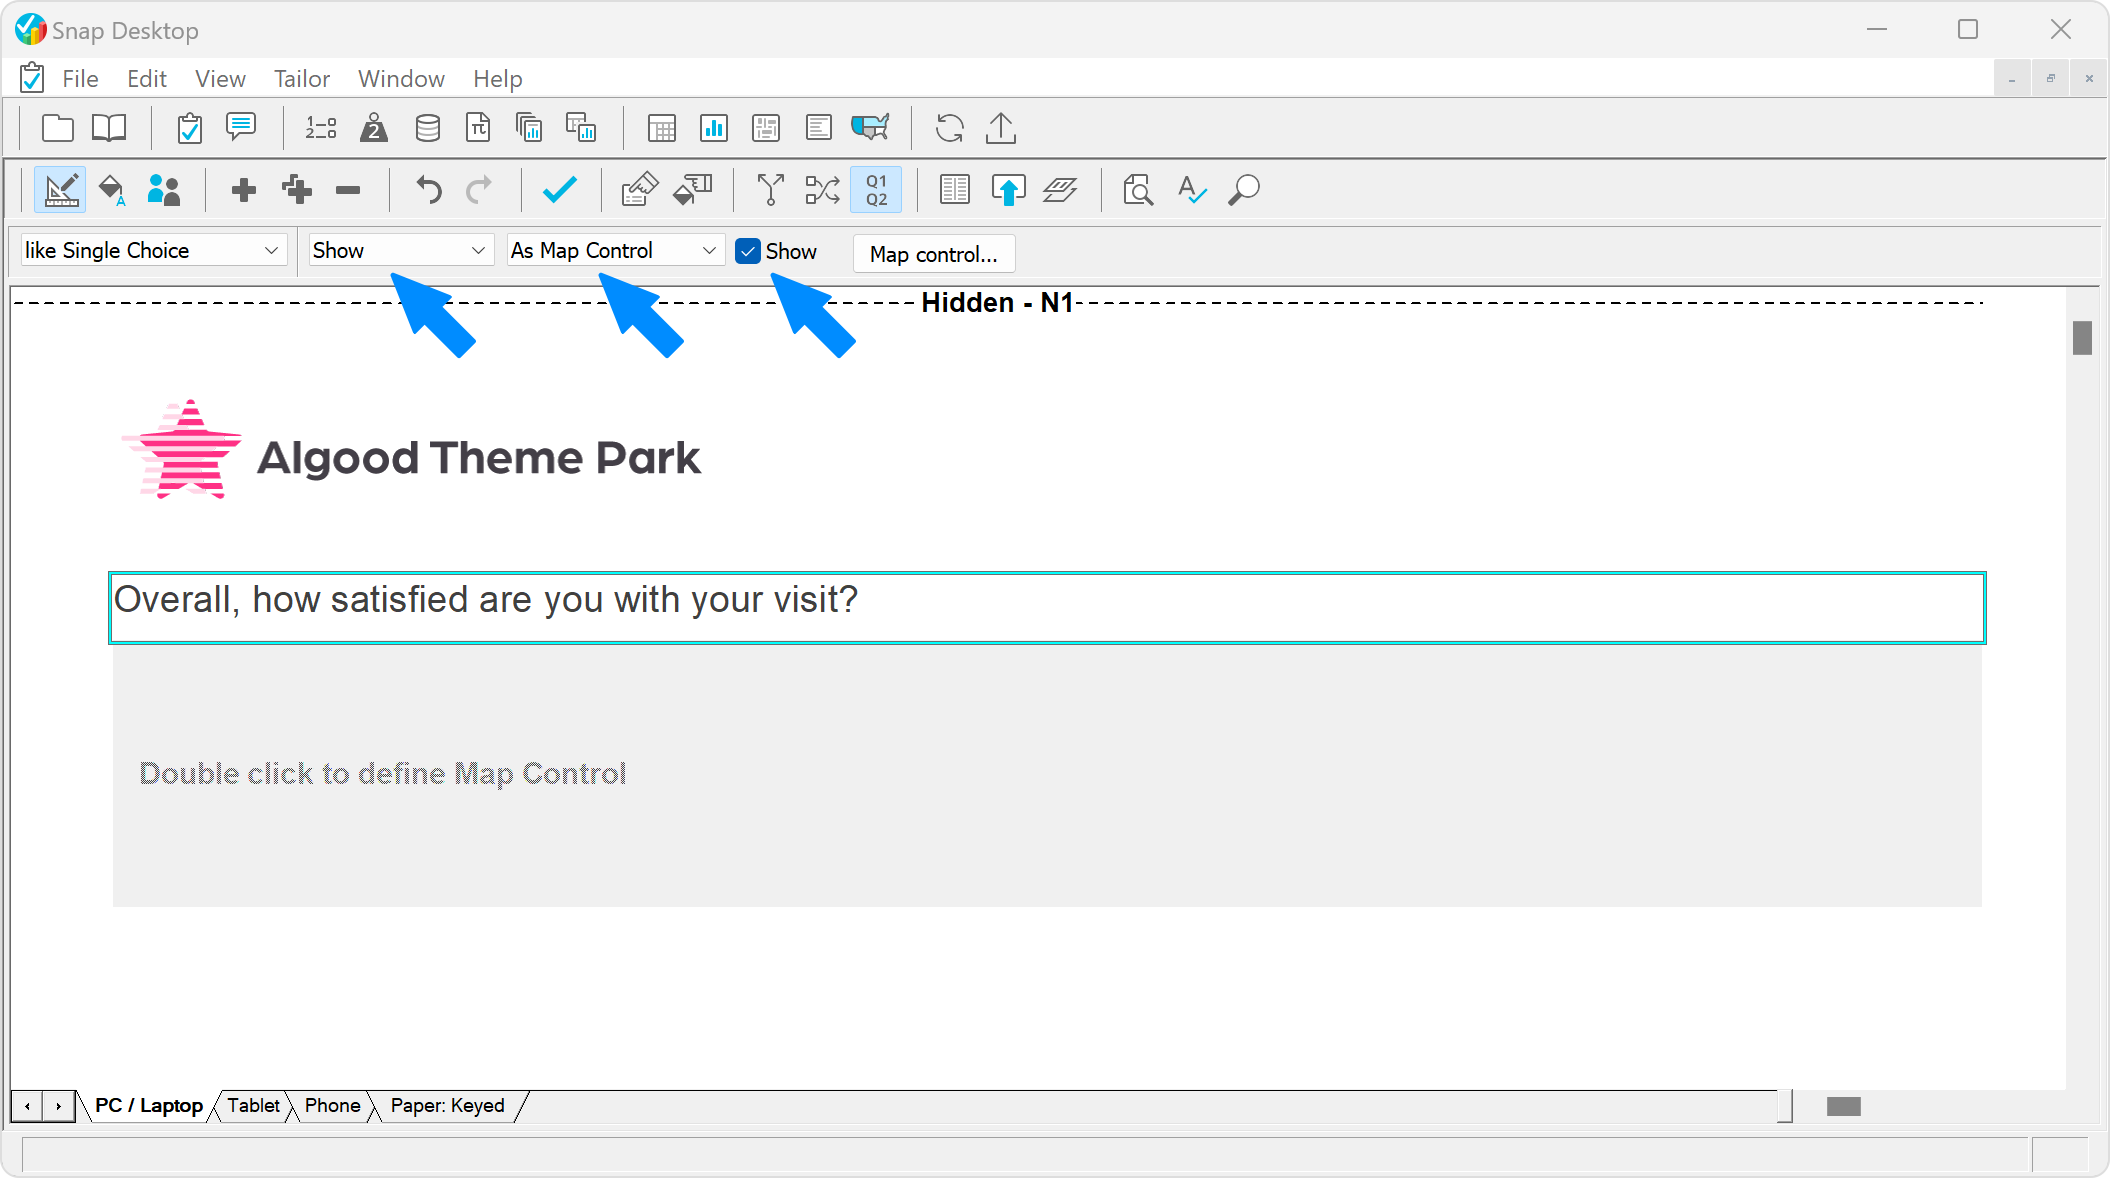
Double-click the grey area or click the Map control… button on the toolbar to open the Map Control Editor.
Select the File menu, then Load Map Control and locate your rating scale file. We’ve used the gold star rating scale available here.

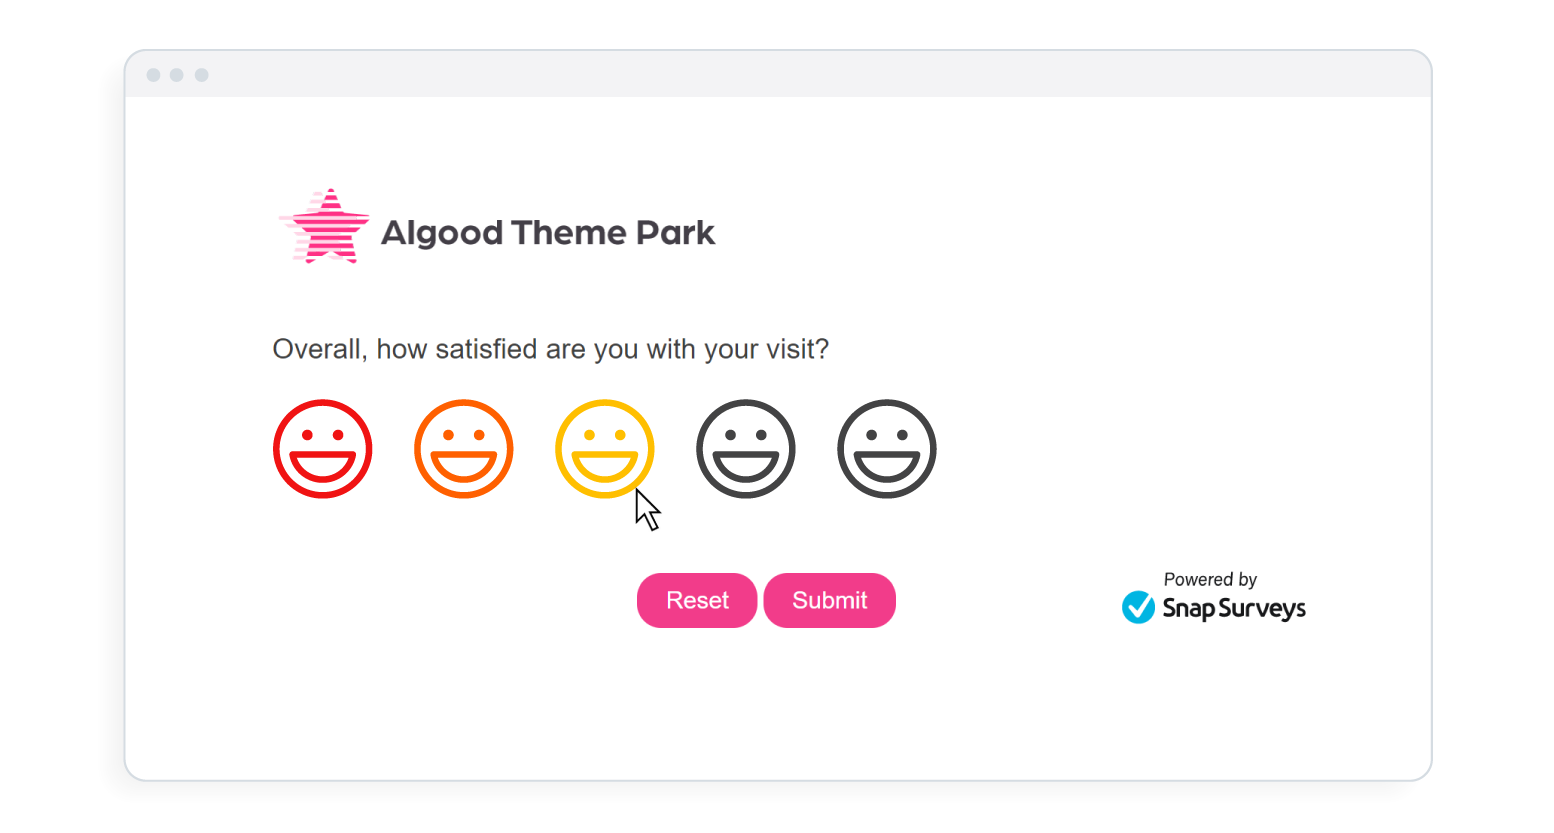
Click the Preview tab at the base of the Map Control Editor.
Click on each star in turn to check it behaves as you would expect (you are able to see the code label in the hover text).
Click OK to save the rating scale and return to the survey. Publish a preview of your survey to check the rating scale looks and works as expected.

Colouring rating scale images
With Snap XMP Desktop it’s possible to colour tint the images in rating scales. We advise using the outline style rating scales to do so, as these have been designed with colouring in mind.
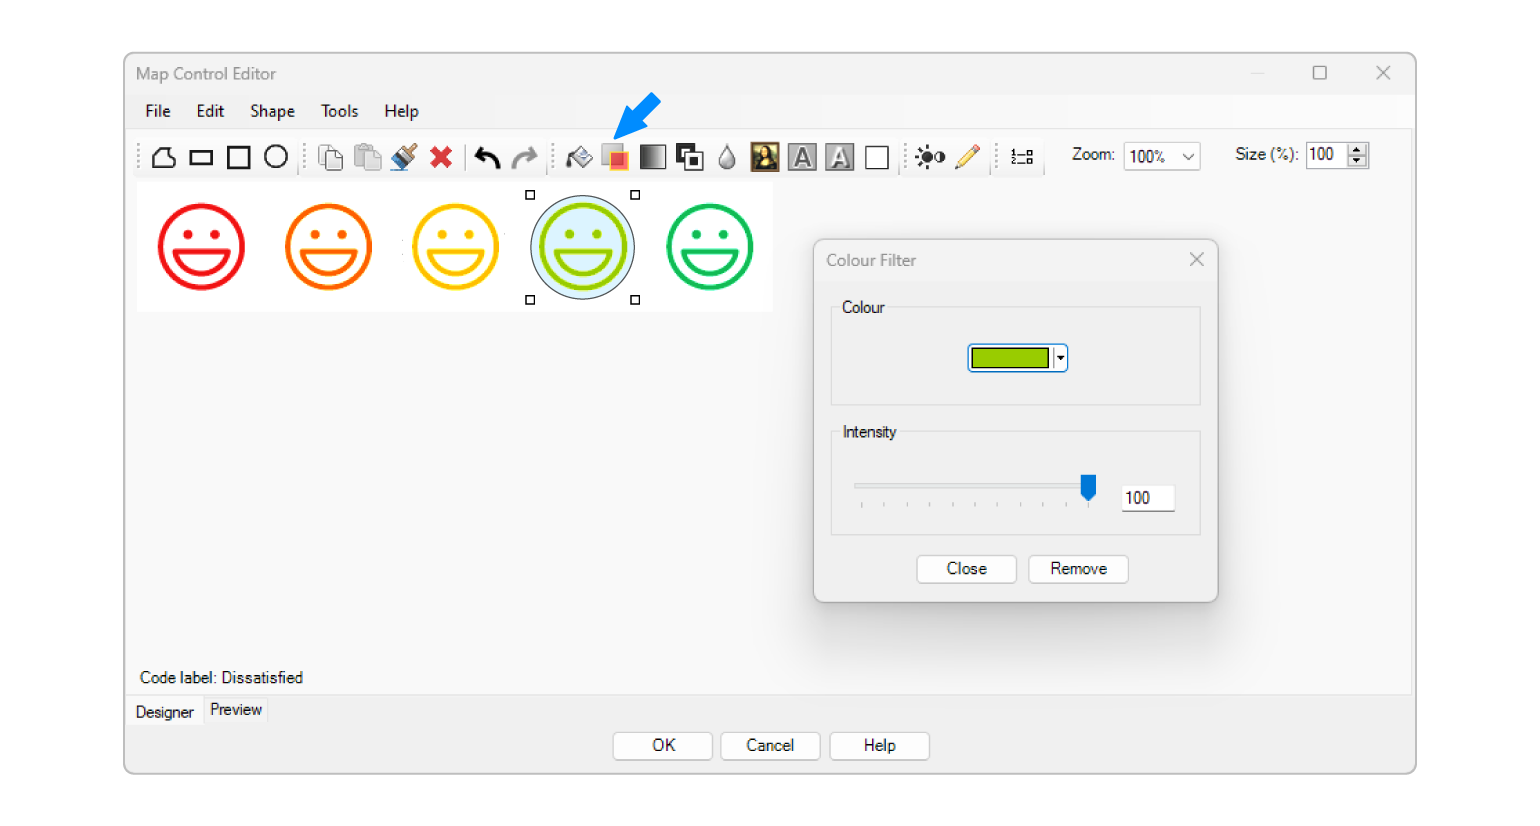
Follow the same process as above but, while in the Map Control Editor, select the image you’d like to colour and click the Colour Filter.
In the pop-up dialog, click the colour box and choose the new colour you’d like, and click Close when you’re done.
The Map Control Editor shows the selected state, so use the Preview tab to check everything works as expected. If it does, click the OK button to exit the editor.
Save your survey and publish a preview to check in a browser.
If you have any issues, check our Support Hub or call the team for help.