On-Premises Snap XMP Online installation guide
System requirements
- Windows Server 2019 or later running IIS, matching Microsoft’s minimum requirements, plus an additional 2GB memory
- SQL Server 2016 or later, matching Microsoft’s minimum requirements
- Further resources will be determined by load levels and usage profiles
You can find the latest technical specifications here.
These installation instructions have been written for Window server 2022. You will need to refer to the system documentation if installing on a different version of Windows server
This document assumes that your server is configured, secured and functioning properly using a server certificate for SSL
You will require server administrator skills and rights
You will need a Snap XMP Desktop installation code during the Snap XMP Online installation process. This is required to run the software used by Snap XMP Online. This must be the only copy of Snap XMP Desktop on the server. If you have a networked copy of Snap XMP Desktop the networked copy must be run on a separate server.
Snap XMP Online requires the use of a mail server for certain functionality. The mail server should be running on a separate server to reduce congestion.
Installation steps
IIS installation
Check if IIS has already been installed and if not, install it
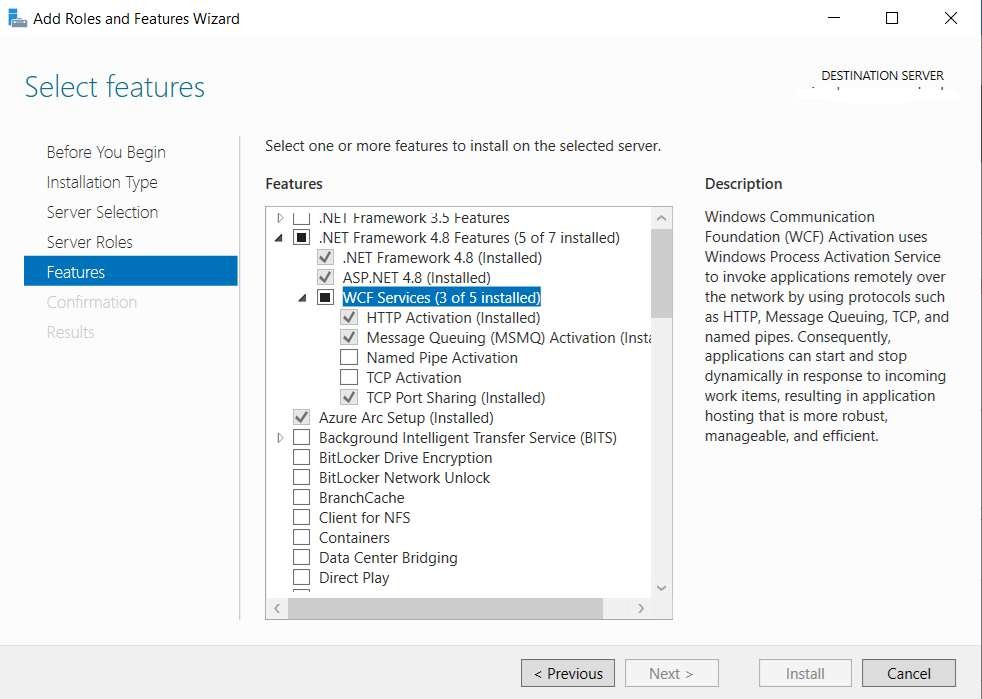
Configure the server using ‘Add roles and features’ to have the following components to ensure the software installs and runs correctly.
- Add Windows Authentication.
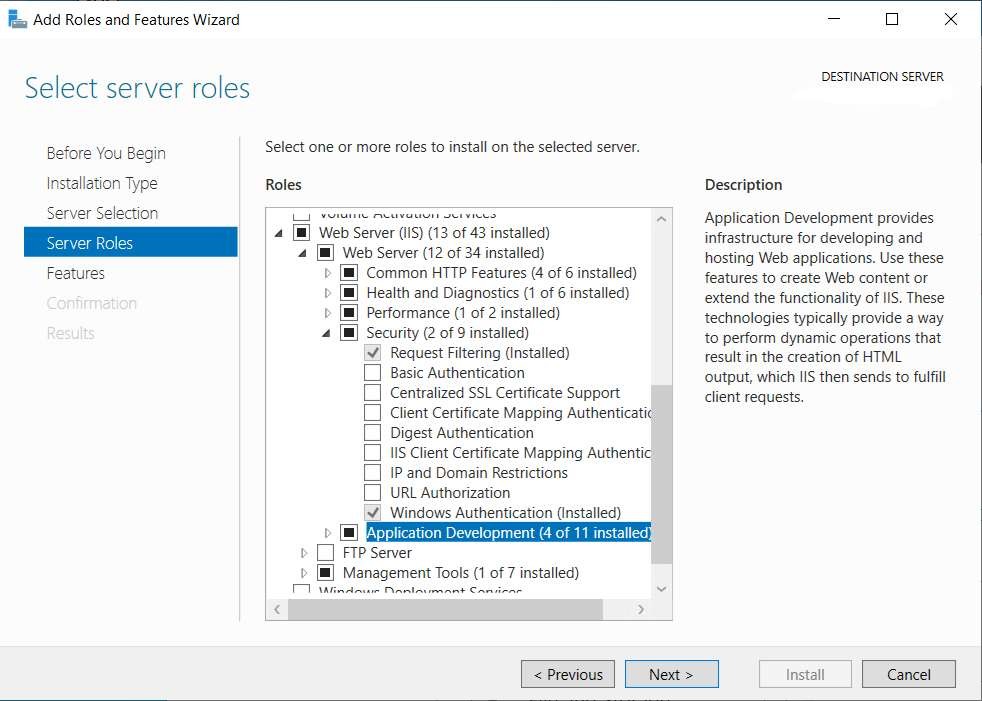
- Add the ASP.NET 4.8 role under the Application Development section
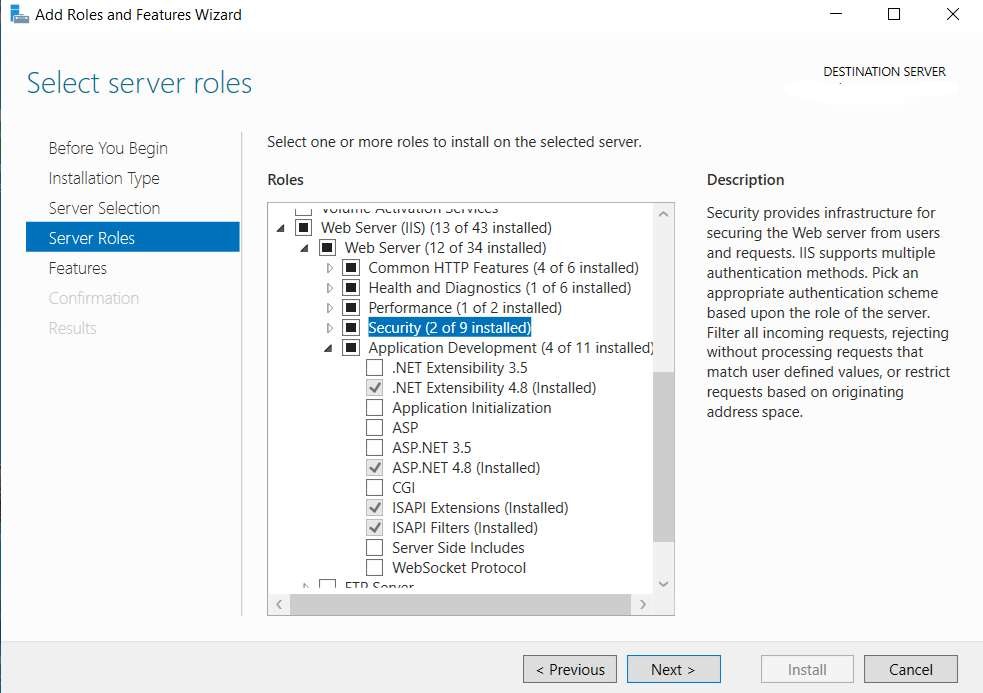
- Include the features that are required for ASP.NET 4.8.
- Add the HTTP activation for WCF services and the Message Queuing (MSMQ) Activation (including the features required):
Create databases in SQL Server
Snap Online requires 5 separate databases to store the data.
NB: The collation must be Latin1_General_CI_AS. This needs to be set when the databases are created.
The naming convention allows for a prefix of your own choosing followed by the following names:
- prefix_CustomURL
- prefix_SOL
- prefix_SOLMailing
- prefix_SOLResources
- prefix_SOLShares
The prefix along with user credentials for an account that has permission to create tables in these databases will be required when running the installer. We recommend you create a new user and set the new user to be the database owner.
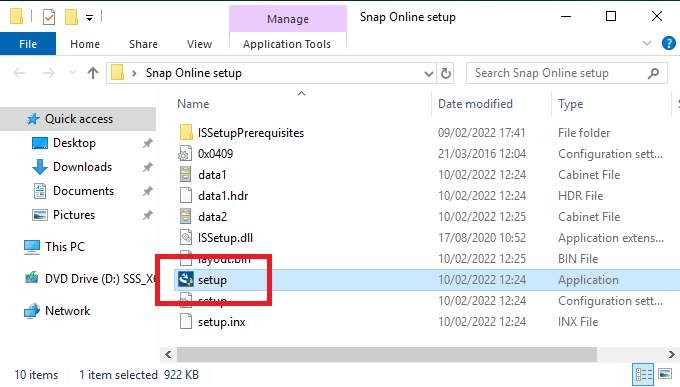
Run the installer
The Snap Online setup.exe will install the following components:
- Snap Online
- Snap Desktop
- Snap Pool12
- Win2pdf (a pdf printer driver to enable reports to be generated)
- AttachIt
Run setup.exe from your download:
Install all the pre-reqs and reboot as required.
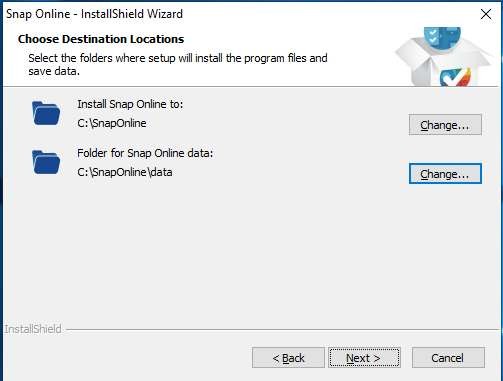
Select where you would like the Snap Online software to be installed and the folder you would like to use to store the survey data.
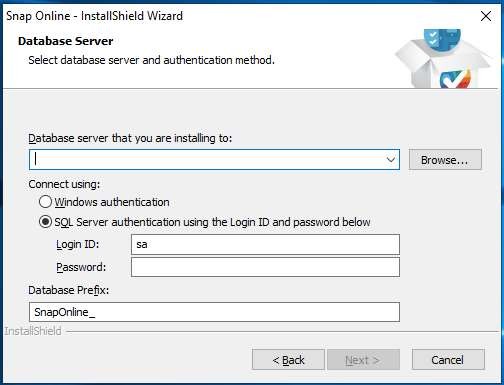
When prompted select the SQL server and specify the user credentials and prefix chosen for the databases:
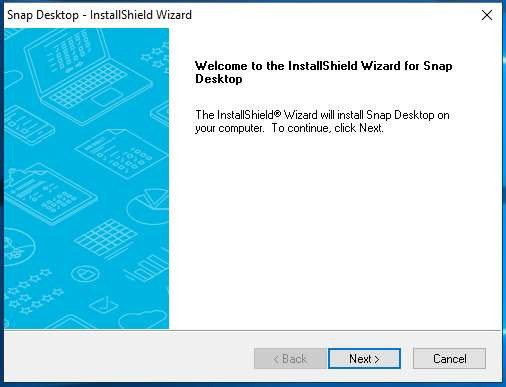
Press the Next button. The Snap Desktop installer will start.
Enter the installation code when asked to do so.
- You do not need to install the sample surveys.
- You do not need the SPSS add-on.
- You do not need the shortcuts.
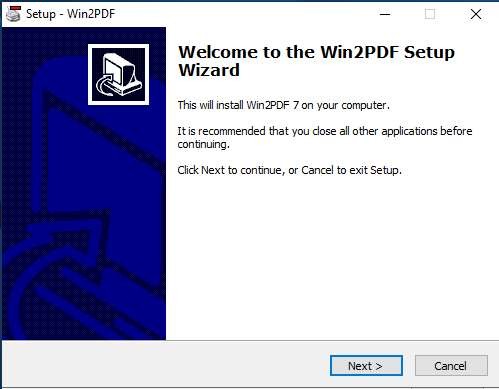
The win2pdf installer will automatically start. Follow the prompts to install.
The SnapPool12 installer will automatically start. Follow the prompts to install.
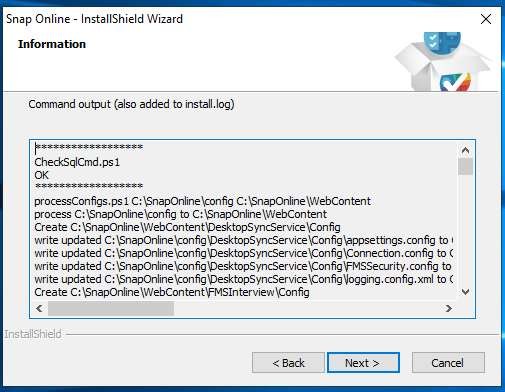
Check the information dialog at the end for errors:
Restart server
Once the installer has finished restart the server to update the security permissions set up during the install.
Configuring Snap Online
Log in as sysadmin
Open the SnapOnline site in a browser: https://localhost/SnapOnline
NB – access needs to be over https://
Log into the sysadmin account. The default password is sysadmin.
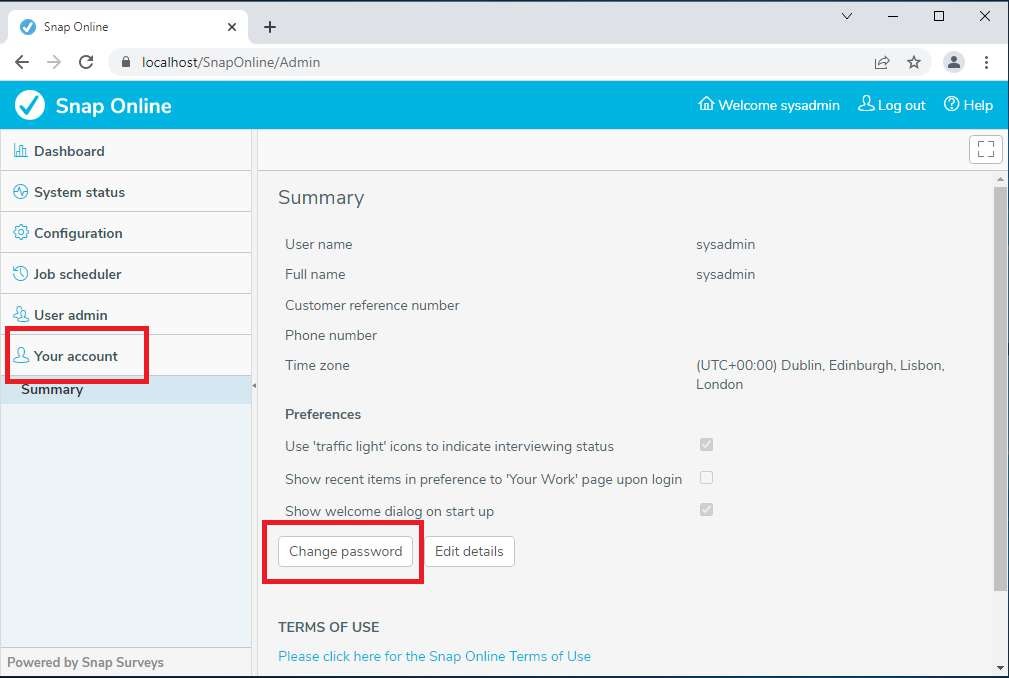
Change the sysadmin password
Select Your account from the accordion and then select the Change password option:
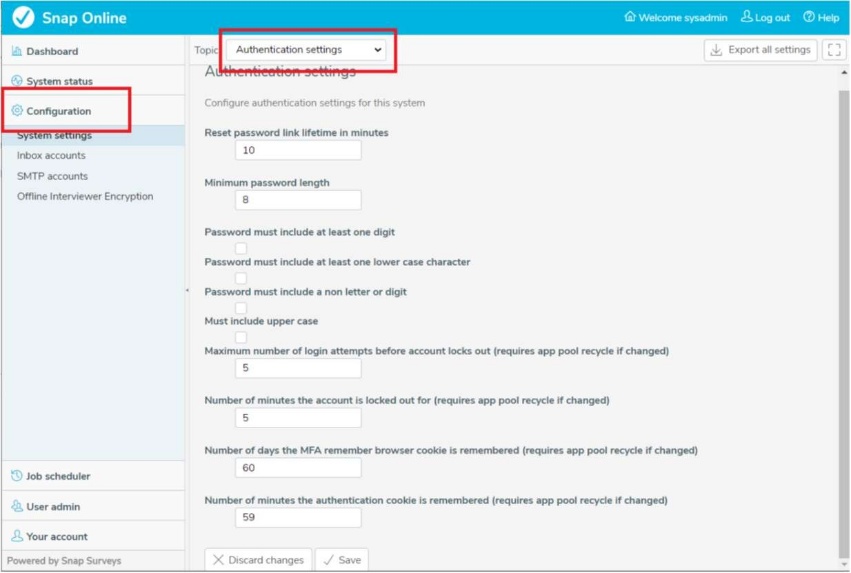
Password complexity rules
The password complexity rules can be configured in the User interface:
Configure the site
Most of the configuration is set up for optimum working of Snap Online and so will not need to be adjusted. However, the following configuration is necessary:
AttachIt
Select Configuration in the accordion and select the AttachIt topic:
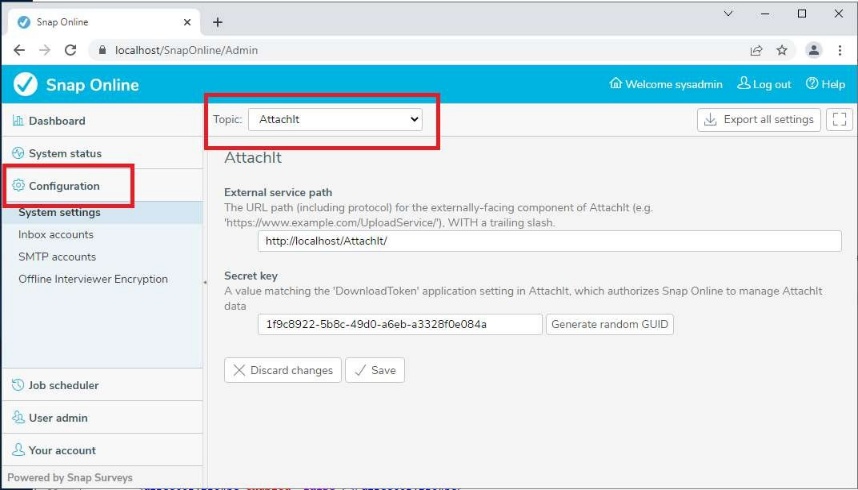
Set the ‘External service path’ to your sites public domain
Generate a new random GUID and copy the GUID into the ‘DownloadToken’ setting in AttachIt’s web.config (C:\inetpub\wwwroot\AttachIt)
Main site URLs
Select Configuration in the accordion and select the ‘Common settings’ topic:
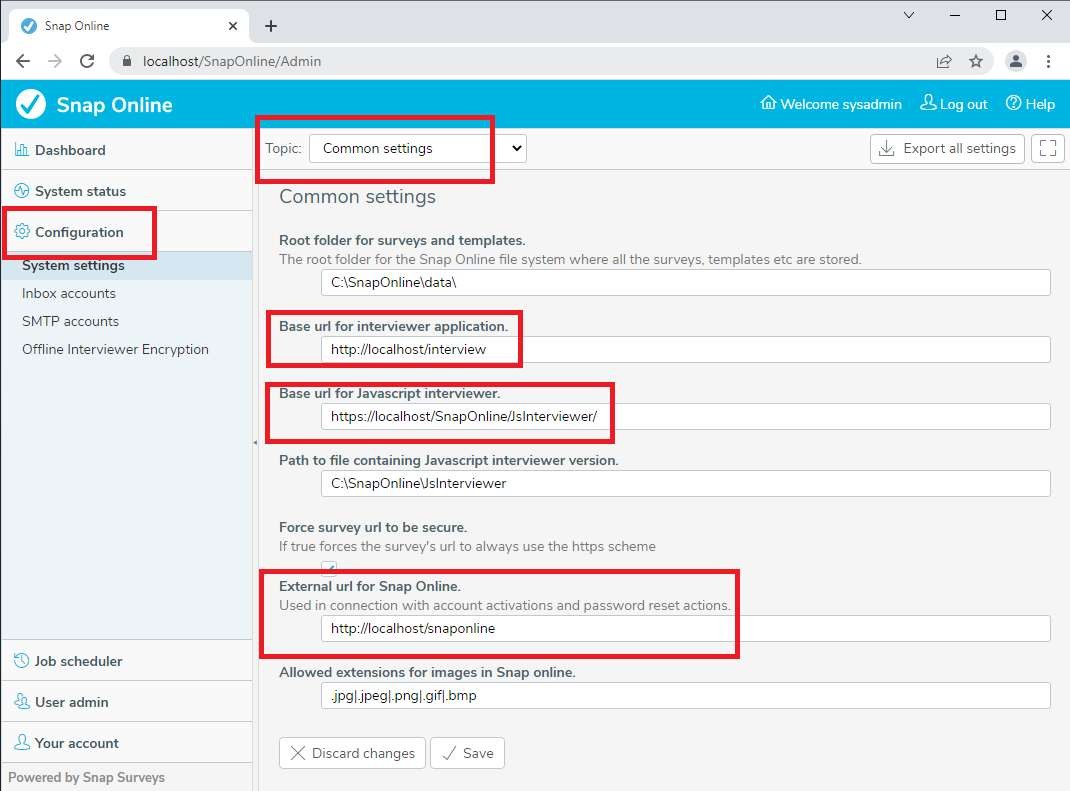
You will need to configure the following with your site domain:
- Base url for interviewer application
- Base url for Javascript interviewer External url for Snap Online
Content security policy for the interviewer site
Select Configuration in the accordion and select the ‘Content security policy’ topic:
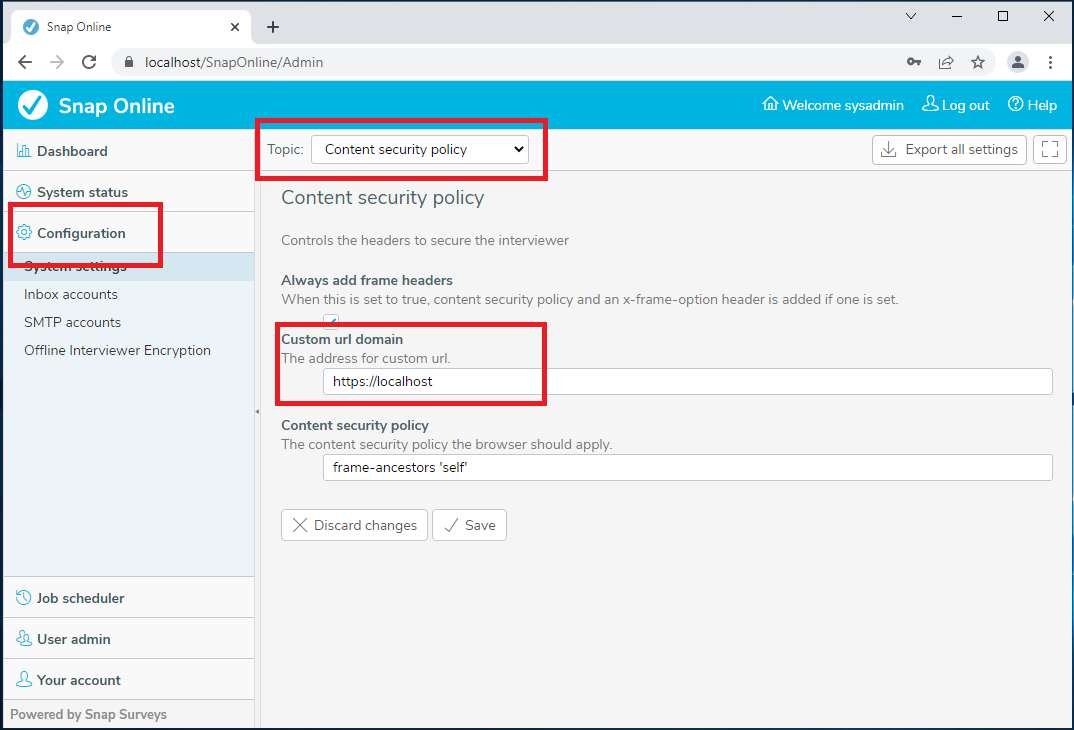
You will need to configure the following with your site domain:
- Custom url domain
Custom URL site
Select Configuration in the accordion and select the ‘Custom URL’ topic:
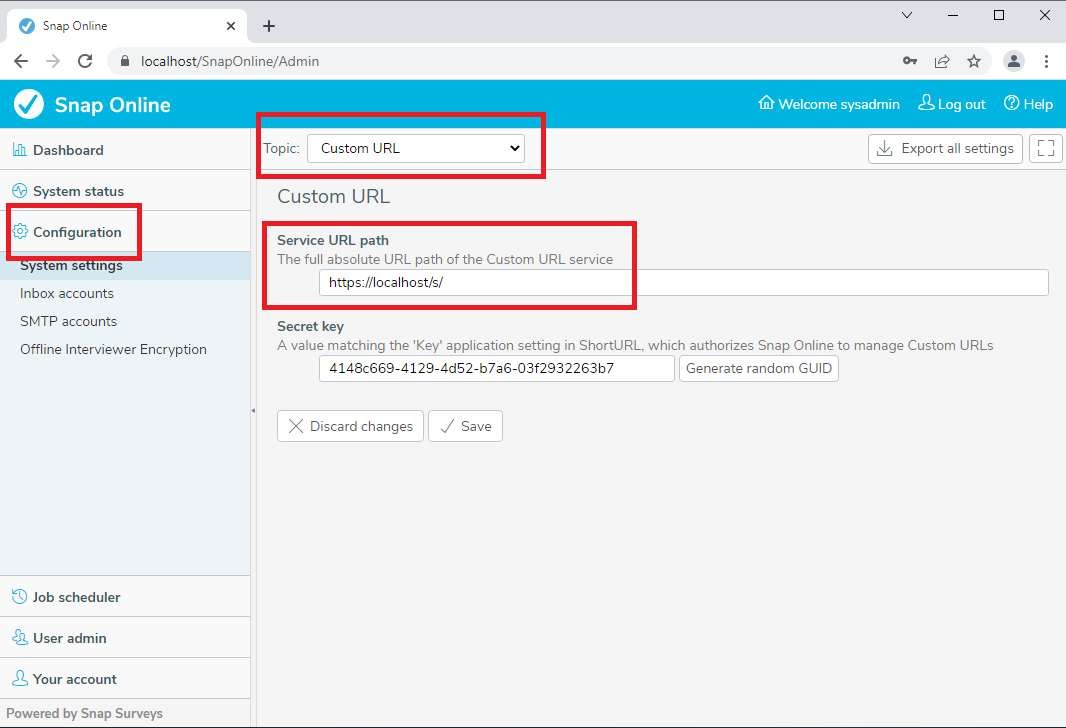
You will need to configure the following with your site domain:
- Service URL path
Custom URL template
You will need to edit the config file
C:\SnapOnline\WebContent\ShortUrl\config\MachineSpecific.config and change the setting:
<setting name=”UrlTemplate” serializeAs=”String”>
<value>http://localhost/s/{0}</value>
</setting>
And replace “http://localhost” with your site domain. This is the base URL for surveys that respondents will use.
Secret key
On a new install a unique secret key will be automatically generated. If you need to change it use the
‘Generate random GUID’ option and then copy the GUID into the ‘Key’ setting in
applicationSettings.config for the Custom URL service. (C:\SnapOnline\WebContent\ShortUrl\config)
Email responses and invites
Snap Online can be configured to send and receive emails. Snap Online uses the SMTP server to send emails regarding administration tasks such as password reset and invitations to participants as well as email alerts configured on a survey by survey basis. The SMTP and POP3/IMAP mail servers can be set up to use basic authentication or Office 365 Exchange Online OAUTH certificate or secret key based authentication – details can be entered in the Inbox and SMTP account pages. See the additional Help guide ‘Inbox set up when using OAUTH and Office365.pdf’
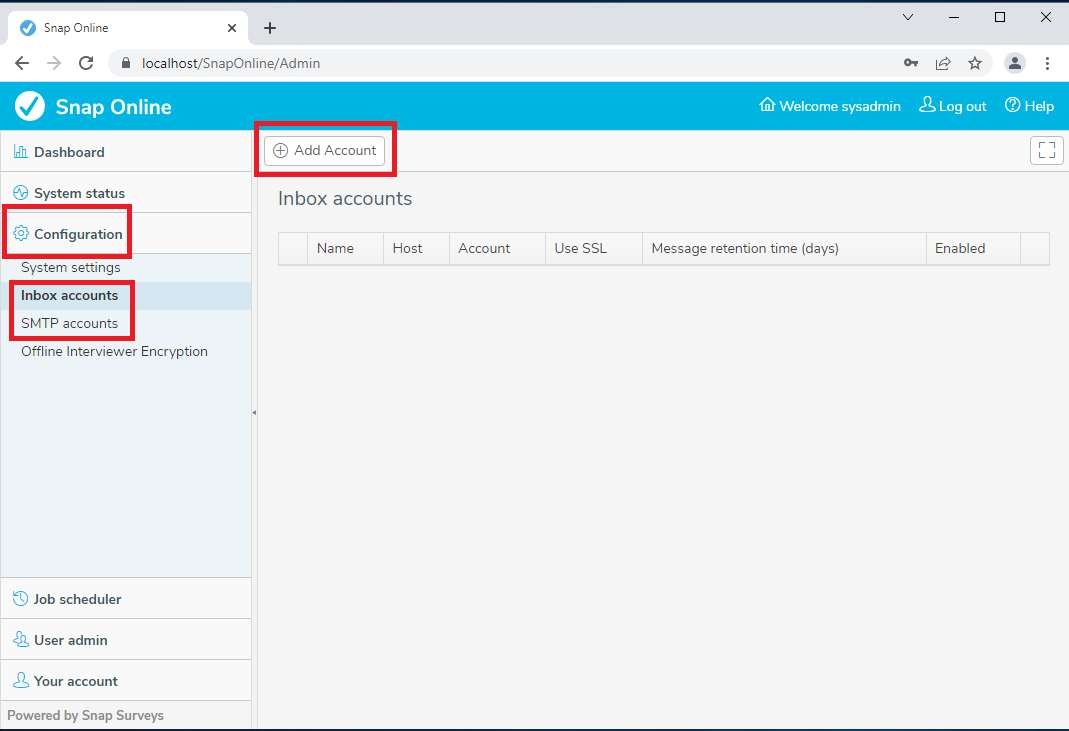
Snap Online can be configured to process an inbox to handle replies to invitations including bounced emails.
After an SMTP mailer has been configured you will need to enable the job which is periodically called to send the invitations. Select Job scheduler in the accordion and Edit the ‘Send invitations’ job:

Adding Single sign on
Each account can be configured to use Snap Online authentication or can be set to use an alternative SAML2 Single sign on provider such as Microsoft Azure or OKTA. The identity providers can be set up via the SSO accounts configuration option. See the additional Help guide ‘Setting up the Identity provider for Snap XMP Online.pdf’ for details.
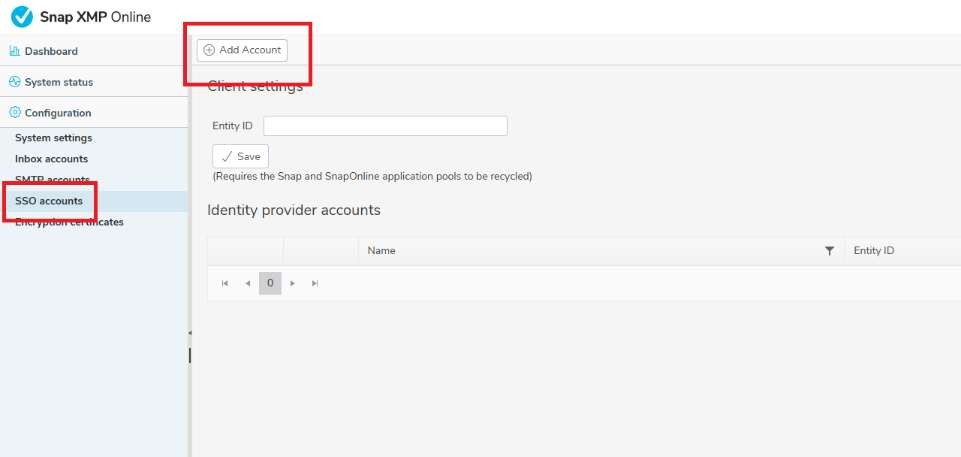
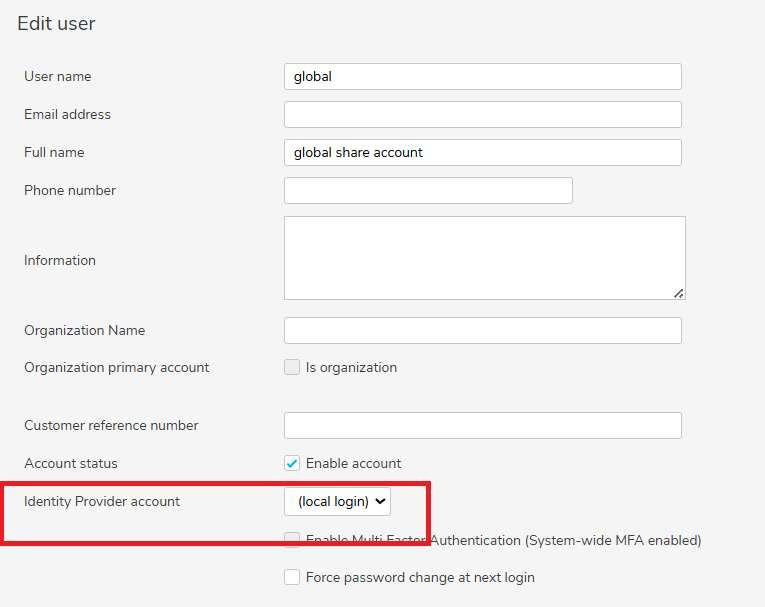
Once an identity provider has been configured each account can be set to either use local (Snap Online) authentication or the identity provider.
Select the account from the list of users followed by Edit details:
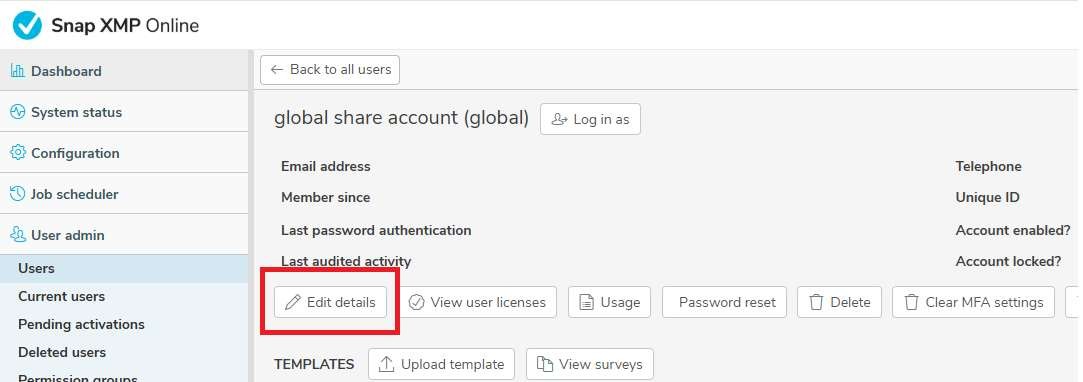
Select the Identity provider from the drop down option:
Adding CAPTCHA to password reset and account register pages
Select Configuration in the accordion and select the ‘ALTCHA’ topic:
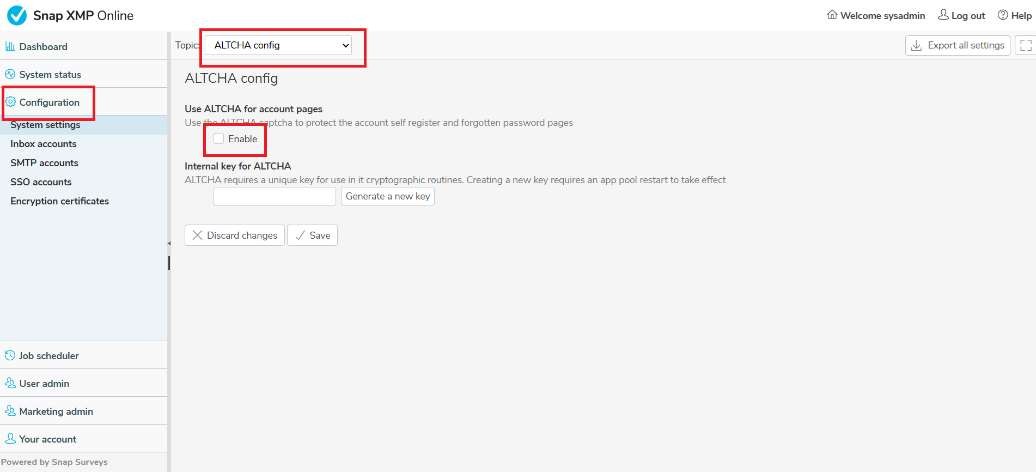
Tick the ‘Enable’ option.
A unique key will be automatically generated on a new install. If you want to generate a new key the Snap Online appPool will need a restart for it to take effect.
Adding CAPTCHA to interviews
To allow users to add a CAPTCHA at the start of each interview the appropriate permits need to be updated to enable this feature.
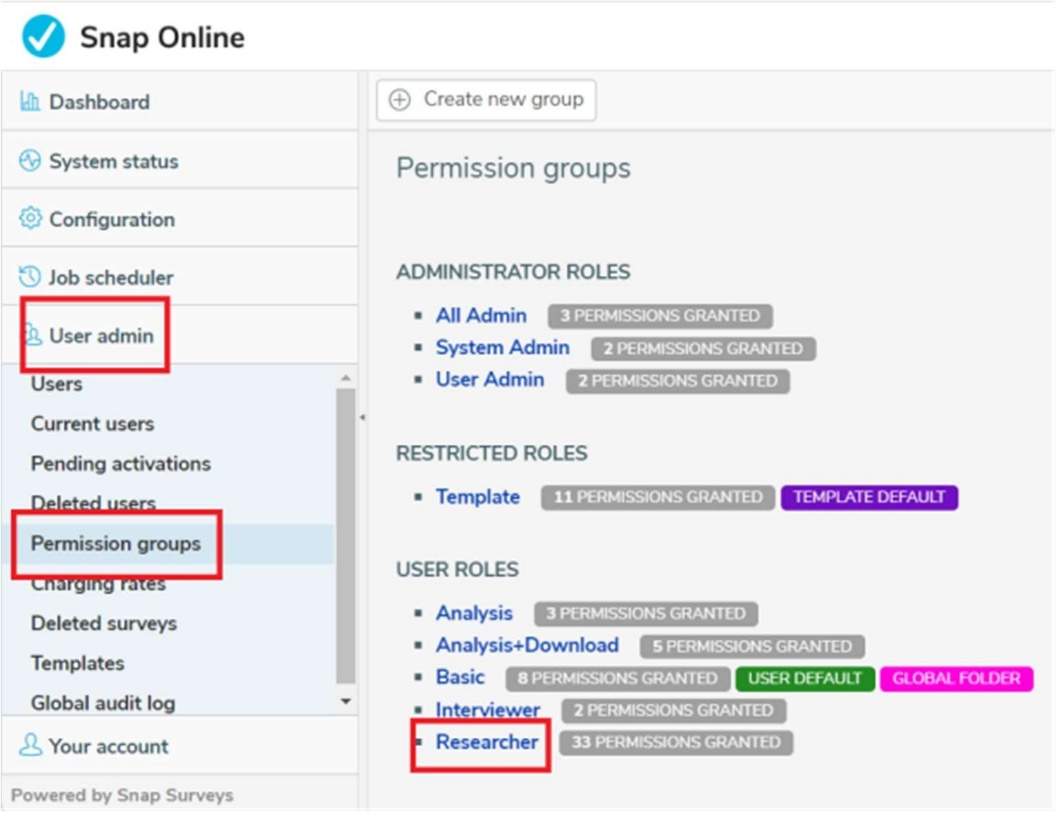
Select Permissions under User admin:
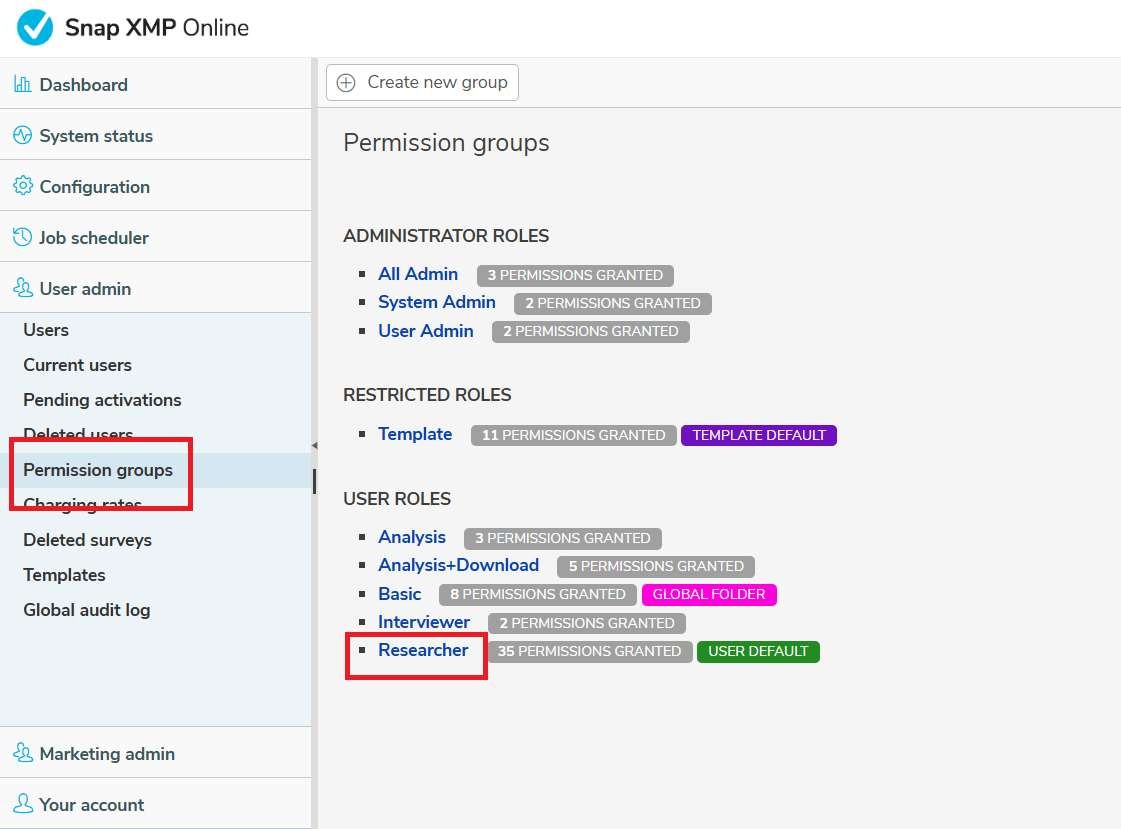
The default ‘Researcher’ permit can have the ‘Enable ALTCHA for interviewing’ permission selected:
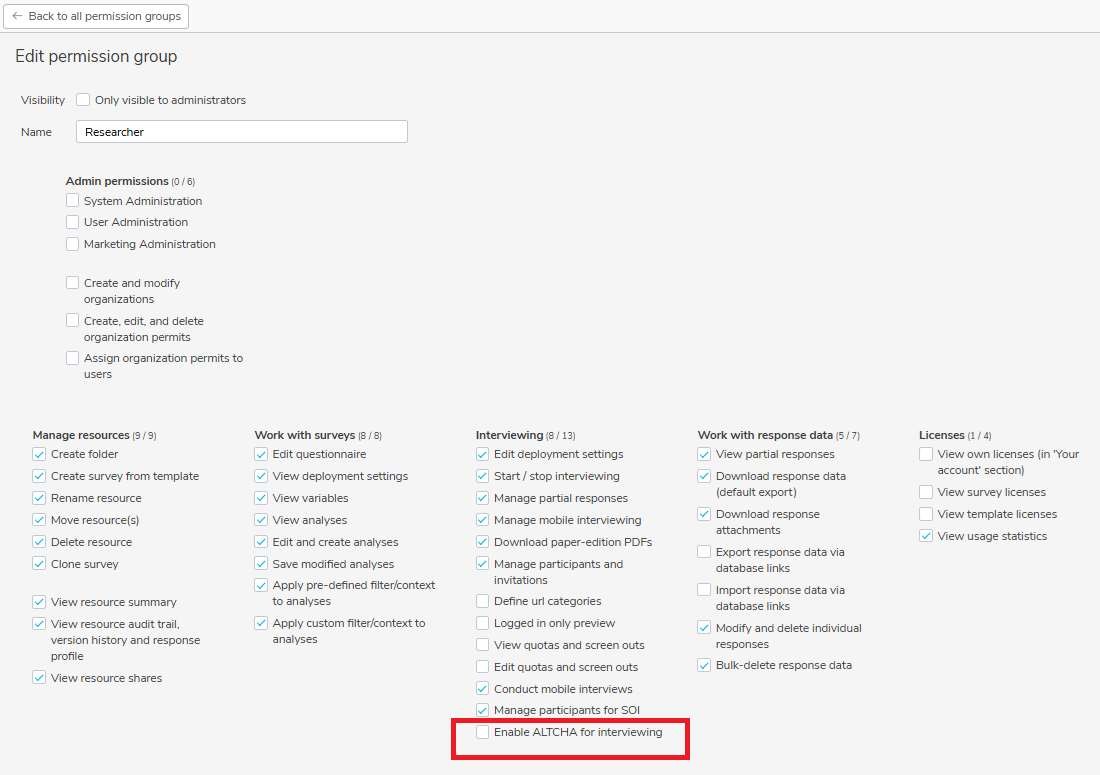
Any other permit groups that need the permission can also be enabled.
Enabling the API
To allow programmatic access to the data held within Snap Online apply the following configuration:
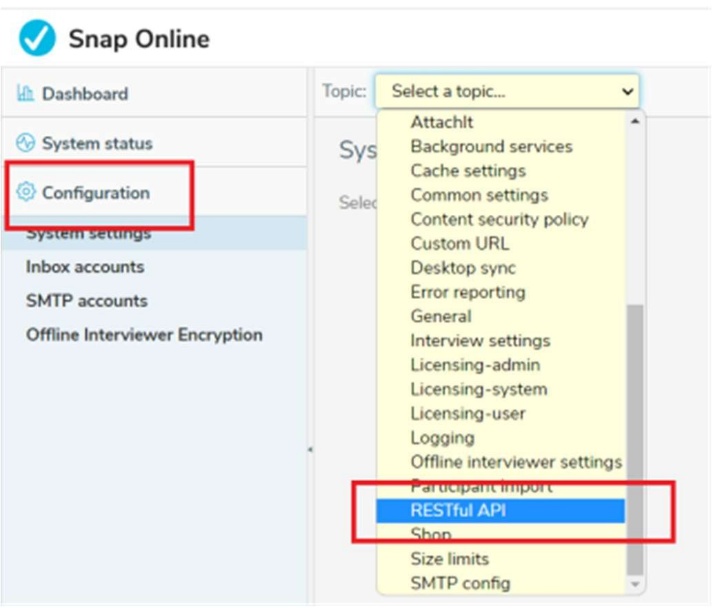
Access to survey information and response data is controlled by ‘Enable RESTful API’ and access to participant information (to add, update and delete) is controlled by ‘Enable Participants’
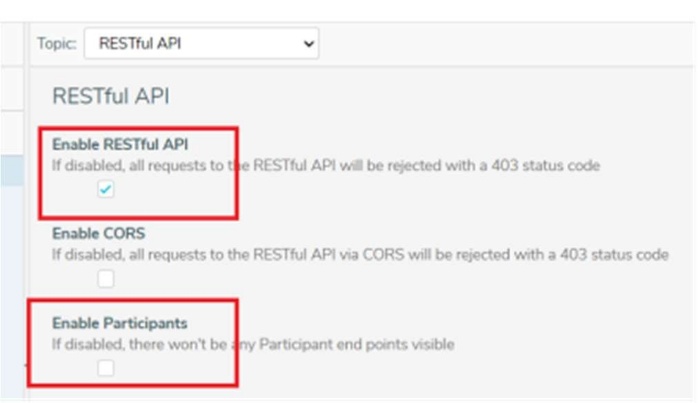
To add and delete participants via the API the PUT and DELETE HTTP verbs need to be enabled in IIS
Initialising the system
To create surveys in the Snap Online editor you need to have a starting template. Snap Online can be configured to share the contents of a global folder so that any starting templates you upload to this folder will be available to all accounts.
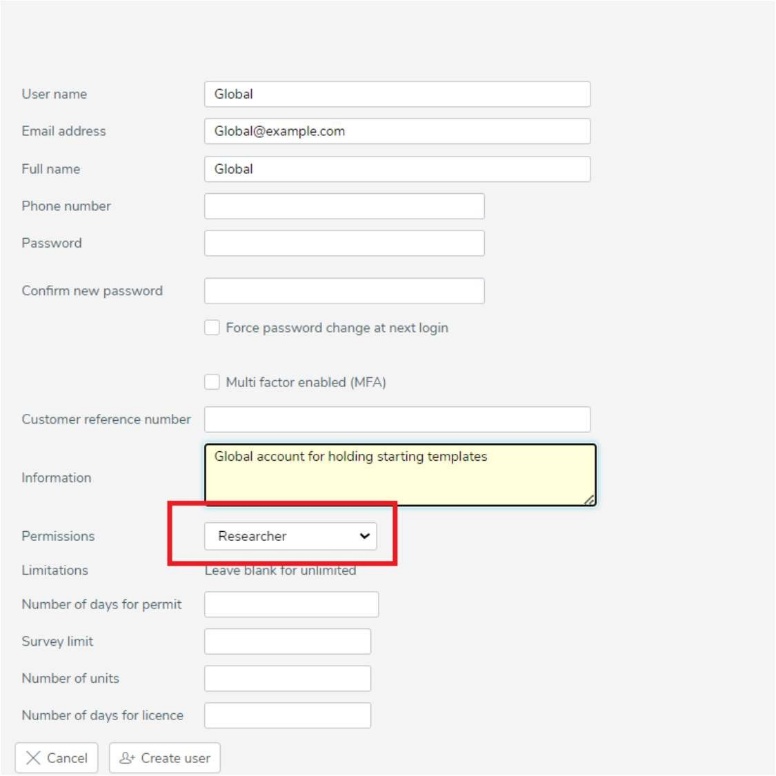
Create an account to hold the global folder
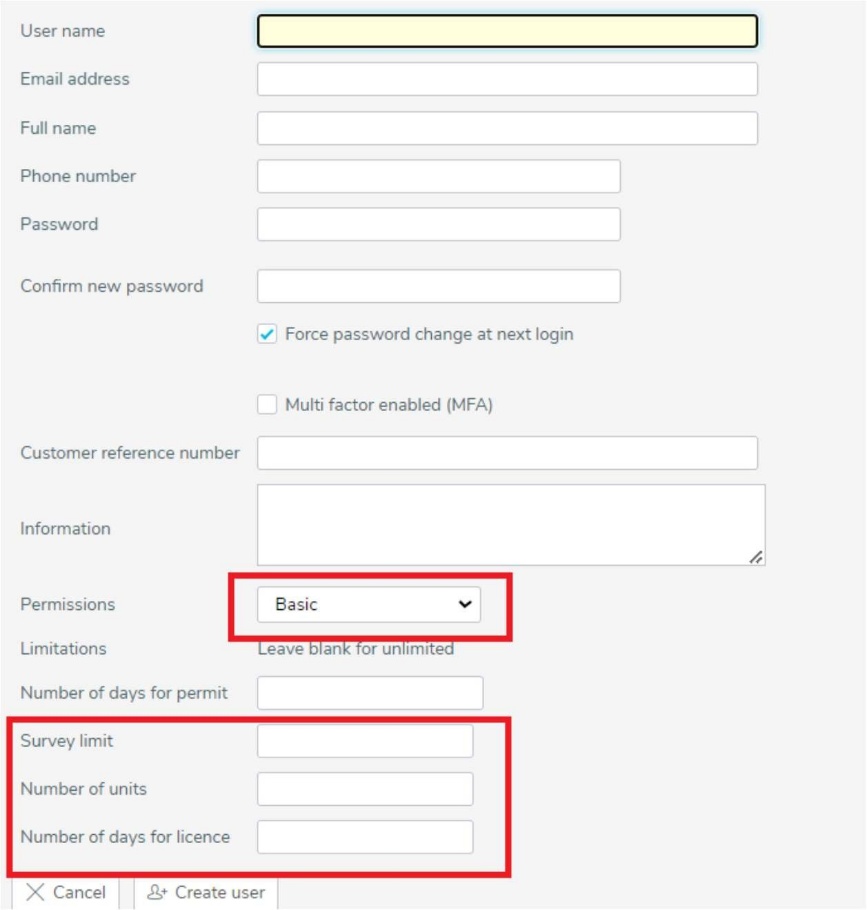
Select User admin in the accordion and select the ‘Create new user’ option:

Fill in the details, setting the Permissions to be ‘Researcher’ and select the ‘Create user’ button at the bottom of the page:
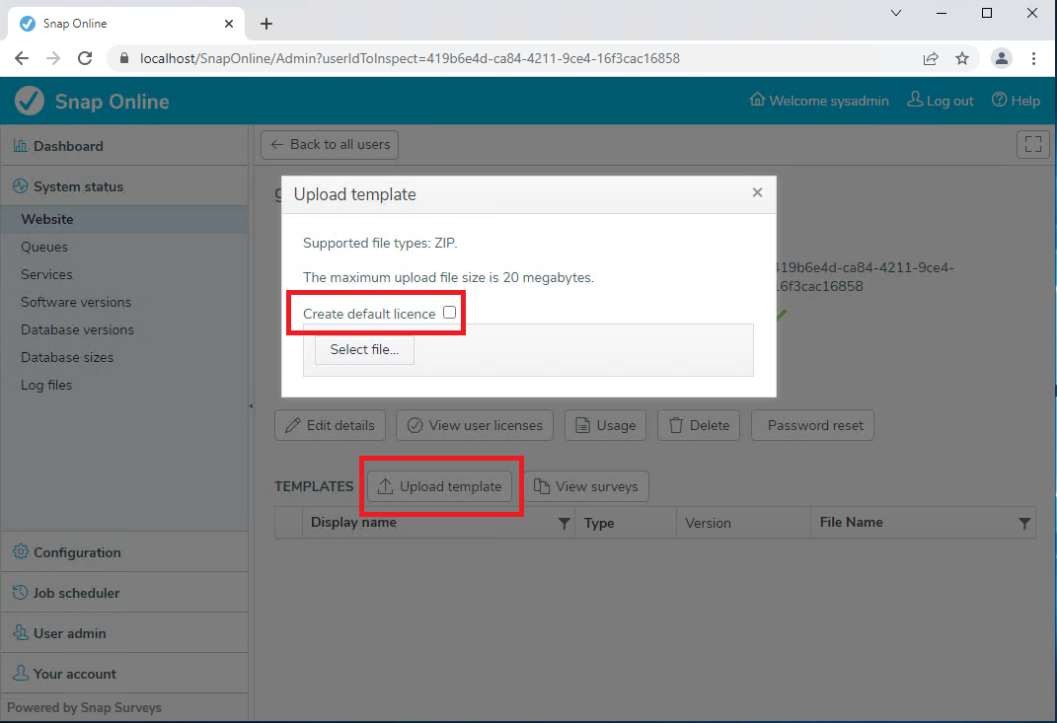
Upload a starting template into the account
Select the account and use the ‘Upload template’ option to upload a zip file containing a Questionnaire template and an optional image (with the same name as the template). A blank starting template can be found in the ‘Questionnaire templates’ folder alongside the SnapOnline installer setup.exe. Untick the ‘Create default licence’ option before selecting the file:
Once the template has uploaded you can log into the account to set up the global folder:

Select the ‘New folder’ option and create a folder:
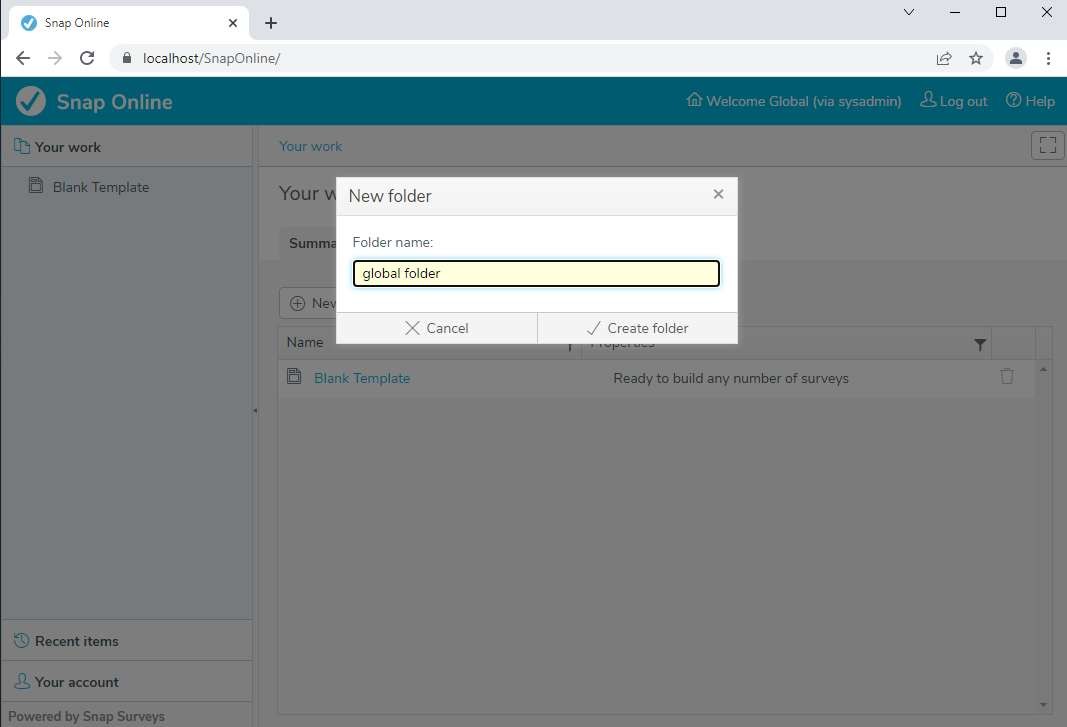
Move the template into the folder by dragging the item in the accordion:

Select the folder in the accordion and make a note of the (folder) ID on the URL
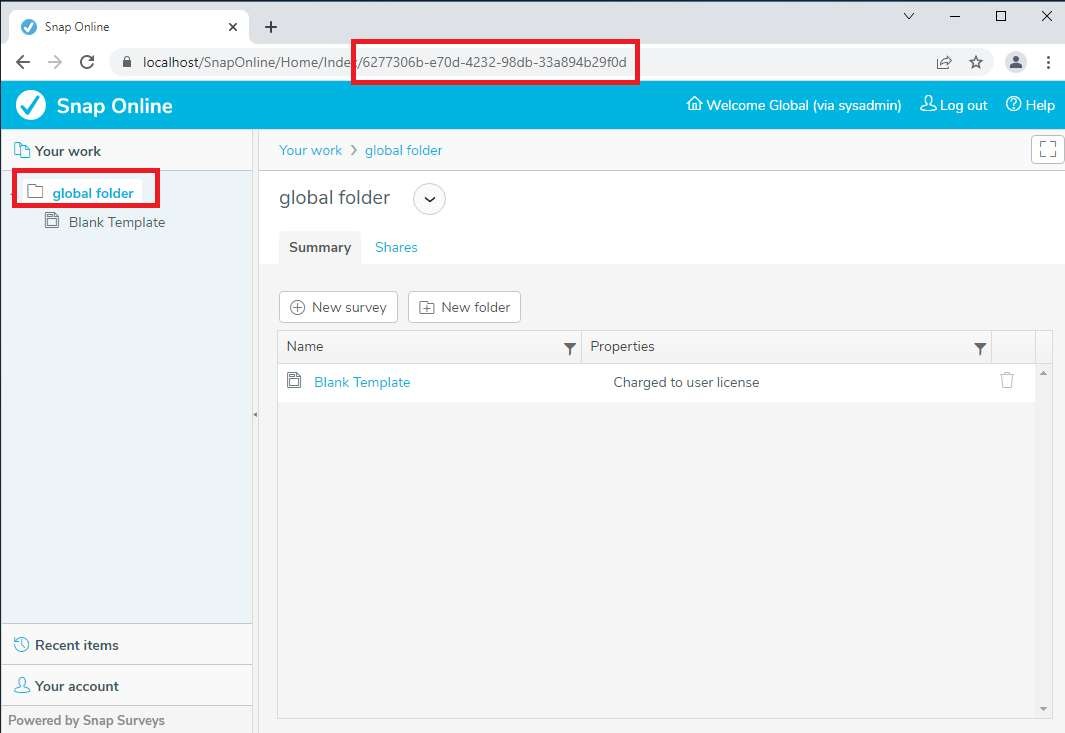
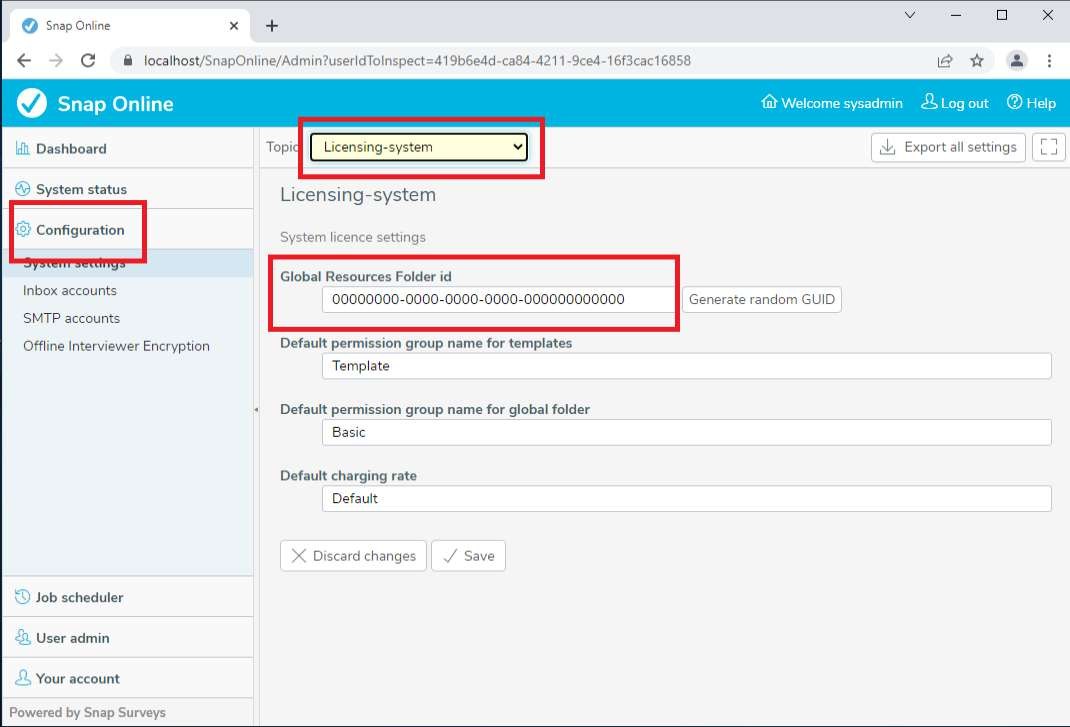
Log out of the account to return to the Admin area. Select Configuration in the accordion and select the ‘Licensing-system’ topic. Copy the folder ID into the ‘Global Resources Folder id’:
Follow the steps above to upload all custom Questionnaire templates for your system.
Creating new user accounts
Each account on the system has a permit (which details what the account is able to to) and a licence (how much the account can do). Permits are defined by Permission groups and allocated when the user is created and can be changed at any time. Some default Permission groups are created during the installation process eg Researcher (the permit for users who need to create surveys), Analysis (the permit for users who just need to view reports and analyses) and Interviewer (the permit for users who use the mobile interviewing app (Snap Offline Interviewer) to conduct face to face or kiosk based surveys). The Permissions groups can be adjusted to enable or disable functionality. On saving a change any account using that Permission group will be affected immediately.
When creating an account you will allocate a Permit and can specify licence limits. The limits that can be applied are:
- Survey limit (maximum number of surveys that can be created/uploaded),
- Number of units (responses and attachIt file size make up units and can be ‘charged’ according to
- ‘Charging rates’ which can be configured via the accordion.)
- Number of days for licence (how long the licence lasts for once activated)
Snap Online has been written with the intention that the ‘User name’ is the same as the email address. For example: when the reset password option is used the form asks for an email address. Strictly speaking it is requesting the user name field and will use the email address field to send the email. All user names must be unique, however the same email address can be used on multiple accounts. This allows admin accounts to be created with a unique user name but use the email address of an existing account.
Multi Factor Authentication (MFA)
It is possible to allow users to set MFA up on their account. A User admin needs to enable this feature which will then allow the user to set up MFA choosing either email or an Authenticator app (if configured) as an additional factor:

Alternatively, MFA can be enabled for all accounts by editing machinespecifig.cong:
C:\SnapOnline\WebContent\FMSMvc\Config\machinespecific.config
<add key =”MakeMFAAvailable” value=”True”/>
Authenticator App
To allow users to choose an Authenticator app for MFA you will need to configure the following:
C:\SnapOnline\WebContent\FMSMvc\Config\machinespecific.config and set:
<add key=”GAuthPrivateKey” value=”xxxxxxxx”/>
<add key=”GAuthEnable” value=”True”/>
Set GAuthPrivateKey to an 8 (or more) character alphanumeric value which is used to generate a unique key
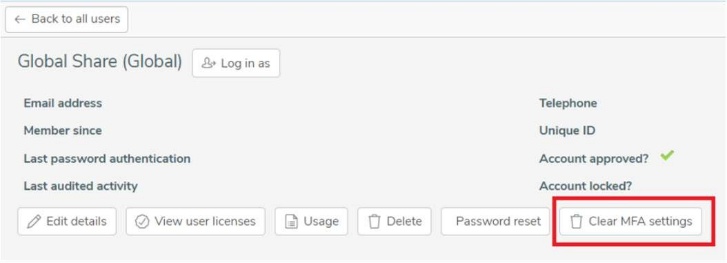
If a user has a problem logging in after setting up MFA a User admin is able to clear the MFA settings reverting the user back to basic authentication:
Allowing API access for the account
API access is controlled by a permission. To add that permission to an account you either need to edit the existing Permission group or create a new one to allocate to the account.
If you want to edit an existing one, log in as a Sysadmin account and select the Permission group:
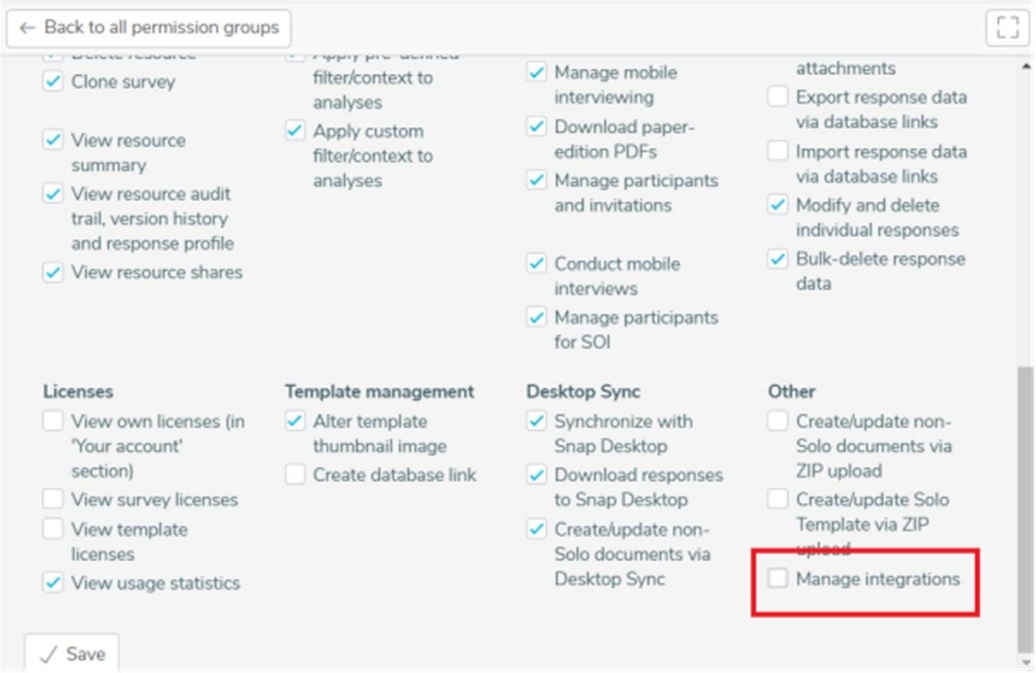
Enable the ‘Manage integrations’ option:
If you want to create a new Permission group (eg Researcher with API) then select the ‘Create new group’ option at the top of the Permissions page, set it to have the same options as Researcher and then add the Manage integrations option. You would use this method if you want to limit which accounts can be accessed via the API. The account that you want to use for the API will need to have a permit that has this permission – so either Researcher if you have modified that or the new one you created.
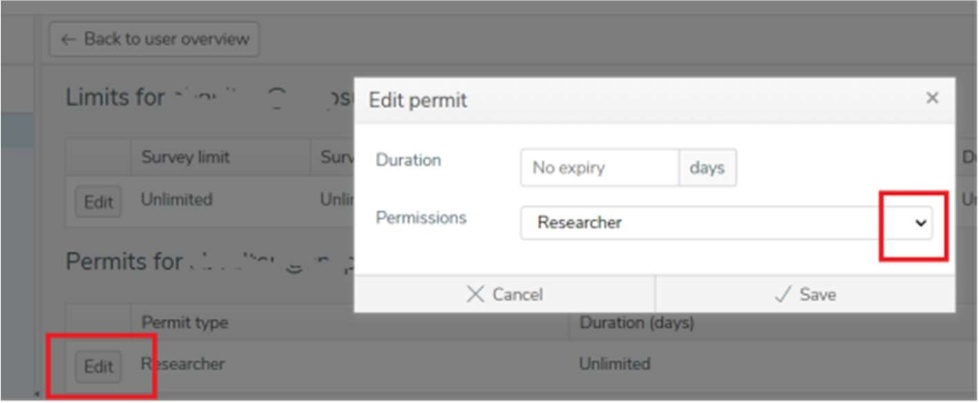
To change the permit, select the user via an admin account and then select the ‘View user licences’ option:

You can then change the permit used by that account:
Note: The permit on a resource (i.e. survey) is dependent on the permit that the resource owner has and in the case of sharing it is also dependent on the permit the shared to account has as well as the permit applied on the share itself. So if you use 1 account via the API and want access to surveys that belong to a different account but have been shared to the API account then both accounts need to have API permission as well as the share.