Managing your invitations
View invitation settings
- Open your survey in Snap XMP Online and from the survey’s Summary navigate to the Collect section.
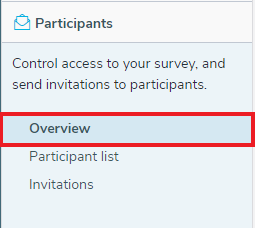
- Select the Participants side menu to view the participants and invitations. This shows the Participants Overview, by default.
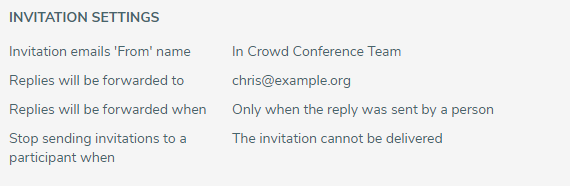
- The main overview area shows the Invitation settings. You can change the settings by clicking the Change Invitation Settings button.
Change the invitation settings
- Open your survey in Snap XMP Online and from the survey’s Summary navigate to the Collect section.
- Select the Participants side menu to view the participants and invitations. This shows the Participants Overview, by default.
- Click the Change invitation settings button to show the Invitation settings dialog.
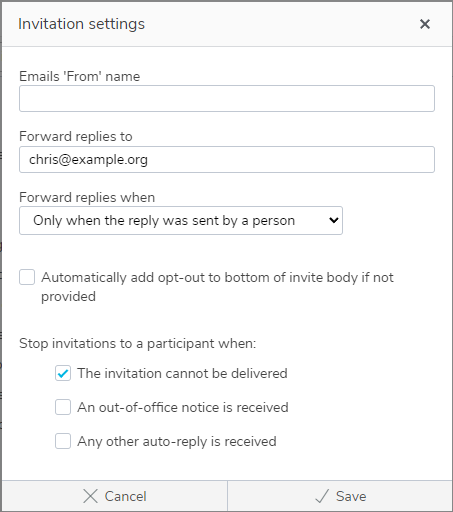
- Change the settings to the required email addresses and options.
| Option | Description |
| Emails ‘From’ name | The name that will be displayed in the ‘From’ field when the participant receives the email. |
| Forward replies to | The email address that any replies will be sent to. |
| Forward replies when | There are two options in the drop down list: Always forward replies (including auto-replies) Only when the reply was sent by a person that excludes auto-replies such as out of the office emails. |
| Automatically add opt-out | This automatically inserts an opt-out link at the end of an email invitation or reminder, if there is not one already included in the email content. |
| Stop invitations to a participant when: | This contains three situations where you would want to stop sending invitations. The invitation cannot be delivered stops the invitations when an email is returned as undeliverable. An out-of-office notice is received stops the invitations when an automated email response is received that contains an out of office response. Any other auto-reply is received stops the invitations when any other automated email response is received. |
- Click Save to update the invitation settings.
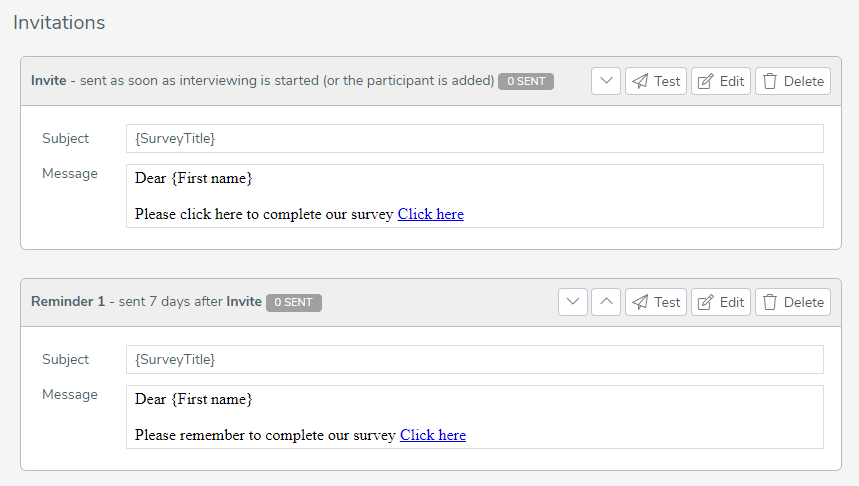
Viewing your invitations
The invitations are the templates for the emails that are distributed to the survey participants. You can view and edit invitations and reminders in the Invitations section of the Participants side menu.
- Open your questionnaire and navigate to the Collect section.
- Select the Participants side menu. This shows the Participants Overview, by default.
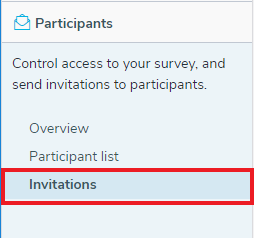
- Click on the Invitations menu item to view the invitations.
- The list of available invitations are available in the overview area.
Add invitations
You can create additional invitations and reminders in Snap XMP Online.
- Navigate to the Invitations menu item in the Participants side menu to view the invitations.
- Click the Add Invitation button will display an invitation email editor where you can compose the email you wish to send to your participants.
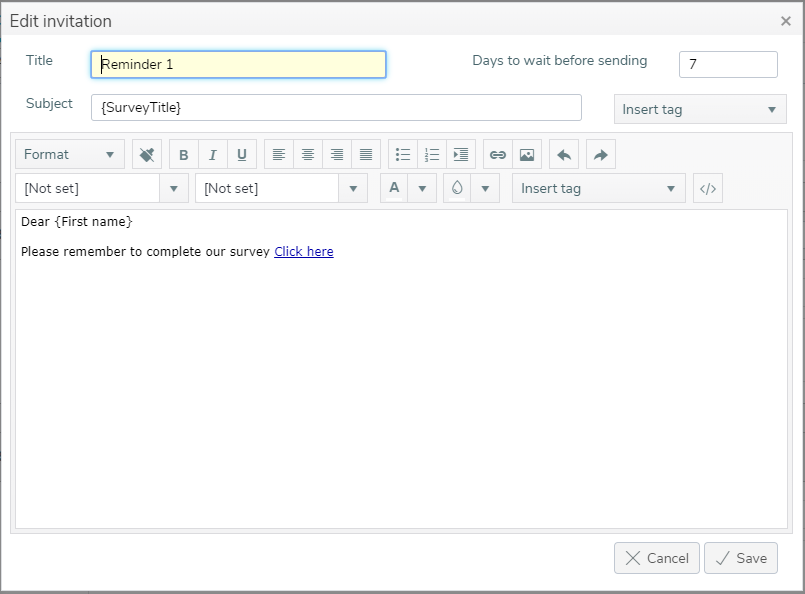
- This displays the Add invitation dialog where you can create your invitation or reminder.
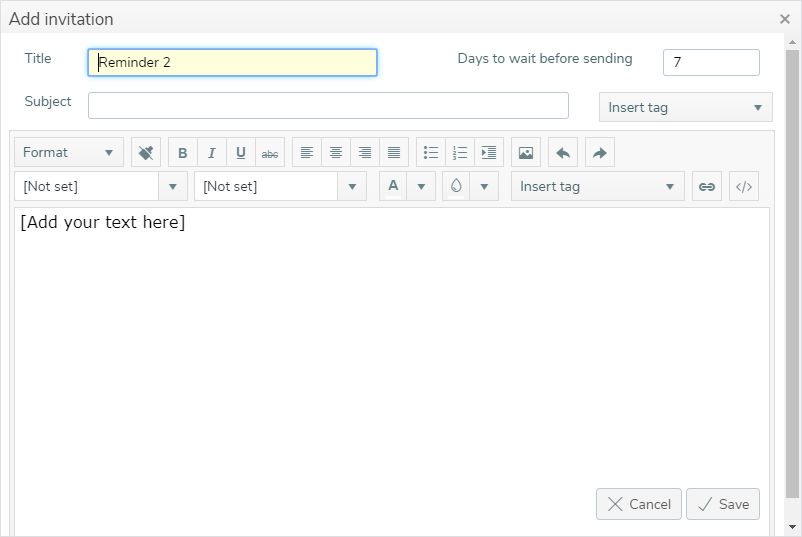
- In Title, enter a title that describes the invitation. The Title identifies the invitation.
- In Subject, enter the subject of the email invitation.
- In Days to wait before sending, enter the number of days that you wish to wait before sending the invitation to the participant. If the invitation is a second or subsequent invitation, the wait time is from the date that you sent the previous invitation.
- Enter the main text of the email. This must include a link to the survey, found in the Insert tag drop-down. You can find more detailed help in Creating invitations using the email editor.
- When you are happy with your new invitation click Save to save your changes.
Test an invitation
Before you send the email invitations to your participants you can check the format of the invitations by using the test functionality.
- Click the Test button.
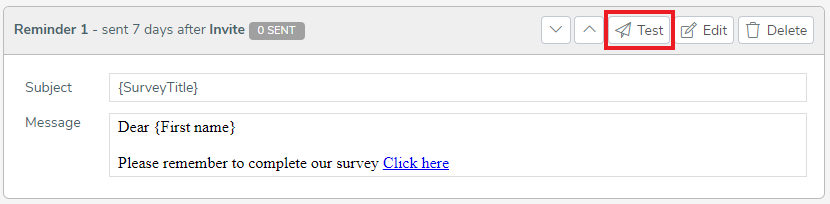
- This displays the Test invitation dialog. You will need to enter an email address that you have access to so that you can view the email and check that the format and seeding are correct.

- Click Send test email. This will send a test email invitation to the test email address.
- When the email arrives check that the format is as you expected. The email will substitute one of the participants in your list to test the invitation seeding is correct.
Edit an invitation
- Click the Edit button to make changes to your invitations and reminders.
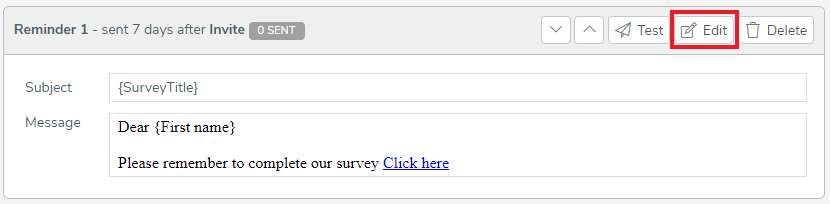
- This displays the Edit invitation dialog where you can change the invitation or reminder.
- You can find more detailed help in Creating invitations using the email editor.
- Click Save to save your changes.
Delete an invitation
- Click the Delete button to remove the invitation.
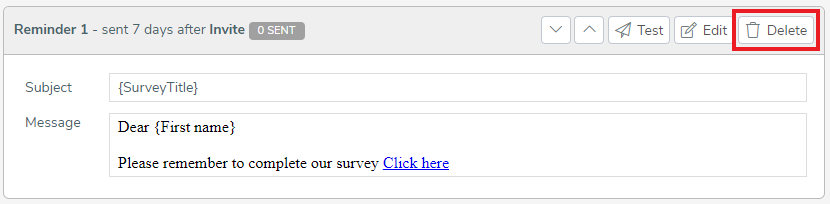
- This displays the Delete invitation confirmation.
- Click Delete to continue with the deletion or Cancel to cancel the operation.
Change the send order of the invitations
The invitations for the current survey are sent out in the order they are listed on the Invitations page. You can change the send order.
- Make sure the invitations are not sending before you start to reorder. Click Pause Invitations to stop the invitations.
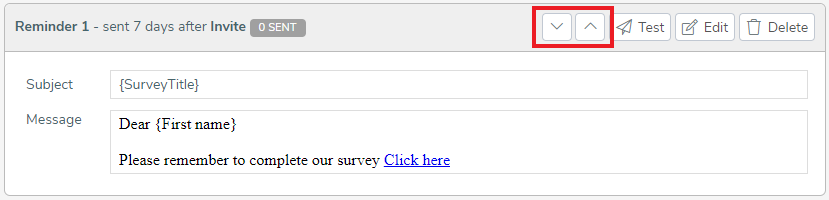
- Click the
 button to move the invitation down the list of invitations.
 - Click the
 button to move the invitation up the list of invitations.
 - When the order is as desired then you can start sending invitations.