Creating invitations using the email editor
Invitations are an important way of letting participants know how to complete your questionnaire. The emails include a link that make it easy for a participant to give their responses.
Here are some helpful tips to avoid spam filters when creating your email invitations and sending online surveys.
Add or edit an invitation
When you add or edit an invitation you will use the invitation email editor.
There are two ways to open the invitation email editor:
- Click on the Add Invitation button in the main invitations menu
- Click on the Edit button next to the invitation that you wish to change.
You can find tips and examples to help write your email invitations, as well as, ideas to create subject lines that attract your participants’ attention.
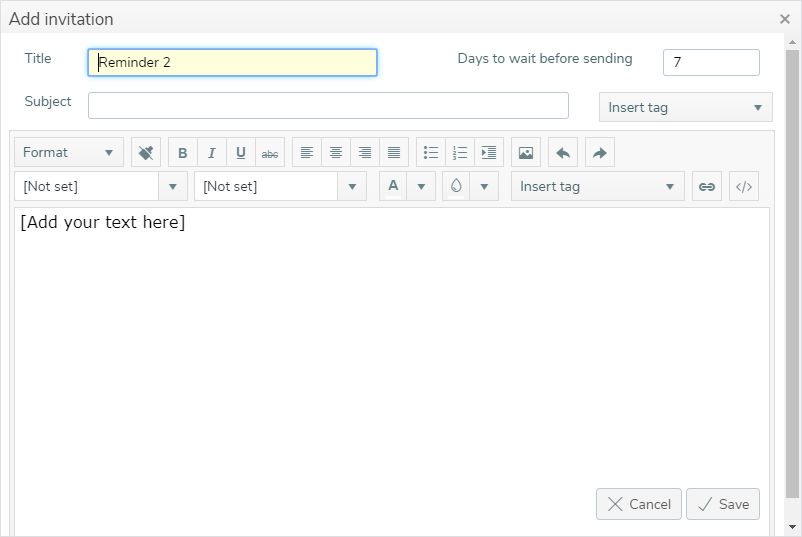
- The Title field contains the name that identifies the invitation or reminder. This is not included in the email. The Title is a required field.
- The Days to wait before sending is the number of days to wait. If this is the first invitation then this is the number of days from the time of activation until the email is sent. For subsequent invitations or reminders it is the number of days to wait from the time the previous invitation or reminder email was sent.
- The Subject field contains the invitation or reminder subject text for the email. The Subject is a required field.
- The Insert tag inserts participant or survey information into either the subject text or the main email text. The inserted tags are shown enclosed in { }. When the email is sent the participant or survey data will be substituted where the tag is inserted. The invitation body text must contain either the SurveyLink or SurveyLinkAuto tag to allow the participant to complete the survey.
- The Insert hyperlink function
 can be used to change the text of the SurveyLink and the SurveyLinkAuto tags. This is available in the main email text but not the Subject.
- The View HTML function
 opens the main email text in an HTML plain text editor. Here you can change the underlying HTML. Click Update to save the changes to the email text.
- When you have completed your email click Save to add or update the invitation.
Insert tag options
| Column | Description | Subject | Email text |
| SurveyTitle | The title of the survey | Yes | Yes |
| SurveyLink | The URL link to the survey requiring the participant to login with their password. | Yes | Yes |
| SurveyLinkAuto | The URL link to the survey that automatically logs in the participant. | Yes | Yes |
| Username | The participant’s username or login. | Yes | Yes |
| Firstname | The participant’s first name. | Yes | Yes |
| OptOut | The opt-out information for this participant. | No | Yes |
| Password | The participant’s password. | No | Yes |
| The participant’s email address. | No | Yes |
The Snap XMP Online email editor toolbar
| Button | Description |
| Format | Select the format for the current text. E.g. Heading, Paragraph and Quotation. |
| Cleans or removes the formatting from the selected text. | |
| Changes selected text to the specified format. Within the selection, new text will be entered in the specified format | |
| Changes selected text to the alignment you click on | |
| Changes selected paragraph(s) to a numbered or bulleted list, or indents them | |
Apply a link to the selected text. Opens a pane for you to enter any acceptable HTML link (normally http:// web address or mailto: email address). You can specify if the link opens in another window and what ALT text appears. | |
 | Insert an image. The image must be in the published zip file you have uploaded or already be on the internet. You can specify the image size in pixels. The description gives the ALT text (displayed if you place your mouse over the image or if the image is not available). |
| Undo and Redo the previous action. | |
| Opens a pane to enter raw HTML code. Note that Snap XMP does not support or provide instruction on writing HTML. |
| Font family | Select a font to apply to the selected text |
| Font size | Select an HTML font-size to apply to the selected text |
| Set color of selected text | |
| Set background color of selected text | |
| Insert Tag | Insert an active tag into the email (e.g. a link to the survey or a database field) |
Inserting images
You can insert any image that is already on the Internet via its URL.
- Create the graphic that you want to use in your email. Check that it is a suitable size (small) and resolution to be in an email. Save it as a png, gif or jpg format.
- When editing the email message in Snap XMP Online click in the email at the place where you would like the graphic and then click the insert image button on the toolbar.
- The Insert image dialog appears.
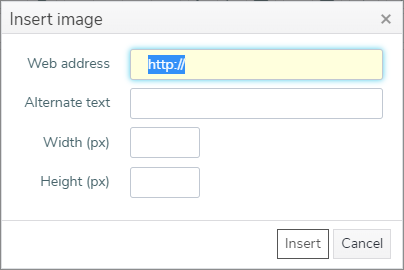
- Enter the URL of the image in the Web address box.
- Enter some text that describes the image in the Alternate text field. This text replaces the image if it is not available in the email.
- Leave the Width and Height boxes blank.
- Click Insert to insert your image.
Putting links in your email
You can create a link so that your participant can easily go to a given website address.
- Navigate to the Invitations section in the Participants side menu.
- Open the invitation in the email editor using either the Add invitation or Edit button.
- Select the text that you wish to add a link to or position the cursor at the point you wish to insert the link.
- Click the link button . The Insert hyperlink dialog opens.
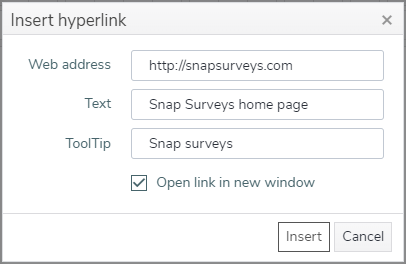
- Enter the URL that you wish to link to as the address.
- If you have selected text this will appear in the Text box otherwise enter the text you would like to describe the hyperlink.
- Enter the ToolTip text that will appear when the respondent hovers over the image.
- Click Insert to create the hyperlink.
Hiding the survey address behind clickable link text
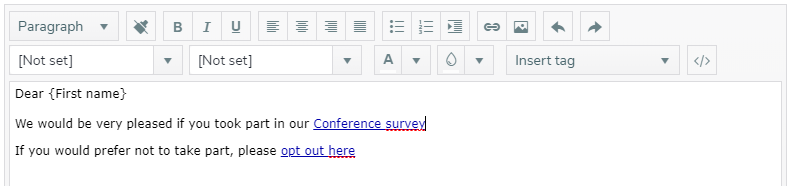
Your invitations need to contain a link that your participants can use to access and complete your survey. You can replace the survey link text with something more meaningful to your participants that will help them know what the survey is about.
- Navigate to the Invitations section in the Participants side menu.
- Open the invitation in the email editor using either the Add invitation or Edit button.
- Click at the point you want to place the opt out link in your invitation.
- Expand the Insert tag dropdown and select SurveyLinkAuto or SurveyLink.
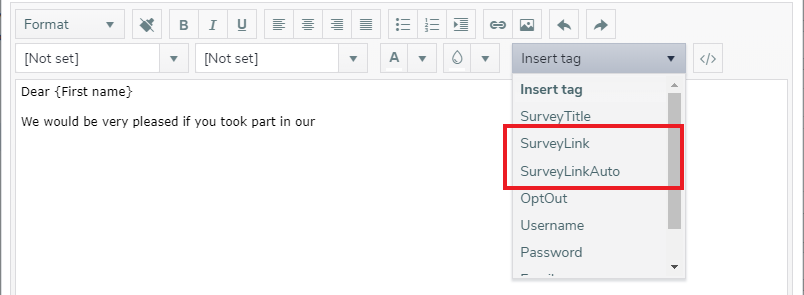
- This will insert a link with the text {SurveyLinkAuto} or {SurveyLink}.
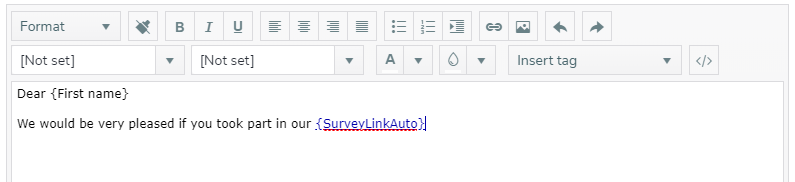
- Select or click in the SurveyLinkAuto link text that will take your participants to the survey.
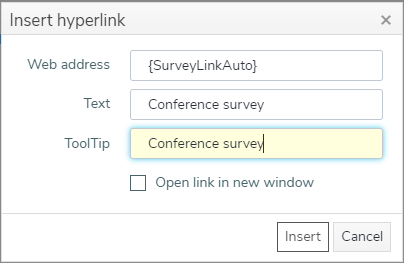
- Click the hyperlink button to open the Insert hyperlink dialog. The text {SurveyLinkAuto} appears in the Web address field and this provides the link to the survey. Enter your replacement text in the Text field and your tool tip text in the ToolTip field.
- Click Insert to update the link text.
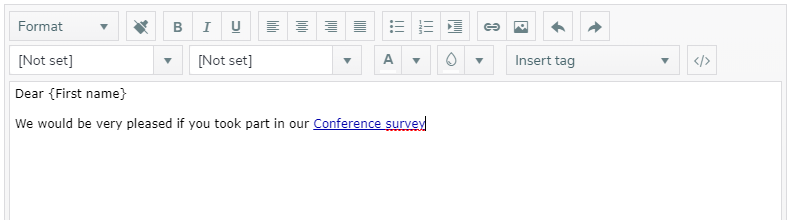
- When the participants receive the email they can easily join the survey by clicking on the link.
Inserting tags into your email
There are two types of field that you can insert into your email invitations
- System defined data in Snap XMP Online such as Survey Title or Opt out
- Seeded data uploaded with the participant details in the Upload Participants wizard.
Example: Using the {OptOut} insertable tag as a link
- Navigate to the Invitations section in the Participants side menu.
- Open the invitation in the email editor using either the Add invitation or Edit button.
- Click at the point you want to place the opt out link in your invitation.
- Expand the Insert tag dropdown and select OptOut.
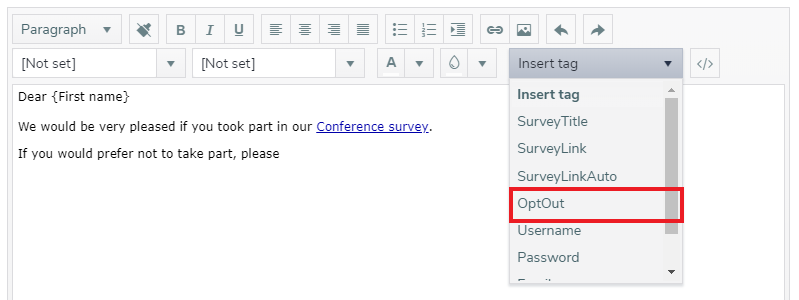
- This will insert a link with the text {OptOut}.This link will take the participants to a webpage where they can opt out.
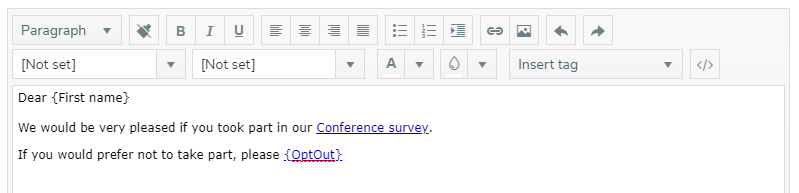
- Select or click in this link text and click the hyperlink button to open the Insert hyperlink dialog. Type the replacement Text and ToolTip.
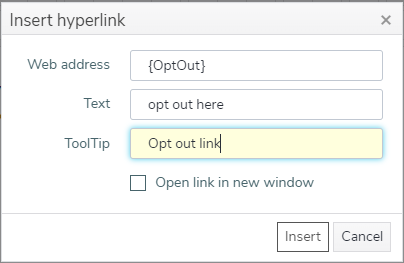
- Click Insert to update the link text.