Variables
All questions in a questionnaire are a form of variable. When you create a question in Design mode you create a variable used in the structure of all the editions of a survey.
In addition, you can create extra variables that are not part of the questionnaire.
- Derived variables allow you to manipulate data in existing variables and convert it to other values.
- System variables provide data generated by the system (such as the case number or the time that a survey was completed)
- Pre-coded variables provide a way at looking the questionnaire data dependent upon its position in the data file. They are generally used in the analysis of imported files.
In the Variable window, information is held on:
- how the data is stored
- the order and conditions under which a question is asked
Showing variable properties in the Questionnaire window
- Each variable has a set of individual properties. The properties depend on the type of question. You can examine and change the properties when you are in Design mode
 in the Questionnaire window.
 - Select one or more questions.
- Click
 to display the Variable Properties dialog box , or right-click and select Variable Properties from the context menu
 - The Variable Properties dialog will be displayed
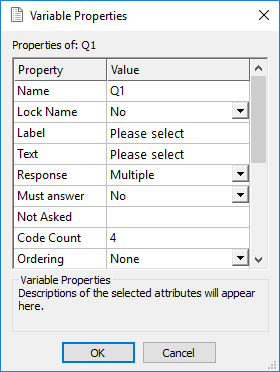
- You can then edit the property values. If you have selected several questions of the same type, you can change any properties they share.
The Variables window
The Variables window displays a summary list of all the variables in your survey, whether visible in the questionnaire or not.
You can choose whether variables are listed alphabetically or by question order in the Variable Tailoring dialog by selecting the Tailor|Variables menu option.
You can drag and drop items from the Variables window into analysis definitions.
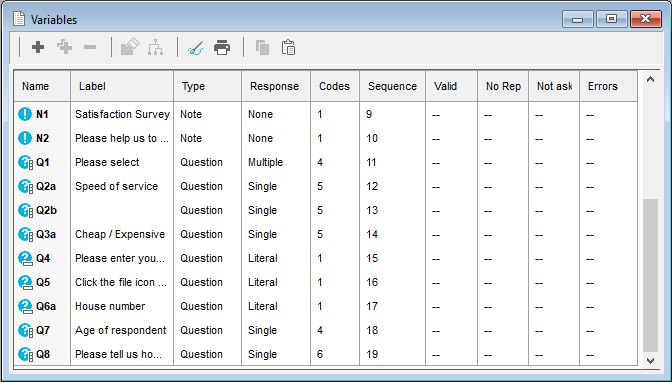
| Name | Name of the variable you currently have selected, for example: Q1 |
| Label | Variable label (usually the question text) |
| Type | Type of the variable |
| Question | Standard question with question text. Can appear in questionnaire |
| Derived | Variable that contains manipulated data. Can be used as a dynamic variable in questionnaire but completed by respondent |
| Note | Title, sub-title or instruction. No associated response |
| Response | Response types shown will depend on the question type selected. The response will determine the number of replies that are possible and the way in which they are recorded when data entry is completed. |
| Single | Allows one answer to be stored. |
| Multiple | Allows more than one answer. |
| Quantity | Requires a number |
| Date | Accepts suitable date formats, e.g. dd/mm/yy. |
| Time | Accepts suitable time formats, e.g. 2.30pm. |
| Literal | Accepts any text |
| Codes | Number of answer codes (possible responses). Quantities and literals give 1. |
| Sequence | Position of the variable within the question order |
| Valid | Number of valid responses received (invalid responses will be tagged as “No Reply”, “Not Asked” or “Error”) |
| No Reply | Number of No Reply responses received |
| Not Asked | Number of Not Asked responses. Snap has the ability to skip over questions that are not relevant. If a question has been skipped, it will be identified as “not asked”. |
| Errors | Number of response errors or invalid responses |
Reserved keywords
There are two reserved keywords in Snap XMP, which means they cannot be used as variable names:
- pID (used for participant ID)
- rID (used for response ID)
The reserved keywords are not case sensitive. If someone were to create a survey and have these as named variables then manual seeding of the url will not work because Snap Online is already using them.
Creating new variables
You create new variables every time you add a question in Questionnaire design. It is also possible to create them in the Variables window. This allows you to create variables that are not included in the questionnaire, such as derived variables.
- You can open the Variables window in three ways
- click the Variables button
 on the main toolbar
 - select the menu option View | Variables
- press Ctrl + R
- click the Variables button
- Click
 to open the Variable Details window to create a new variable.
 - You are prompted for the next variable name. It will create a multiple response question variable by default.
- Make the changes you need and click on
 to save them and return to the Variables window. Alternatively, click
  to abandon any changes.
If you need to see the fields for Sequence, Length, Must Answer, Ordering, Min, Max, Exclusive, Patterns or Mask click ![]() to hide the question text. Click
to hide the question text. Click ![]() again to display the question text.
again to display the question text.
Editing variables
Once a variable has been created, you can change it. Care should be taken to ensure that any case data already entered does not become “invalid”.
- Open the Variables window by clicking the Variables button
 on the main toolbar or the menu option View | Variables or press Ctrl + R.
- Select the variable to change. If the survey has many variables, it may be faster to select View | Go To or press F4 to display the Select by Name dialog
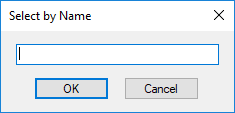
- Enter a variable name or a letter and click OK to select it in the variable list.
- Press Enter, click
 or double-click to open the Variable Details dialog.
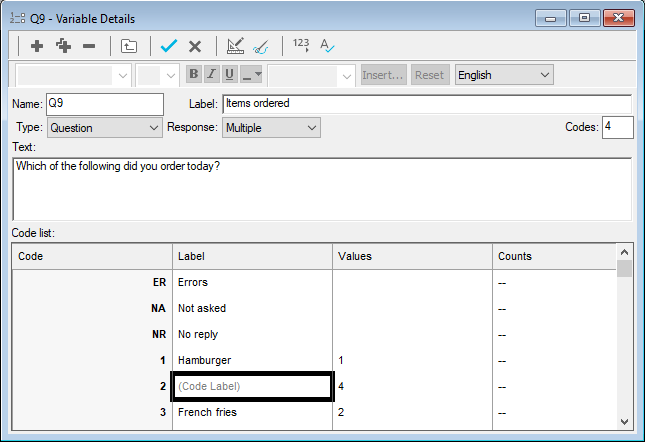
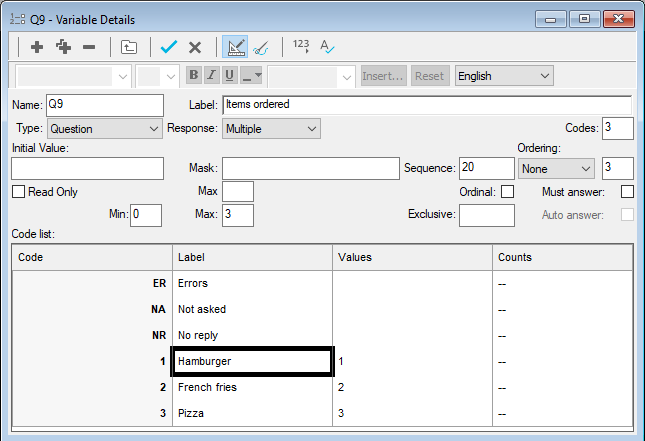
- To add a code, place the cursor in the Label field and click
 or press Tab on the last code. A new code will be inserted after the selected code. The value given to the code will be next available value. In the example the new code 2 has the value 4 as it was the fourth item created in the list.
 - Make the changes you need and click on
 to save them and return to the Variables window. Alternatively, click
  to abandon any changes.
Cloning or copying variables and variable codes
In many questionnaires there are often questions that are very similar. This is particularly true for attitude questions, where views are being sought on a number of topics, and the range of possible answers or codes is the same for all questions.
You can copy the contents of one variable to a new variable and change key items of information such as variable name and sequence. The technique is referred to as cloning.
- Open the Variables window by clicking the Variables button
 on the main toolbar or the menu option View | Variables or press Ctrl + R
- Highlight the variable that you wish to copy and click
 or use the menu option Edit | Clone or the shortcut Ctrl + O.
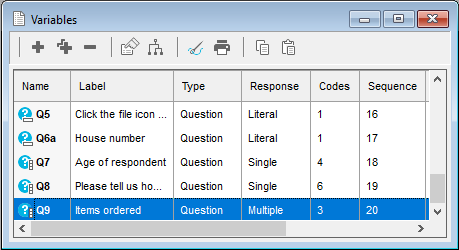
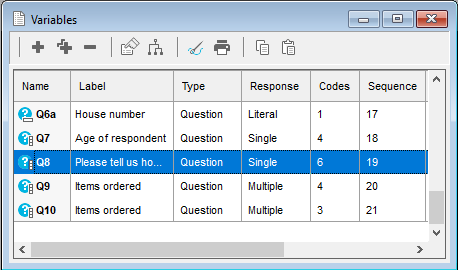
 - A new variable will be created with a new variable name. The new variable will be given the default name of the next available question or next available grid question. In the example the variable Q8 is selected and the next available question is Q11 so a cloned variable will be given this name. If the original variable is a grid question with a name such as Q1a, the new one will be Q1b. The variable name can be changed to a different name that is unique for the selected questionnaire.
- Both the sequence number and the values are incremented, based on the information held in the variable being cloned.
- Change any question text or variable label information, and when complete, click on
 to save the new variable and return to the Variables window.
Deleting variables
You can delete unwanted variables from a survey.
If you have any data for the variable:
- you will be unable to retrieve and analyse it
- the data will have been stored on the raw data case in a specific source
- Select the variable to be deleted, by highlighting it in the Variables window
- Delete the variable by
- clicking

- selecting the menu option Edit | Delete
- pressing Delete
- clicking
- A dialog will appear asking you to confirm that you wish to delete the variable from the survey. Click OK to confirm the deletion and Cancel
Viewing sources and dependents
You cannot delete a variable if its definition refers to another variable as there is a dependency.
This happens when a variable is:
- used in routing
- used by a derived variable
- inserted in the label of a variable
- used in an analysis variable
You can view Sources and Dependents by clicking ![]() .
.
- Click
 to open the Variables window.
 - Highlight the variable you wish to inspect and click
 .
. - The Sources/Dependencies window opens, showing the selected variable together with any source variables (variables that it depends on) and any variables, reports or analyses that depend on it.
In the example below, the variable Q3a depends on Q3, as Q3a is only asked if the respondent answers Other to Q3. You cannot delete Q3 until the Not Asked condition in Q3a is removed.

In the Sources/Dependencies window you can
- check the details of a dependent by selecting it and clicking

- display the sources/dependencies of a variable by selecting it and clicking
 or double-clicking the variable
 - move to the previous view in the Sources/Dependencies window by clicking

- move forward by clicking

Deleting answer codes
- Open the Variables window by clicking the Variables button
 on the main toolbar or the menu option View | Variables or press Ctrl + R.
 - Select the variable to change. Press Enter, click
 or double-click to open the Variable Details dialog.
 - Select the code to be deleted by clicking on the Label field.
- Delete the code by clicking
 or by selecting the menu option Edit | Delete.
 - Click
 to save the changes.
Reporting on variables
Summary and full reports can be produced of all variables in a survey or from a specified list.
- Click
 on the Variable window toolbar to display the Print Variable Details dialog. You can also select File | Print Report, or press Ctrl + P.
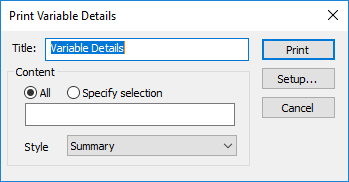
- Select the report settings you would like.
| Title | The title appears at the top of the report. |
| All | All variables in the Variables window will be included in the report. When the selection field is cleared All is automatically selected. |
| Specify selection | The selected list of variables will be included in the report. When you enter a selection Specify selection is automatically selected. You can use a comma separated list or the word to for a range. Selecting a group of variables in the Variables window prior to opening the Print Variable Details dialog will automatically enter this selection. |
Style | You can choose from Summary, Details (single column), Details (double column). Summary prints a list of the variables as shown in the Variables window. The Details report prints the variable details, including codes and values for each variable. The format selected determines whether the data is printed in a single column or double column format. |
| Prints the selected report. | |
| Setup | Opens the Page Setup dialog to specify the layout of your report. |
- When your selection is complete, press Print to output the required report.