Setting up the online survey framework for scanning
Please check that you can successfully scan a page with the scanner you are planning to use before you start your survey. This makes sure that any problems you meet are not to do with the scanner set-up.
The Survey Overview window opens when you first start Snap XMP Desktop. There are two types of survey: online surveys and offline surveys. Click Online surveys to show a list of all the online surveys that are available to the current online account. Click Offline surveys to show a list of all the surveys that are stored in your current offline working folder.
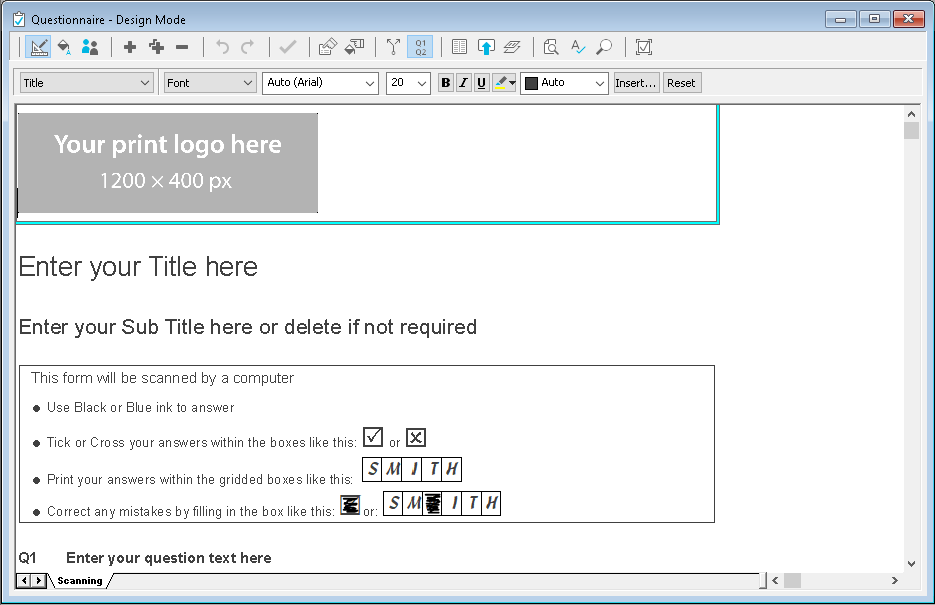
These instructions show how to create an online survey with the Scanning survey template, available with Snap XMP Desktop. Using an online survey allows you to access the survey in Snap XMP Online as well.
Add your online account details
Before you can create or view the online surveys in Snap XMP Desktop you will need to set up a link with a Snap XMP Online user account. You will need to enter your Snap XMP Online account details to link the surveys created in this Snap XMP Online account to Snap XMP Desktop.
- Close any open surveys in Snap XMP Desktop using File/Close Survey.
- Click the Tailor menu and click Online Account to open the Log in to Snap XMP Online dialog.
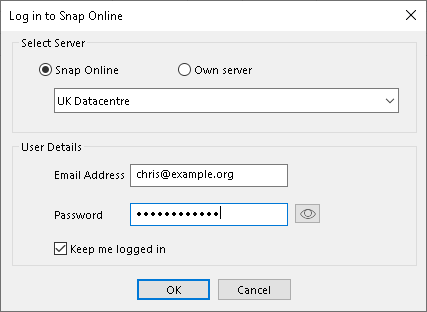
- In the Select Server section there are two options
- Select Snap XMP Online if your account is run by Snap Surveys. Select the Snap XMP Online server to log in.
- Select Own Server if your organisation is running Snap XMP Online on their server. Select the server URL to log in.
- In the User Details section enter the Email Address and Password to connect to the server.
- Check Remember my credentials if you would like the Password to be remembered every time you use Snap XMP Desktop.
- Click OK to log in to the online surveys via Snap XMP Desktop.
Creating a folder for your scanning online surveys
Folders help to organise your online surveys. Creating your folders first allows you to create or transfer your online surveys to the place you want straight away.
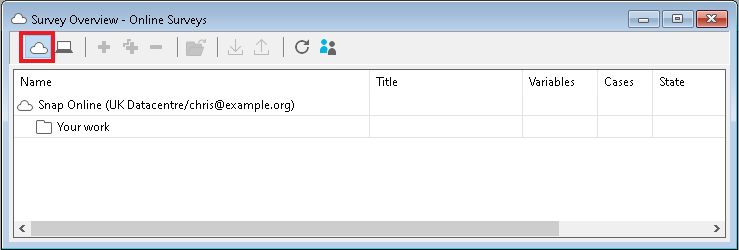
- When you start Snap XMP Desktop the Survey Overview window appears. If it is not open, click Survey Overview
 on the Snap XMP toolbar, which opens the Survey Overview window.
 - On the Survey Overview toolbar, click Online Surveys
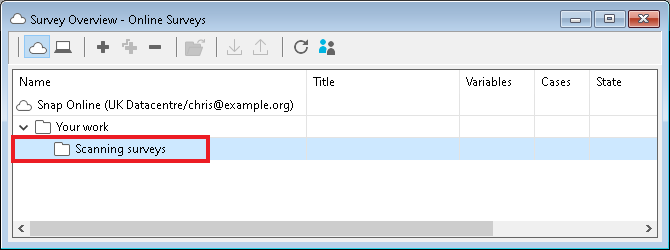
 to show the online surveys. When opening the online surveys for the first time, you will see a top level folder called Your work.
- Click on Your work then right click to show a popup menu and click New Folder.
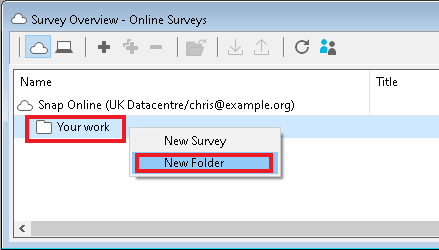
- In the New Folder Name dialog, enter a name for the folder. In the example, the new folder name is ‘Scanning surveys’.

- Click OK and the new folder is shown in the Survey Overview window.
Creating a new scanning survey
- Click
 to create a new online survey.
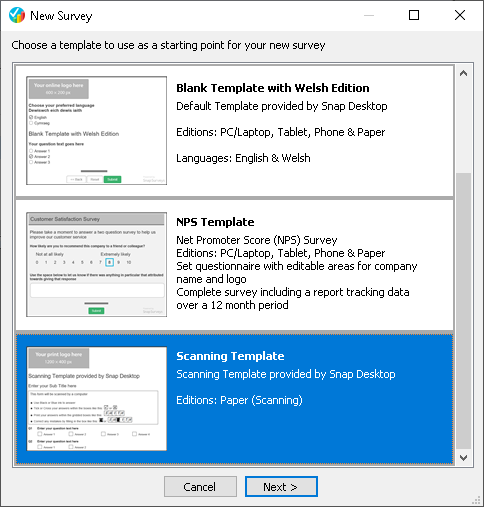
 - Choose the Scanning survey template, which is supplied with Snap XMP Desktop, as a starting point for the new scanning survey. Click Next.
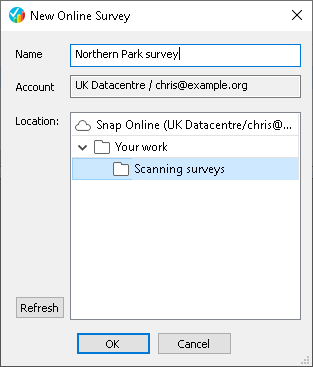
- In the New Online Survey dialog, enter a name for the survey and select the folder to add the survey. Click OK.
- This creates the new survey. You can now build your questionnaire in the Questionnaire window. The tabs for the different editions are shown at the bottom.