Running the reports
When you have completed your report there are a number of options
- Check that the instructions in the report complete successfully.
- Preview the report to test that it appears the way you want.
- Run the report to print or export the report results.
All these actions are carried out in the Report Execution dialog.
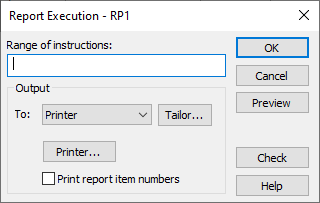
Report Execution dialog
-
Click Reports
 to display the Reports window showing a list of reports for the current survey.
-
Select the report you want to run and click Execute
 to open the Report execution dialog.
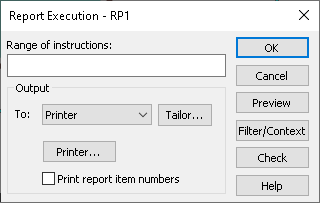
Range of instructions | Leave blank to execute all instructions or enter a valid range. See Entering a range of instructions for examples. |
Output To: | Select to export the report to a file or printer. |
Tailor | Open the Report Tailoring dialog to specify more report details. This is also available via the Tailor menu. |
Printer | Open the Print Setup dialog to specify your printer or to print to a file such as PDF. This is only available if printer is selected as the output. |
Print report item numbers | Check to add the instruction number in available space within your report. This is useful when testing complex reports. |
Type | Specify the file type that you wish to use to export your report. The available file types are Comma Separated File (CSV), Enhanced Metafile (EMF), Excel (CSV), Tab Separated File (TSV), Web Format (HTML), and Windows Bitmap (BMP). This is only available if printer is selected as the output. |
Preview | Click to preview your report on screen |
Filter/Context | Open the Apply External Filters/Contexts dialog to test available contexts and filters for Snap Online. Only available if an external filter or context has been defined |
Check | Check that the instructions in the report will all work, without creating a report |
OK | Run the report with the selected options |
Entering a range of instructions
Range Instruction | Effect |
1 to 3 | Execute instructions 1 then 2 then 3. |
FROM 2 | Execute instructions starting with instruction 2 through to the end of the report. |
TO 6 | Execute instructions starting with the first instruction and ending with instruction 6. |
2 for 3 | Execute 3 instructions starting with instruction 2. This example performs instructions 2 followed by 3 then 4. |
| If the field is left blank all instructions will be executed. |
You can also execute a range of instructions by selecting the instructions you wish to execute in the report, and then clicking the right button on the mouse to display the context menu. Select Execute Selection from the menu. The Report Execution dialog will be displayed with the selected instructions ready to execute.
Checking a report
In the Report Execution dialog, click Check to test the report instructions complete successfully. A message appears once the check has been run.
Previewing a report
- In the Report Execution dialog, enter a range expression in Range of instructions to preview parts of the report or leave blank to preview the whole report.
- In the Output To list, select Printer.
- Click Preview to preview the report on-screen.
Running a report
- In the Report Execution dialog, enter a range expression in Range of instructions to preview parts of the report or leave blank to preview the whole report.
- Set the Output details to print or export a report, depending on your requirements.
- Click Check to test that the report instructions complete successfully. A message will appear once the check has been run.
- Click Preview to show the report on-screen. Review the report to make sure everything is correct. (The Output must be set to Printer for this option to be available.)
- Once you have reviewed the report, click OK. All the required analyses are created and the reports are sent to the printer or a file, as specified in Output.
If you need to cancel a report after it has started, click Cancel while the report is running.
Exporting report results to a single report file
- In the Report Execution dialog, specify the range of instructions to be executed or leave blank to execute all instructions for the report.
- Set the file Type according to the package that the reports will be used in.
- Click OK. The Export file details dialog opens.
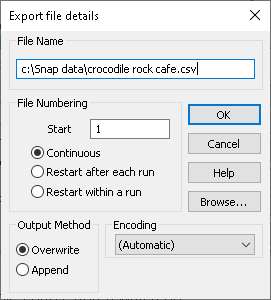
- Check the file numbering. By default, Snap starts each run at the next available number. Click OK to export the report data to a single CSV file.
Exporting report analyses to separate files for inserting into documents
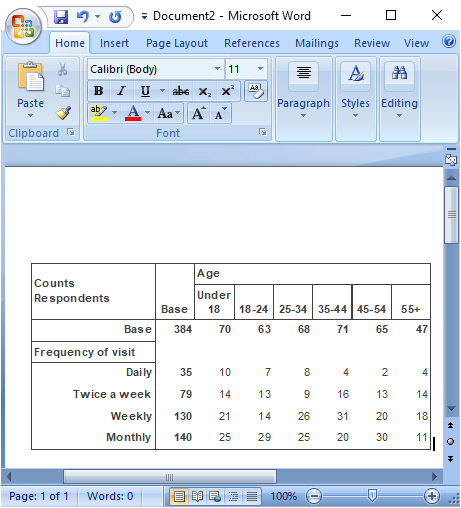
An entire report of tables and charts can be output to separate files that can then be inserted into a presentation software program such as PowerPoint or word processing package such as Word.
- In the Report Execution dialog, specify the range of instructions to be executed or leave blank to execute all instructions for the report.
- In the To: box select Export, then in the Type box select Enhanced Metafile (EMF).
- Click Tailor.
- In the Report Tailoring dialog, click File Details.
- In the Export file details dialog set the File Name to one that includes “??”. For example use the filename “Crocodile Rock Cafe??.emf” to ensure that each table or chart produced is stored in a separate file, starting Crocodile Rock Cafe 01.emf, Crocodile Rock Cafe 02.emf, and so on continuing in the sequence.
- Click OK to save the file settings, then click Keep to save the new tailoring settings.
- Click Check to check the report. If there are no errors, a separately numbered file is created for each table or chart.
- In the presentation software you want to use, such as PowerPoint or Word, insert the picture from the exported files. For example, select “Crocodile Rock Cafe01.emf” and import into your chosen software.
Printing report results
-
Click Reports
 to display the Reports window showing a list of reports for the current survey.
-
Select the report you want to run and click Execute
 to open the Report execution dialog.
- In the To: box select Printer.
- Click Tailor, then in the Report Tailoring dialog, click Page Details.
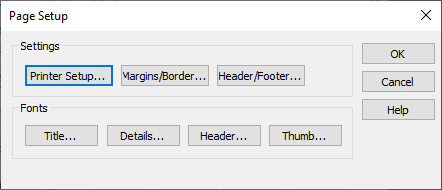
- In the Page Setup dialog, click Printer Setup to change printer settings such as type of printer and page orientation (portrait or landscape). The Printer Setup dialog depends on the currently installed printer. You can select a PDF printer driver which will create the report to a PDF file.
- Click Margins to change the distances between the edge of the page, the drawn border and the analyses.
- Click Header/Footer to specify the contents of your headers and footers.
- Click OK to save your page settings and return to the Report Tailoring dialog.
- Click Keep to use these settings for all subsequent reports. Click Use to only use these settings for this report.
- Click OK to print the report.