Recording the whole interview
Snap XMP supports the ability to record the whole interview using the Interviewer app, with up to one hour of recording time. This can include the questions being asked, as well as the spoken response itself. Once synchronised, you can download the audio file attachments from your Snap XMP Online account. The files will be tagged with a unique ID, allowing you to pair the recording with the submitted data.
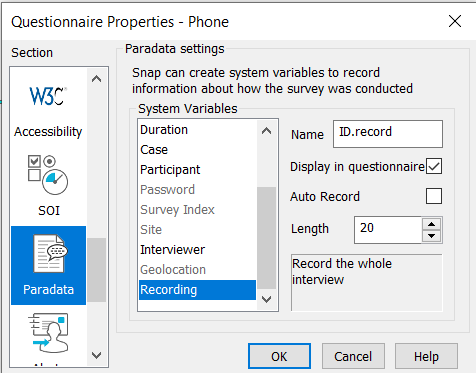
Interviewer allows you to record the whole interview. The option to include a Recording variable can be found in the Paradata settings of Questionnaire Properties.
This worksheet explains how to do this and contains some notes on privacy considerations at the end.
Please note: This feature is available for Interviewer surveys only. To record an audio response you will first need to set up a survey designed for the Interviewer app.
Including the Recording Paradata Variable
- Open Snap XMP Desktop and create an online survey for mobile interviewing.
- Open the Questionnaire Properties menu.
- Select the Paradata option from the left-hand pane.
- Choose Recording from the list of System Variables and check the Use In Survey box. If you wish to start recording automatically without having to press a button, check the Auto Record box.
- Click OK.
- Then save the change
 and publish the survey. Once the survey has been published in your Snap XMP Online account, you can then share it with your interviewer.
Test the survey in Snap Offline Interviewer
- Open the Interviewer app, and login to your interviewer’s Snap XMP Online account.
- Click on the survey to start a new interview
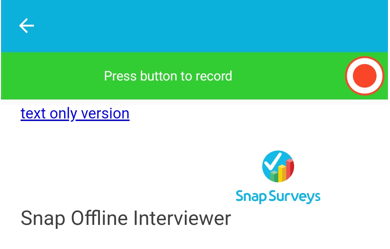
- Press the red record button that appears at the top of the survey to start the recording. If you have the Auto Record option enabled, then this will start the recording upon opening the survey.
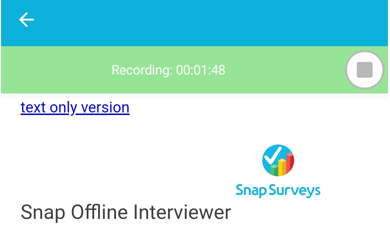
- The recording is stopped once the survey has been submitted, or if you press the stop button that appears along the top. Note: The survey can only record for a maximum of 1 hour.
- Read out the questions in the survey and answer them, to complete the survey.
- Press Submit to complete the survey and stop the recording
- When the device syncs the response will be uploaded along with the recording to your Snap XMP Online account.
Download the attached files
- Login to your Snap XMP Online account.
- Click on the survey and select the Collect tab.
- Select the Responses option from the left-hand pane.
- Then select the Attachments option, you will then see a list of all the attachments that have been submitted.
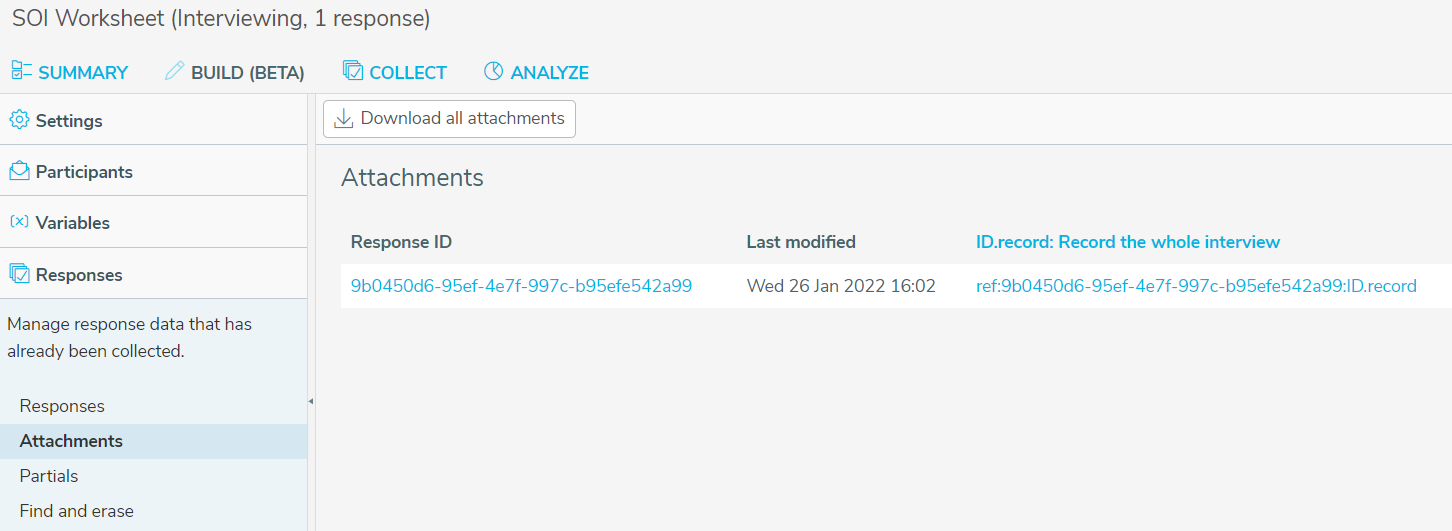
- Each recording has a unique Response ID which is the unique ID assigned to each respondent’s completed data, under the ID.case paradata variable.
- You can download a individual recording by clicking on the Response ID link or the unique reference held under the ID.record field. Alternatively, you can download all attachments at once using the Download All Attachments button.
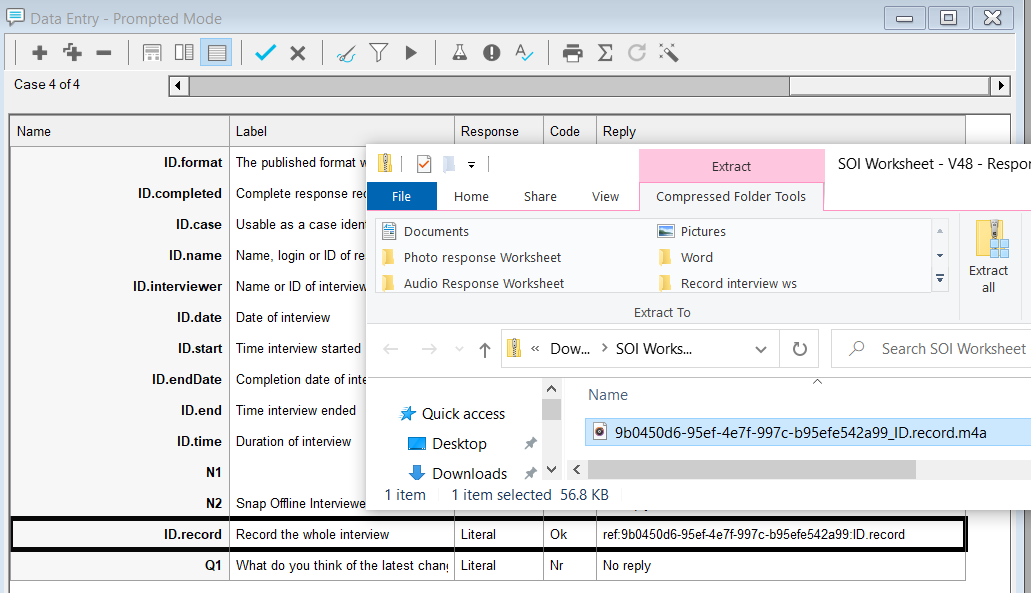
- If you then open the survey in Snap XMP Desktop to import the data, you can then match each recording to the unique reference submitted under the ID.record paradata variable.
Recording consent for data protection
As well as providing your participants with the privacy information that you would provide for any other survey, you should ensure that your participants are aware that their responses to the whole survey are being recorded, and that you have a basis for recording their response, such as their consent. For example, you can create a Multi Choice style consent question:
-
Open your survey in the Questionnaire Window and Design Mode
 .
.
- Click into the first title or question field at the top of your questionnaire.
-
Click
 to create a new question.
- Select the dropdown list on the toolbar where it says Single Choice and change it to Multi Choice. The shape of the response boxes changes from a radio button to a square.
- Click on the field below and Press [Ctrl] + [Shift] + [B] to insert a page break above your new question (alternatively click the right–hand button on the mouse and select Break and Page Break.
- In the area marked Click here for text enter your consent request text.

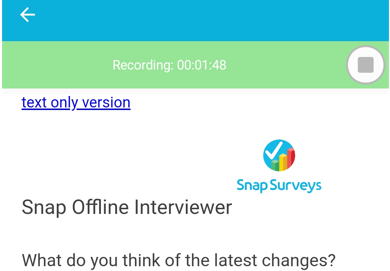
Where you have enabled the recording feature, a green bar appears at the top of the screen to indicate that recording is in progress and what is it that is being recorded.
This feature works best in surveys in the field where an individual interviewer is interacting with the participant, as opposed to kiosk surveys. If you enable the feature for a kiosk survey, make it very clear to participants that the survey is recording and saving what they are saying.