Producing a cover page
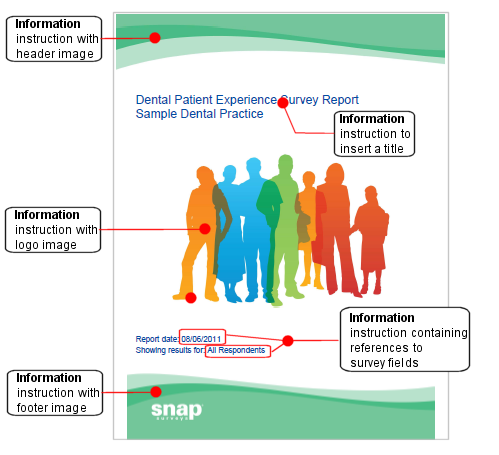
This example describes how to produce a cover page consisting of
- a header graphic
- a title
- a picture
- a description of the report
- a footer graphic
It assumes that you have the three graphics at the correct size for your report.
-
Click
 on the Snap toolbar to open the reports window.
-
Click
 to create a new report. You will just use this report to create a cover. You can then include it in other reports.
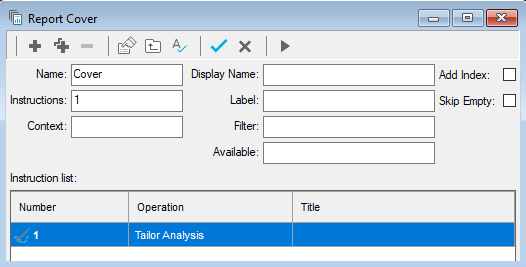
- Set the name to Cover and clear the Display and Label boxes.
-
Click
 to add a new Page Layout instruction.
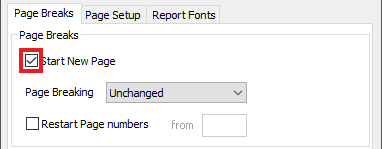
- Check the Start New Page box. This will automatically start a new page. It is unlikely that you will have a page number on the title page so you can leave the Restart Page Numbers box clear. (You may need another Page Layout instruction before the report content starting a new page and setting the Restart Page Numbers from 1).
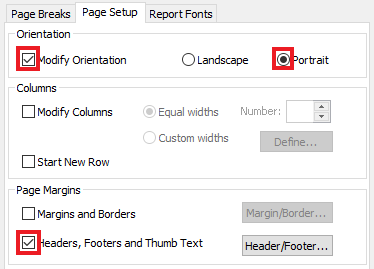
- Click the Page Setup tab.
- Check the Modify Orientation box and make sure that Portrait is selected. (This ensures that the cover page will always be in portrait orientation).
- Check the Modify Headers, footers and thumb text box.
- Click the Header/Footer… button to open the header footer dialog.
- Clear all the default values of the headers and footers and click OK.
- Click OK to close the Page Layout dialog.
-
Click
 to add a new Information instruction.
- Enter the top banner graphic for your cover page using the Insert button and click OK.
-
Click
 to add another Information instruction and enter the title then click OK.
- Add another Information instruction and enter the logo using the Insert button then click OK.
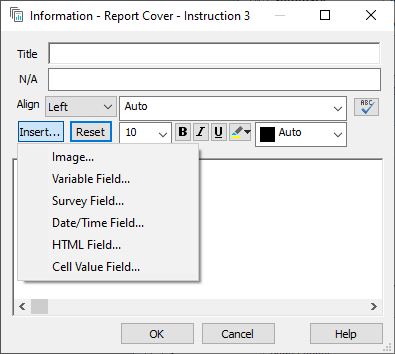
- Add another Information instruction and enter any further text.
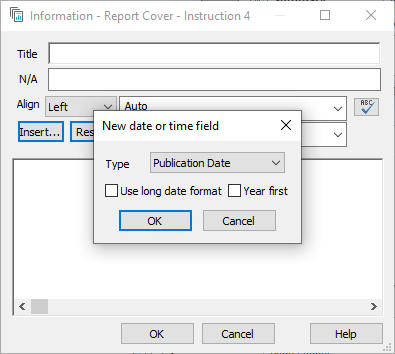
- To create the text seen above, enter “Report date:” then format the text. Click Insert and select Date/Time field. Select Publication date from the list of available fields and click OK.
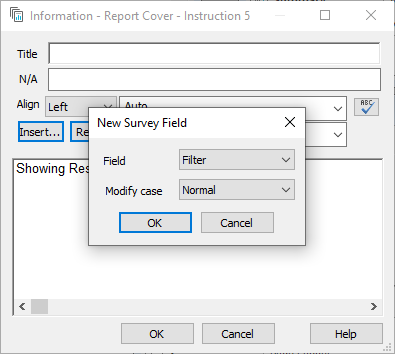
- Then enter the text “Showing Results for:” and click Insert. Select Survey Field from the available options and select Filter as the field property. This shows any filter that has been applied to your report. Click OK to add the filter field then click OK to save your instruction.
- Add another Information instruction and enter the lower banner graphic using the Insert button then click OK.
- Save your report. You can now execute this report at the beginning of any other report to create a standard title page.
Remember to insert a Page Layout instruction at the top of the next part of your report that sets up a new page, new headers and a page number if required.