Page setup for printing reports
The Page Setup dialog allows you to set the report page margins, headers, footers and printer options. You can also set default fonts for each area of the report. The setup covers all reports within the survey, including smart reports listed in the Reports window, or a print report on details of the survey, such as, variables or weights.
Page Setup dialog
You can open this dialog from the menu File|Page Setup or click Setup on any Print Report dialog . You can also click the Page Details on the Tailoring|Reports dialog.
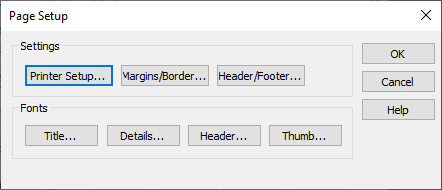
The available options are:
- Printer setup to change printer settings such as type of printer and page orientation
- Margins and border to change the distances between the edge of the page, the drawn border and the analyses.
- Header and footer to change the contents of the headers and footers.
- Fonts to set the default font used in the title, details, header and thumb.
Click the relevant button to change the settings. Select Page Numbers Omitted to print the report without page numbers, even if they are in the headers or footers.
When you have completed the setup, click OK to save the changes.
Printer setup
Printer Setup allows you to change printer settings such as type of printer and page orientation (portrait or landscape). The Printer Setup dialog depends on the currently installed printer. You can choose to print to a printer or create a PDF file.
- Click Printer Setup to open the Print Setup dialog.
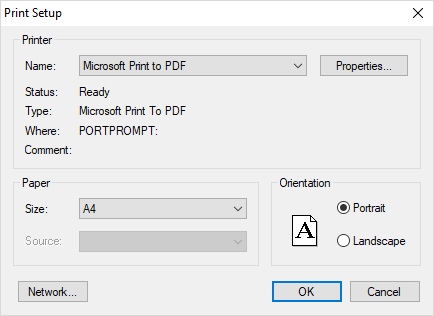
- Select the printer in the Name drop-down list. Click Properties to set the properties and advanced options for the selected printer. The options available are dependent on the selected printer. Click Network to add a network printer.
- Choose the paper size and orientation.
- Click OK to save the changes and return to the Page Setup dialog.
Setting margins and borders
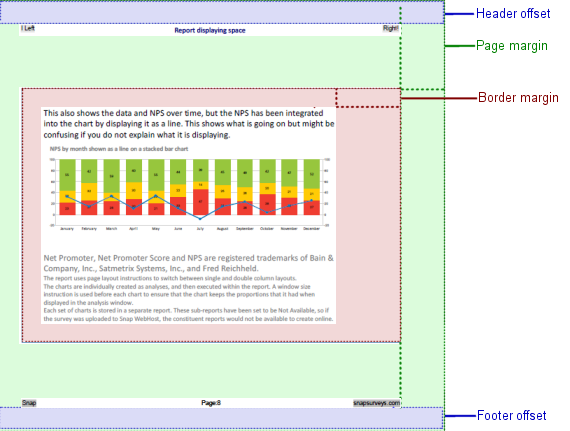
Margins and border change the distances between the edge of the page, the drawn border and the analyses.
- Select Margins and Borders and click the Margin/Border button to open the Report Borders dialog
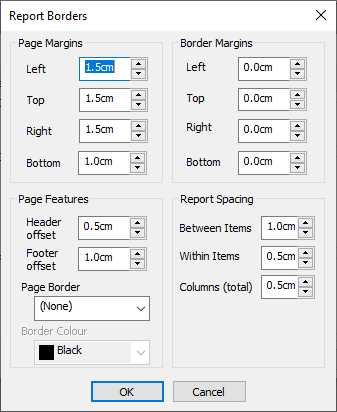
- Change the margin dimensions to the values you need.
- Click OK to save the changes and return to the Page Setup dialog.
Adding headers and footers
You can add additional text and graphics to the header and footer of the first page and/or the subsequent pages.
- Click the Header/Footer button to display the Headers/Footers dialog.
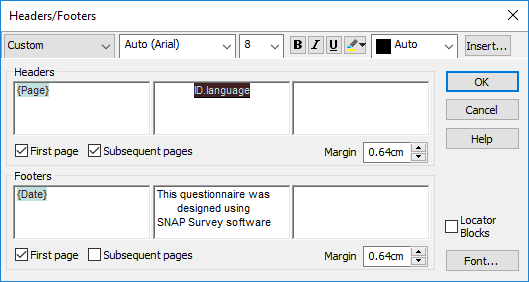
- Select the boxes to display the headers and footers on the first page and/or subsequent pages.
- The header and footer each consist of the three areas (left, centre and right). The header/footer may contain:
- free format text
- images
- variable fields
- survey fields
- date and time of printing or publication
- To insert a field click Insert and choose from Image, Variable Field, Survey Field or Date/Time Field from the menu. You can also select a Survey Field from the drop-down list in the top left corner in the dialog toolbar.
- Use the format buttons and fields at the top of the dialog to set the font name, size, style and colour. You cannot change the justification in each area.
- Click OK to save the changes and return to the Page Setup dialog.
Default fonts
The fonts section sets the default font used in the title, details, header and thumb.
| Button | Description | |
| Title | The default font style of the report title. | |
| Details | The default font style of text that is in the report. | |
| Header | The default font used for the header and footer text. | |
| Thumb | The default font of the text running in the margins of the report. | |
Print report
The behaviour of the Print Report command is different for each active window. The layout of the printed report is controlled via a Page Setup dialog and depends on the type of report being printed.
| Window | Print description |
| Data entry window | Create a data report listing the contents of the specified cases or variables. |
| Variables window | Print a summary or detailed list of the variables and the case counts in the survey. You can select which variables are included in a detailed list. |
| Weights window | Print a detailed list or summary of all weights in the survey. |
| Reports window | Print a detailed list or summary of all reports in the survey. |
| Analyses window | Print a detailed list or summary of all analyses in the survey. |
| Analysis window (table, chart, map, list) | Print the specified analysis using the appropriate analysis and break details. |
| Analysis variables window | Print a summary of the specified analysis variable. |