Multi-Mode design
You can output the same questionnaire in different output formats and languages. The structure of the questionnaire remains the same for each mode, but the appearance, language and the published output will be different for each mode.
- The name and structure of the variables in each survey will be exactly the same and will be repeated throughout each edition of the questionnaire.
Output formats
- For each output format of the questionnaire (paper, screen etc) you can use a different style template.
- You can show/hide different questions for different outputs
- You can apply different paragraph styles to the same question in different output formats
- You can have different questionnaire layouts for the different output formats
- The output edition is identified in the Id.format variable.
- The selected edition is published unless it is an adaptive survey
Language versions
- You can create several versions of the same language if you wish to have different text in your questions (for example for adults and children)
- The same paragraph styles are applied to the same questions in different language editions
- The language version is identified in the Id.language paradata
- All language editions for an output format are published together.
Translation
- The questionnaire text is displayed on each language version. If you have not added a pre-translated question, the original language text will be displayed in grey and will not appear in the published version. You must type the translation over the top of it.
- Snap XMP Desktop has a bank of standard phrases, such as No Reply, Not Asked, in each language available for use. Other language translations need to be added to the survey.
- Some SurveyPaks contain questions in several languages, and when you import them, all the language versions will be imported into the correct place.
- The translation wizard is used to provide text for external translators. The translated text can be imported and used in your questionnaire.
Editions
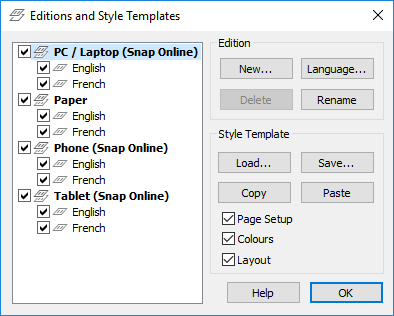
| Edition list | Check the box by an edition to include it when you publish your questionnaire, uncheck the box to remove it. |
| New | Create a new output edition. Questionnaire has same structure and text but different properties |
| Language | Open the languages dialog to create a new language edition (one per output edition). Questionnaire can have different text but same structure and properties |
| Delete | Delete selected edition. This is only available if survey has never been published. |
| Rename | Change the name of the selected edition (you cannot change the language tag) |
| Load | Load one of the style templates (.qsf file) supplied with Snap according to which boxes are checked |
| Save | Save the current questionnaire styles to a template file. |
| Copy | Copy the current styles to the Clipboard. This is often used to transfer styles between surveys. |
| Paste | Paste styles from the Clipboard. |
| Page setup | Check to use portrait/landscape, page size etc |
| Colours | Check to load the colours of questions/backgrounds and images |
| Layout | Load the question styles and the layout (number of columns and width of margins etc.) |
Adding an edition
- With the Questionnaire window open, click
 to display the Editions and Style Templates dialog box.
 - The dialog will display any editions of the questionnaire that currently exist.
- Select New from the Edition area of the screen. A New Survey Edition dialog box will display.
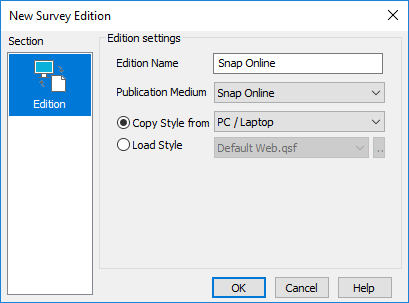
- Enter an edition name to appear on the edition tab that identifies this edition. If you choose a name that already exists within the questionnaire, an error message is displayed.
- Select the publication medium details from the drop-down list. The choices are Snap Online, Paper and Scanning.
- Select which current edition to copy styles from, or select a template to load styles from.
- Click OK.
- The new edition of the questionnaire will have been added to the list on the Editions and Style Templates dialog.
- Click OK to return to the Questionnaire window.
- You can toggle between the various editions by
- clicking on the tabs at the bottom of the screen
- using Alt +PageUp and Alt +PageDown to switch between the tabs

- If you have multiple languages in your questionnaire, the new edition will include a tab for each language.
Deleting an edition
- You can only delete editions from unpublished questionnaires. Once you have published a questionnaire, you cannot delete any editions from it, even if you have added them after the questionnaire was published.
- Open the Questionnaire window.
- Click
 to display the Editions and Style Templates dialog.
 - Select the edition you wish to delete and click Delete.
- This displays a message to confirm that you want to delete. Click Yes.
- Click OK to return to the questionnaire.
Hiding an edition
You can always hide editions. Hidden editions are not visible in the Questionnaire window and will not be published.
- Click
 in the Questionnaire window to display the Editions and Style Templates dialog.
 - Displayed editions have a check mark in the box next to them. To hide an edition, uncheck the box.
- Click OK to return to the questionnaire. The hidden edition(s) will no longer be listed in the edition tabs at the bottom of the pane.
Renaming an edition
- Open the Questionnaire window.
- Click
 to display the Editions and Style Templates dialog.
 - Select the edition you wish to rename and click Rename.
- The Format Name dialog opens displaying the current name. Change the name to the one you require and click OK.
- Click OK to return to the questionnaire.
Setting up an adaptive questionnaire
You can set up a survey so that different devices can see different versions of the questionnaire, tailored for their screen size.
To do this you need to create separate online editions for each output (for example, for PC, tablet and smartphone) and all editions will be published together.
How it works
The largest questionnaire that will fit on the screen for a given device is chosen for the interview. The dimensions are set in Page properties for an edition and the screen size of the device. This means that if you have a phone with a very large screen, it may receive the edition for a tablet.
Setting up the different editions
- Open your survey in the Questionnaire window by clicking
 . Select Design Mode using the
  icon.
icon. - Click the Editions and Style Templates icon
 to display the Editions and Style Templates dialog.
 - Click New to create a new edition.
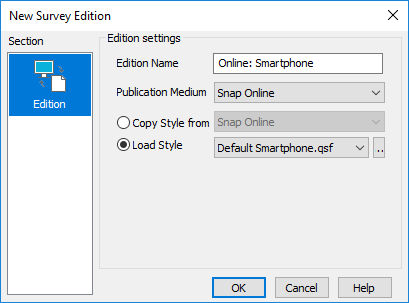
- Enter a name for the new edition in Edition Name. The name must be unique for the survey.
- Select Snap Online from the Publication Medium dropdown.
- Select Load Style to choose a new style template for the layout of the questionnaire.
- There are a number of supplied style templates in the drop down list. Select
- Default Smartphone.qsf to access the template for a smartphone
- Default Tablet.qsf to access the template for a tablet survey
- Default Web.qsf to access the template for an online browser survey
- Default Kiosk.qsf to access the template for a kiosk survey
- There are other color themed style templates available in the drop down list. You can also browse for styles by clicking the
 button.
 - Click OK to close the New Survey Edition dialog.
- Click OK to return to the Questionnaire window. The new edition will now be visible in the Questionnaire Window.
Laying out the questionnaires for different devices
The editions can differ in the way they look and the way they are laid out, but their variables, routing and the publishing settings must remain the same. (Publishing settings include the Interview, Paradata and Data link details).
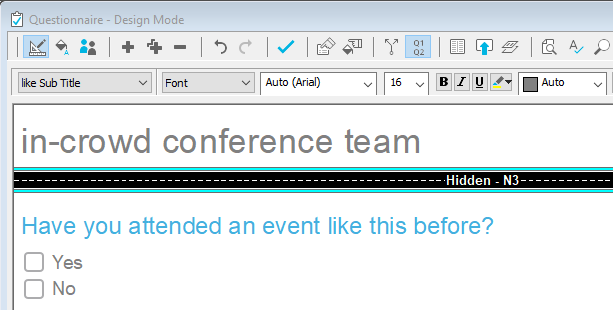
You can choose to show or hide different items in the different editions. This allows you to tailor the text and images according to the edition. You can add extra page breaks to reduce scrolling on small screens.
You can also provide routing that is dependent on which edition you are in, so the questionnaire can route to the appropriate questions in the different editions. You can do this by routing on the ID.format variable.
You can also make the following changes to all your questionnaires which will improve the experience on small screens and mobile devices
- Keep the text of questions and the codes as brief as possible.
- Split large grid questions into several smaller grids to make them quicker to load
Laying out a questionnaire for a small screen
Smartphones have limited screen space, a mobile internet connection (which may use a slow speed) and small keyboards. When creating a questionnaire for a smartphone you should:
- Have ten or fewer questions (you can hide extra questions)
- Have few or no open response questions (you can hide them if necessary)
- Use small or no graphics (put any graphics in the background)
- Have one or two questions per page (to reduce the need to scroll)
- Turn off the progress bar to reduce clutter on the display
- Choose simple or no images for response boxes (done automatically if you are using the default smartphone template)
- Turn off the option of having the title on every page.
- Choose buttons which look good when small.
- If you have more than a few codes for a question put multiple response questions into two columns to save space, and reduce the tab settings on the question codes to give more space for labels
- Use the drop-down list option for single response questions (done automatically if you are using the default smartphone template)
- Use the drop-down list option instead of a slider or a map control if the survey is likely to be seen on old devices with little memory
Showing and hiding questions
If you want to have less text in one edition of your survey, you can provide different versions of the text, and show the one that is appropriate for that edition.
- Create the different instructions or questions.
- Right-click the item you wish to hide and select Hide Variable in the dropdown list.
- Change to the other editions by selecting the appropriate tab at the bottom of the screen.

- Repeat the process to hide the text or questions that you do not want in each edition.
- Click
 to save the changes to the questionnaire.
Remember that you will need to change the routing if you route through hidden questions.
Showing and hiding questions using ID.format
You can choose which questions are displayed using routing based on the ID.format variable.
You need to look at the ID.format variable to see the code for an edition.
- Click
 on the main toolbar to display the Variables window.
 - Scroll to find the ID.format variable and double-click to open it.
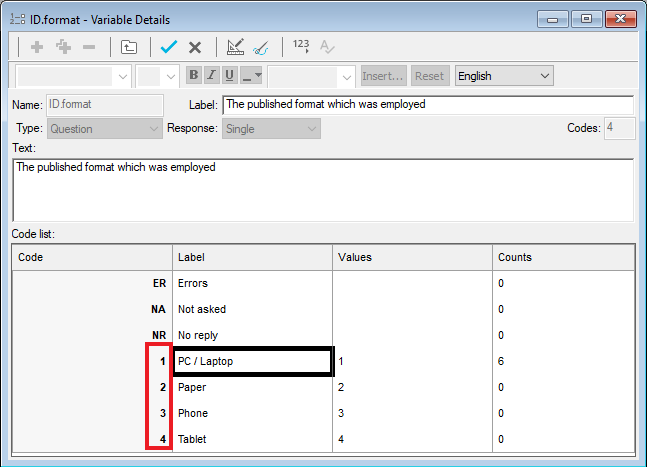
- Take note of which Code represents which edition.
Setting up the routing
- Create the different questions.
- Select the one you wish to appear in that edition.
- Right-click the mouse and select Routing Rules from the context menu or click
 on the Questionnaire window toolbar. The Routing Rules dialog appears
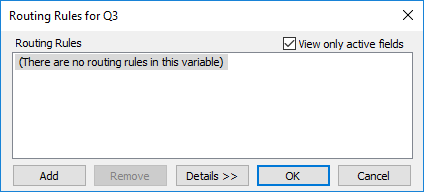
- Click Add to create a new routing rule. Select Conditionally Ask Question from the Type box and click OK. The Rule Details dialog appears.
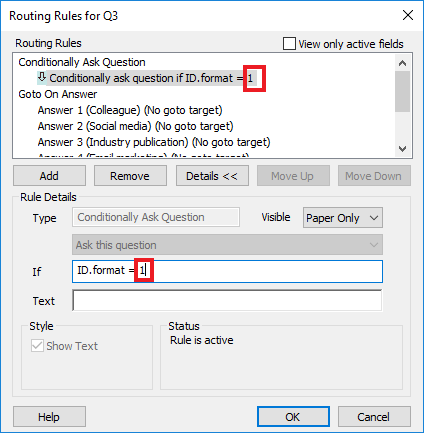
- Type ID.format=1 (replacing 1 with the Code representing your edition). This means that the question will be shown if the questionnaire format is the Snap Online edition in the survey in this worksheet.
- Click
 to save the changes to the questionnaire.
Remember that you will need to change the routing if you hide any questions that have routing on or are being routed to.
Setting up different graphics for different editions
If you want to use separate graphics for different devices, you must do this by placing them in the background, rather than inserting them directly.
It is best to create separate images of the correct size, rather than attempting to resize the graphic.
- Create the different graphics that you wish to use for the large and small screens.
- Check that the Questionnaire Window is in Design Mode
 and that the toolbar topic is set to Background.

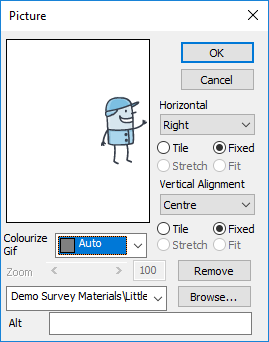
- Select the area that you wish to have a background image in the third drop-down list (highlighted above). Click the Picture button. The Picture dialog appears.
- Click Browse and browse for the appropriate picture file for that edition.
- Set the horizontal and vertical alignment.
- Select Fixed. This ensures that the image will appear at the size you have created it.
- Change to the other edition and repeat with a different picture in the background.
- Click
 to save the changes to the questionnaire.
If you have applied a color and an image, the color will be displayed in areas where the image does not fill the space. The background preview area on the toolbar will be split showing the color alone on the top half. ![]()
Publishing an adaptive questionnaire
If you wish to preview your questionnaire, you will only see a preview of the edition that you publish from. To preview all the editions, you will need to do a Preview only publish from each edition before publishing the questionnaire.
Previewing all the editions
- Open your survey in the Questionnaire window by clicking
 . Select Design Mode using the
  icon.
icon. - Select File | Publish or click
 to display the Publish Questionnaire dialog.
 - In Method, select Preview Only. This opens the default web browser on the device displaying the questionnaire as it would appear during a live interview.
- Click Publish to preview that edition of your questionnaire on the desktop. Check that you have chosen the correct questions and images for that edition. Check that any routing works.
- Repeat the preview on different devices to check that each edition displays as expected.
Selecting which editions to publish
If you do not wish to publish all the editions, hide the editions that are not required. Hidden editions are not visible in the Questionnaire window and will not be published.
- Click
 in the Questionnaire window toolbar to display the Editions and Style Templates dialog.
 - Displayed editions have a check mark in the box next to them. To hide an edition, uncheck the box.
- Click OK to return to the questionnaire. The hidden edition(s) will no longer be listed in the edition tabs at the bottom of the pane and will not be published.
Publishing all editions
- Select File | Publish.
- Select Publish Without Preview as the Output Method.
- Click Publish to publish the survey.
Adjusting screen sizes for adaptive questionnaires
If you wish to create questionnaires for specific devices, you should check that the questionnaires look as expected on those devices.
If the devices have a very large or very small screen, you may wish to change the questionnaire page size to fit the expected screen size.
Note that if you change the screen size for one edition, it may affect which of the other questionnaires is delivered to a device.
- Change to the edition displaying the questionnaire for that device.
- Click
 to display the Questionnaire Properties dialog.
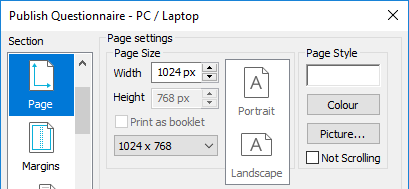
 - Select the Page section
 in the left hand column.
 - Specify the width of the screen of the device that you are using in Width. The screen width will be different if the device in held in landscape and portrait mode, so choose the appropriate value.
- Click OK to save your changes