Entering data from paper surveys
This tutorial describes how to enter responses from paper questionnaires using prompted mode. Prompted mode is the mode that the Snap Surveys data entry team prefer to use.
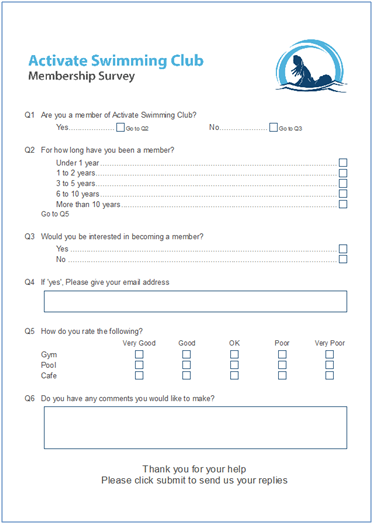
The survey used in the worksheet is Activate, which is included with Snap XMP Desktop. The survey has been cloned or copied without the raw data file.
This worksheet will show you how to:
- Enter test data
- Change settings to speed up data entry
- Enter live data
Step 1: Enter test data
This is a useful way to check that you have set up routing and question response types correctly.
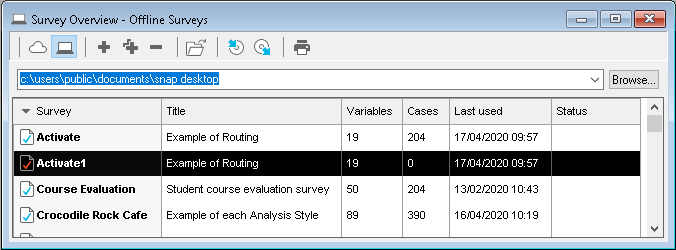
- From the Survey Overview window, open the survey. You can use an online or offline survey. In this example, an offline survey used is called Activate1 which is cloned from Activate.
- Click OK on the Survey Details dialog.
- Click on the Data Entry icon
 in the Snap XMP Desktop Toolbar.
 - There are three options for data entry
- Questionnaire mode
 shows the same view as the questionnaire
 - Interview mode
 presents a single question on the screen at a time and shows the list of answers to make selections from.
 - Prompted mode
 shows each question as a separate line on the screen
- Questionnaire mode
- In the Data Entry toolbar click Prompted Mode
 .
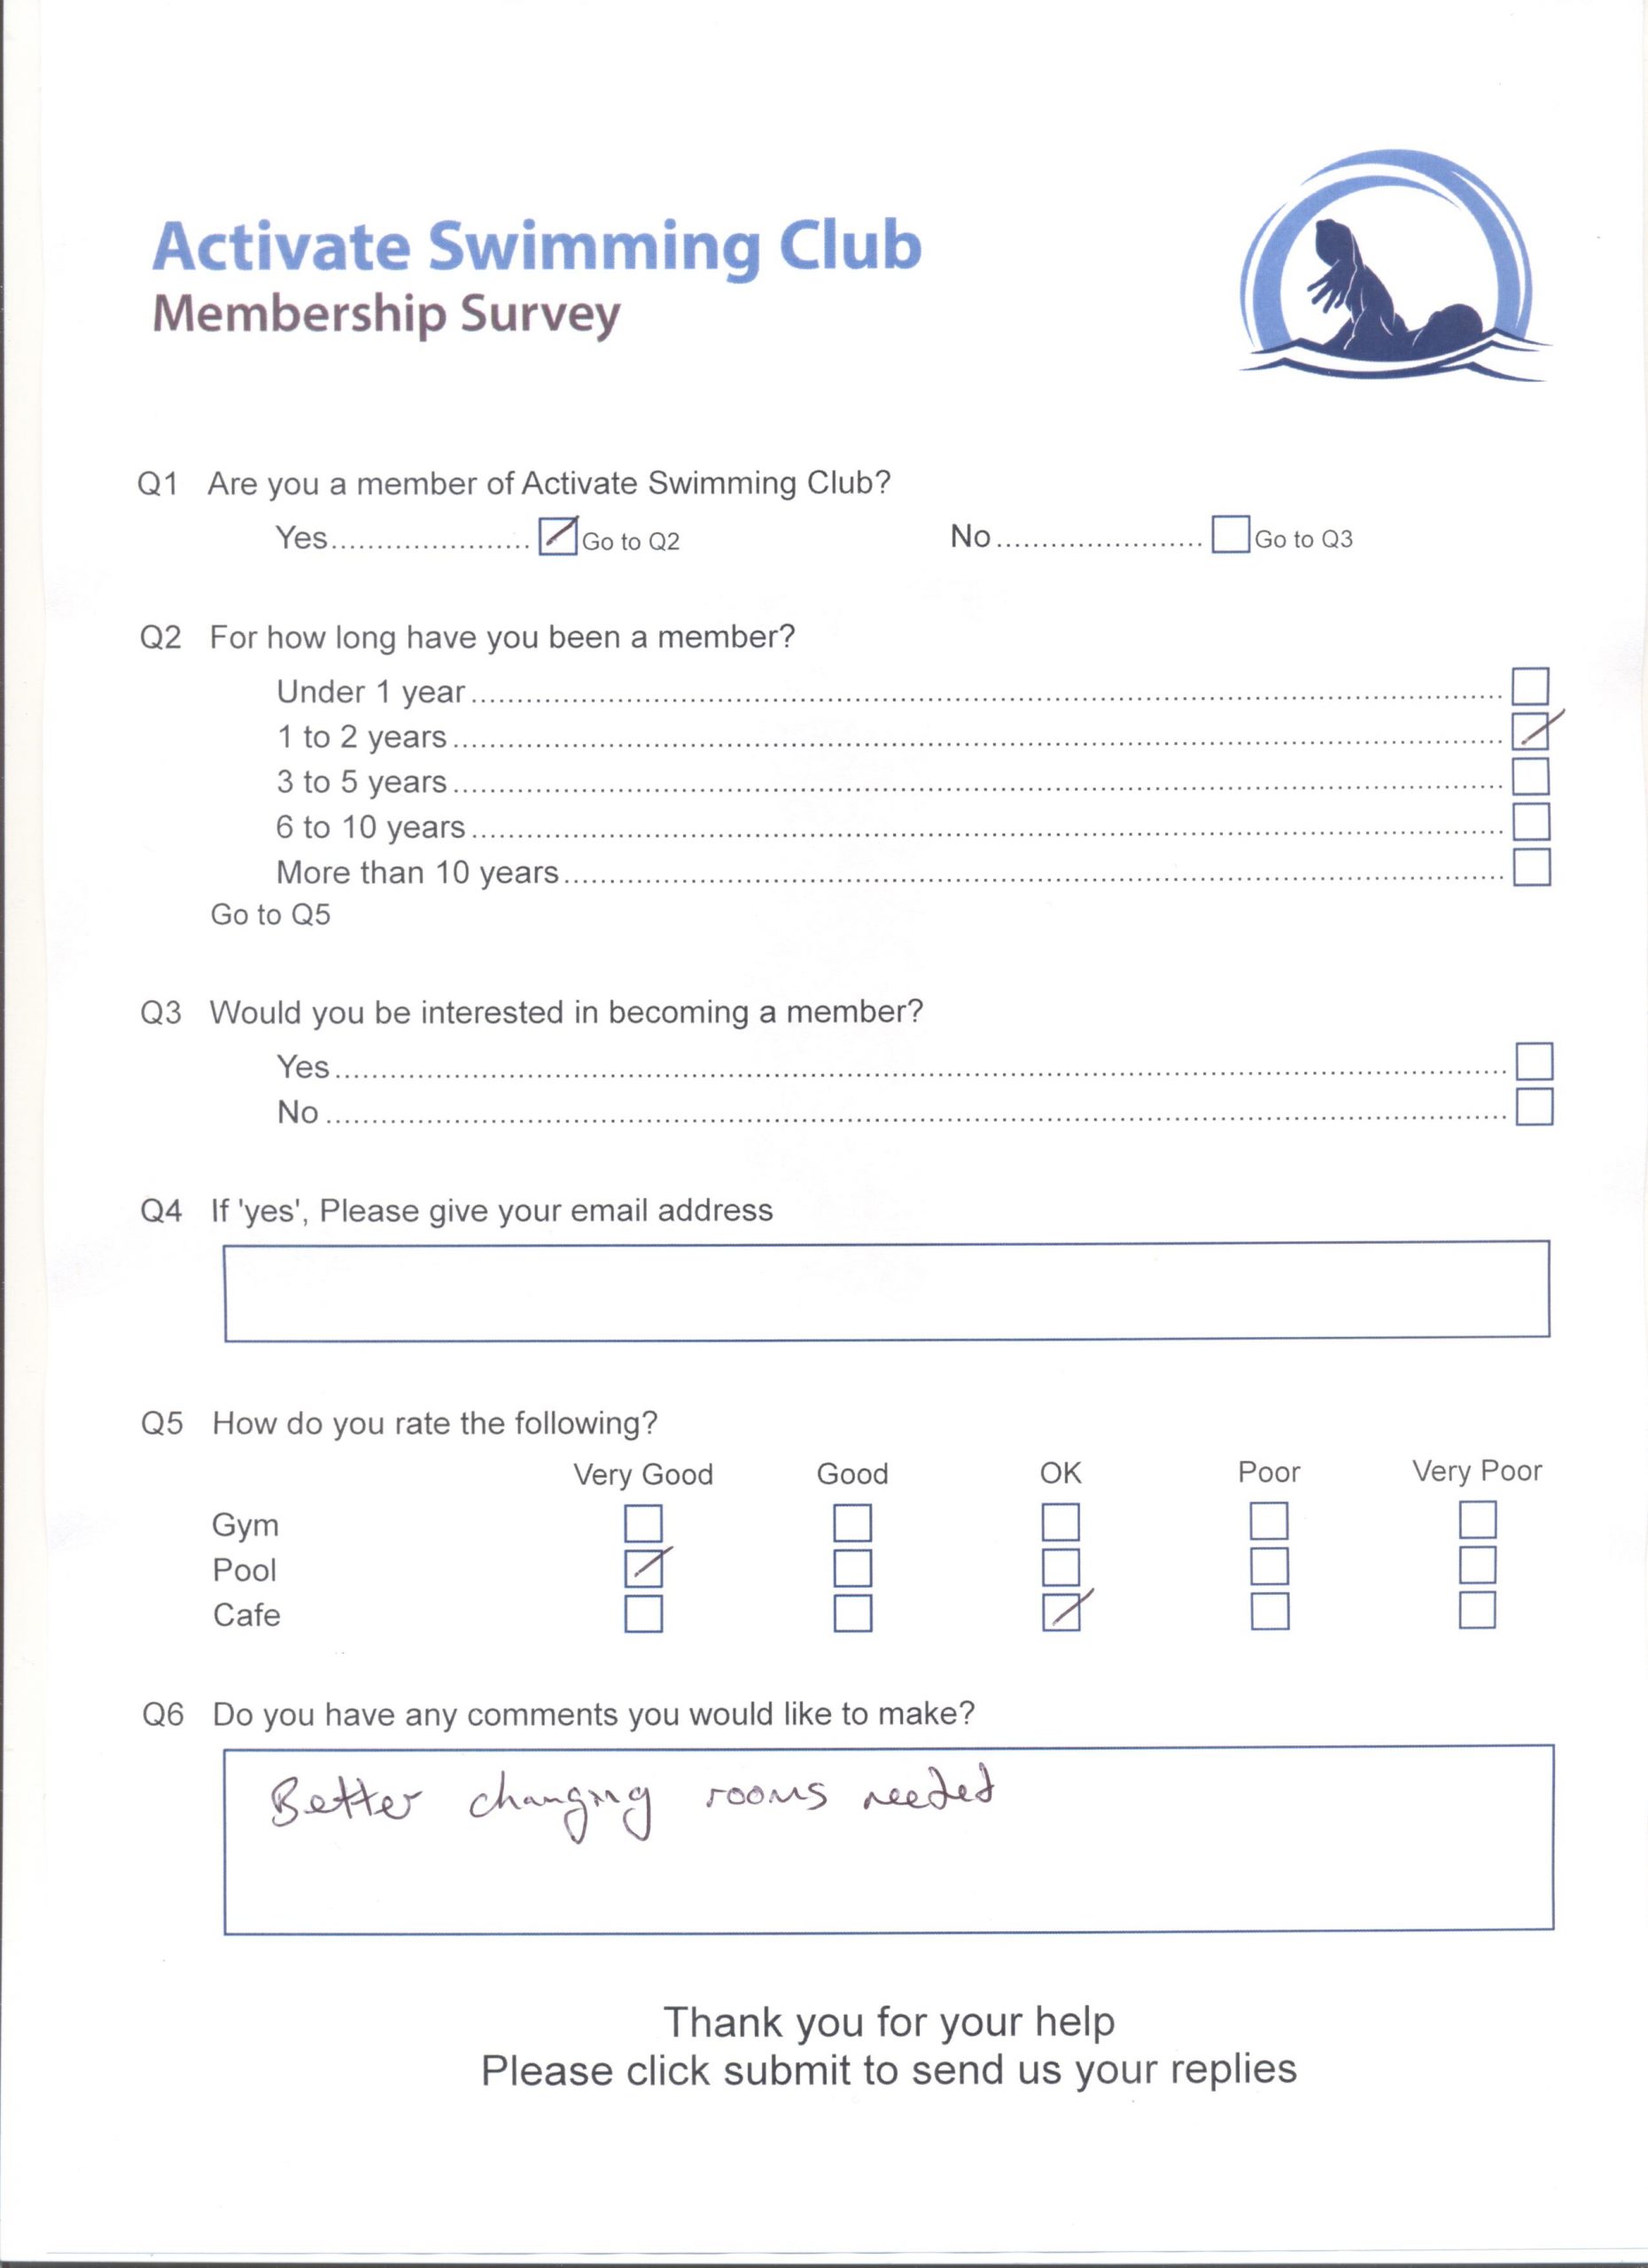
. - The responses from the image below are used as test data, click the image to open it in a new browser tab for printing. Close the new window to return to this worksheet.
Note: Snap XMP Desktop automatically routes from one question to the next, based on the Routing rules set for each variable. No Reply is the default value when no code is selected. Note type variables will be ignored unless set otherwise in Tailor-Data Entry.
-
Click
 Test Case to create a new test case. This will start at ID.interviewer
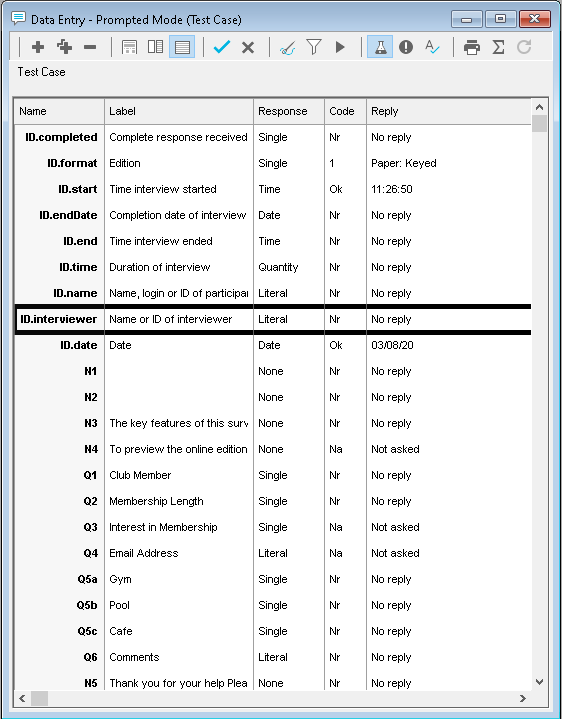
- Follow the steps below to enter the test case data. As you progress through the questions press F5 or double click to open and close the answer options for a question.
- Press Enter
- Press Enter – today’s date is defaulted into ID.date
- The instruction type questions are skipped by default
- Type 1
- Press Enter
- Type 2
- Press Enter
- Press Enter
- Type 1
- Press Enter
- Type 3
- Press Enter
- Type Better changing rooms needed
- Press Enter
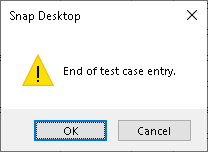
- Click OK
Step 2: Change the settings to speed up data entry
When a question is set to a single response you can change the settings in Data Entry so that you don’t have to press enter to move to the next question.
-
In the Data Entry toolbar click on the Tailor icon

- Change Answer Questions from Individually to Continuously
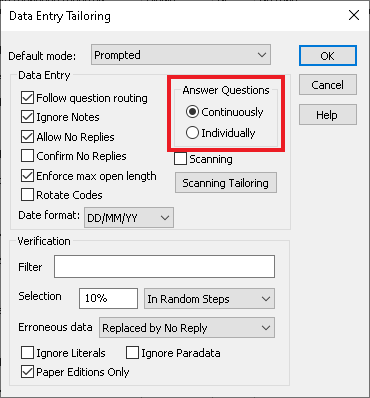
- Click OK
Step 3: Enter a live case
-
In the Data Entry toolbar click
 to create a new case

- Enter the same data as you did for the test case by following these steps. The date and time paradata, such as ID.start, is automatically completed from the system date and time.
- Press Enter
- Press Enter
- Press Enter
- Press Enter
- Press Enter
- Press Enter
- Press Enter
- Press Enter
- Press Enter – today’s date is defaulted into ID.date
- Type 1
- Type 2
- Press Enter
- Type 1
- Type 3
- Type Better changing rooms needed
- Press Enter
- At the end of the case an options dialog window opens.
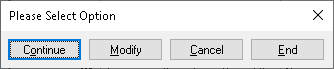
- Select the option required
- Continue saves the current case and move straight on to the next one.
- Modify allows the current case to be edited.
- Cancel deletes the current case (delete it).
- End saves the current case and not move on to another new one.
- When you have completed your cases press End to save.
-
Click
 to Spell check the literal response data
- Data can be verified by being re-inputted, this is optional.
If there is a topic you would like a worksheet on, email to snapideas@snapsurveys.com