Capture audio responses to survey questions using Interviewer
Recording accurate and reliable answers to open questions when surveying face-to-face can be difficult; interviewers may summarise an answer to make the task more manageable, or participants may self-censor answers if they see the interviewer is having difficulty keeping up.
With the ability to record the respondents answer as it is provided, you can easily capture rich qualitative data – expressed in the participants’ own words – with up to one hour recording time per question.
This worksheet describes how to:
- Configure an open-ended question to record audio
- Use Interviewer to record participant answers
- Download audio files
This worksheet contains some notes on privacy considerations at the end.
Please note: This feature is available for Interviewer surveys running on iOS and Android devices only.
Step 1: Configure an open-ended question to record audio
To record an audio response you will first need to set up a survey designed for the Interviewer app that includes an open-ended question. This question can then be configured using a Data Picker to accept an audio response.
- Open the survey in Snap XMP Desktop
-
Create an open-ended style question (Click
 on the toolbar to add a question and use the drop-down list to set its style.).
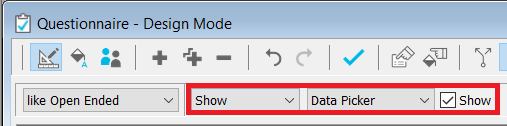
- Set the second drop-down on the toolbar to Show and change the third drop-down to Data Picker and tick the Show box.
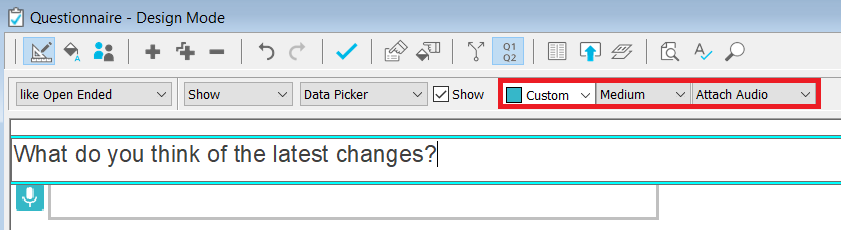
- Select Attach Audio. You can also set the colour and size of the mic button which launches the recorder.
- Publish and upload the survey to your Snap XMP Online account.
Step 2: Use Interviewer to record respondents’ answers
Start the survey and assign it to your interviewer account. Login to the Interviewer app and click on the survey to start it. When viewing the survey, the mic symbol indicates that the respondent can give an audio response.
- Click the mic button
 to record audio responses
 - The player will open.
- Click
 to record
 - Click
 to stop recording
 - Click
 to keep the recording
 - Click
 to delete the recording
- Click
- Submit the survey response and sync the application to send the response to your Snap XMP Online account.
Step 3: Download audio files
When surveys and data have been synchronised with Snap XMP Online, the summary tab will indicate that survey responses and attachments are available to download. MPEG Audio files are downloaded separately from the survey data. They can be played using an appropriate media player.
- Login to your Snap XMP Online account.
- Click on the survey to open it.
- Select the Collect tab.
- Click on the Responses option from the left-hand pane.
- Then select the Attachments option.
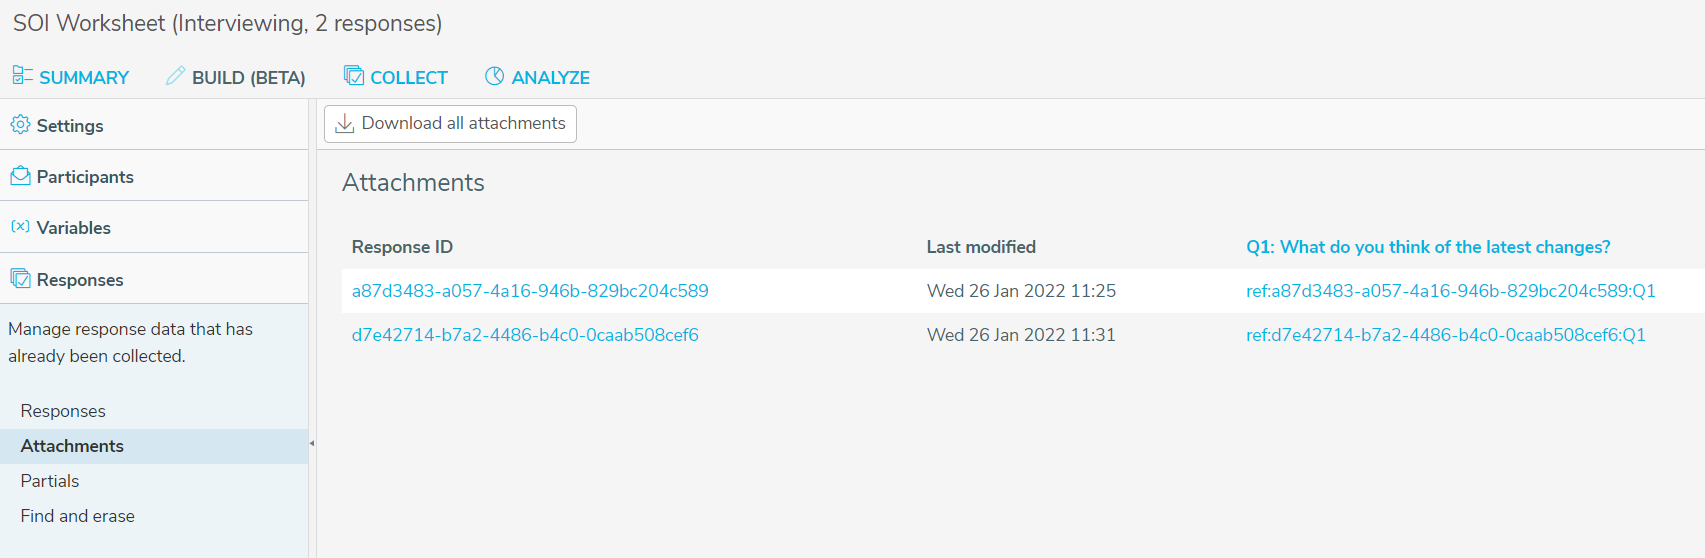
- Here you will see all the attachments that have been synced to the survey in Snap XMP Online. Each attachment is recorded against a unique ‘Response ID’ which is a unique code assigned to each respondent that completes the survey, in the ID.case paradata variable. Each attachment also has a unique reference number, for each attachment question you have within the survey, this enables you to pair the attachment to the original respondent’s data. In the example above, the attachment question is Q1 in the survey, if I create a List Analysis of Q1 I can see the reference numbers, and match the recording to the respondent data.
- You can download an individual recording by clicking on the link displayed under the question. Or you can download all attachments for a single respondent by clicking on their Response ID. Alternatively you can download all attachments by clicking on the Download all attachments button.
Recording consent for data protection
As well as providing your participants with the privacy information that you would provide for any other survey, you should ensure that your participants are aware that their responses to a particular question are being recorded, and that you have a basis for recording their response, such as their consent.
Example consent question
For example, you can create a Multi Choice style consent question:
-
Open your survey in the Questionnaire Window and Design Mode
 .
.
- Click into the first title or question field at the top of your questionnaire.
-
Click
 to create a new question.
- Select the drop-down list on the toolbar where it says Single Choice and change it to Multi Choice. The shape of the response boxes changes from a radio button to a square.
- Click on the field below and Press [Ctrl] + [Shift] + [B] to insert a page break above your new question (alternatively click the right–hand button on the mouse and select Break and Page Break.
- In the area marked Click here for text enter your consent request text.

You should either specify up front which questions are being recorded or, if you ask for consent to ‘some’ questions being recorded let the participant know when responses are being recorded as you ask the relevant question.
Where you enable the Attach Audio feature , a mic symbol indicates that the respondent can give an audio response.

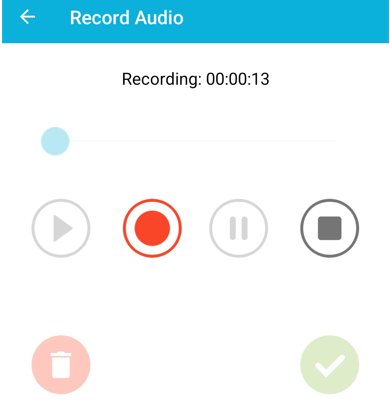
If the mic symbol is pressed, a recording player opens. If the Record button
![]() is then pressed it will flash to indicate recording is in progress. At the same time a recording timer at the top of the screen will commence to also signal recording is in progress.
is then pressed it will flash to indicate recording is in progress. At the same time a recording timer at the top of the screen will commence to also signal recording is in progress.
This feature works best in surveys in the field where an individual interviewer is interacting with the participant, as opposed to kiosk surveys. If the feature is enabled for a kiosk survey you would need to make it very clear to participants that their audio is being recorded.