Inbox set up when using OAUTH and Microsoft Office 365
Setting up a Snap Online Inbox to access Office 365 email data requires authentication using OAUTH. This involves several steps in your Azure portal, on the Snap XMP Online server and in the Snap XMP Online admin user interface.
Step 1: Set up in Azure portal
The following links may help with registering an app:
https://learn.microsoft.com/en-us/azure/active-directory/develop/quickstart-register-app and
Registering the app
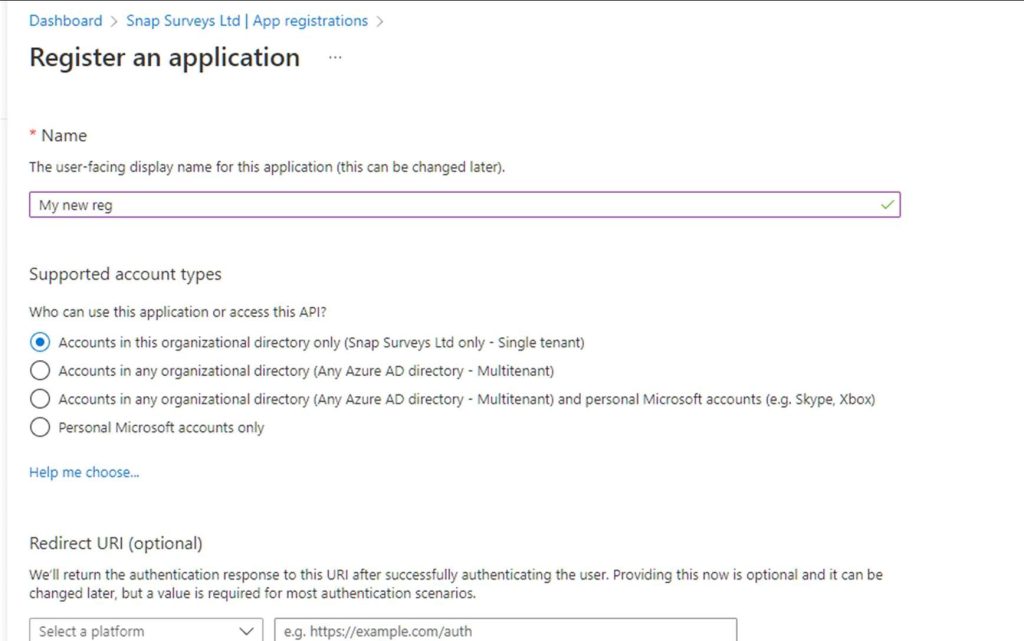
In Azure AD click the App registrations link and then click the New registration link at the top left of the main pane. Give it a name and click the Register button.
You should now see an entry in your registrations list.
From the left-hand size menu click on the Certificates and Secrets link.
To generate a certificate, you need to run a Power Shell script, like this example.
| Certificate creation script |
Run this script as an administrator |
Note: You will need to change the $dnsName variable, check the $folderPath exists on the system where you want to run the script, and maybe consider changing the $fileName to something meaningful.
Set the $password variable to a password you will remember as you will need this when installing in the SOL server.
This generates a PFX file and a CER file.
Upload the CER file
In the Azure AD portal select the certificates tab and click the Upload certificate button and upload the CER file. On loading, the thumbprint will be displayed in the UI.
Setting the app permissions
Next you need to set the permissions for the app.
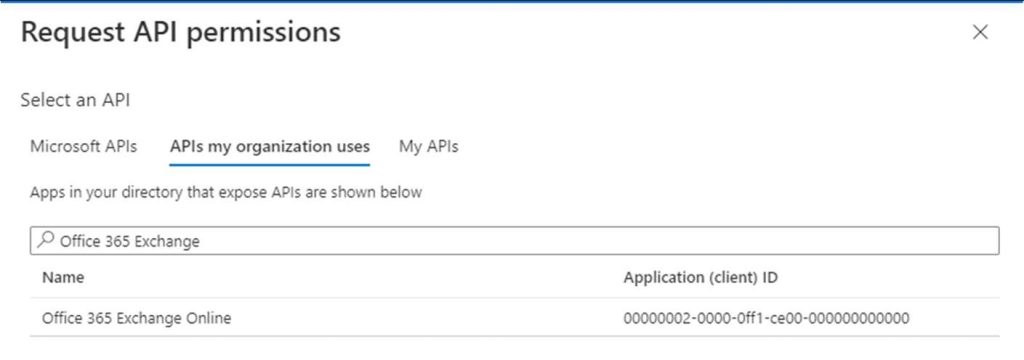
On the left hand side choose API Permissions. Click Add a Permission and select APIs my organization uses. Type in ‘Office 365 Exchange’ in the “Start typing an API name or Application ID” field.
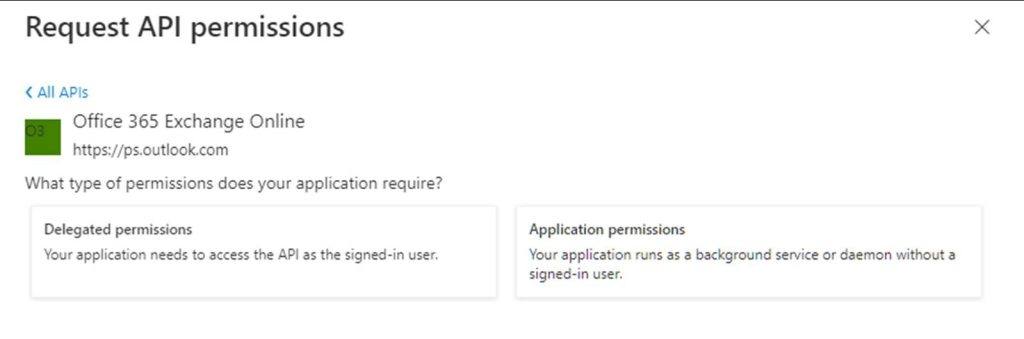
Click on the Office 365 Exchange Online to select it and then choose Application Permissions.
Under Application permissions find IMAP and POP3 and Mail.Read
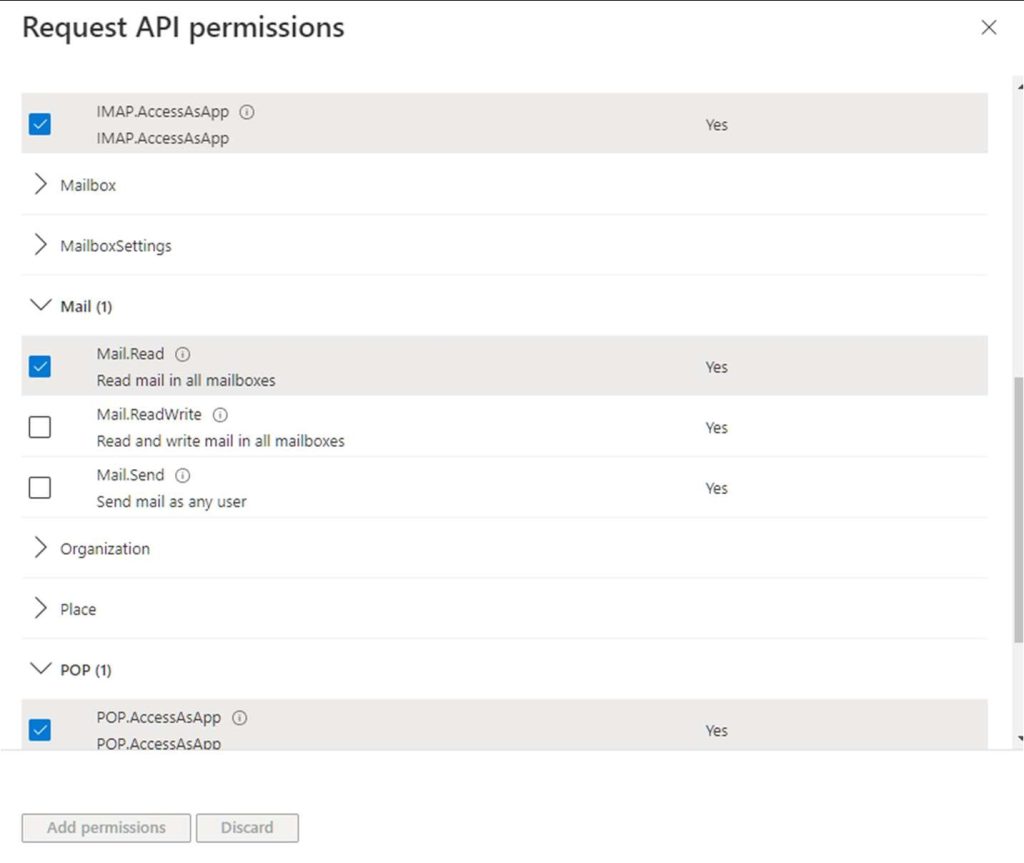
When the permissions are added you should see the following:
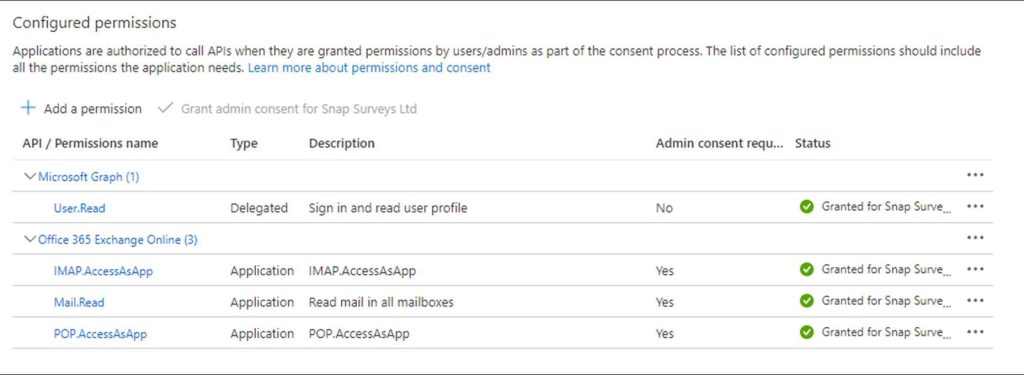
If the status does not show as live, an Azure AD admin needs to approve the permissions.
Link the Exchange app to the Snap Online mailbox
In order for Snap Online to process the emails, you need to link the Snap Online mailbox user with the application registration.
The following Powershell commands need to be run by an Azure AD admin (The Microsoft.Graph Powershell SDK module may need to be installed/imported before these can be run). This script can be run from a Cloud Shell.
$TenantId = "" #Azure Tenant ID (GUID)
$AppName = "" #App name as created
$Mailbox = "" #Identity of mailbox to be used by Snap Online

#install-module microsoft.graph.applications
#import-module microsoft.graph.applications

Connect-MgGraph -TenantId $TenantId
$AppSP = Get-MgServicePrincipal -All | ? {$_.displayname -eq $AppName}
Connect-ExchangeOnline
New-ServicePrincipal -AppId $AppSP.AppId -ObjectId $AppSP.Id -DisplayName $AppName"SP" Add-MailboxPermission -Identity $Mailbox -User $AppSP.Id -AccessRights FullAccess
Step 2: Installing the certificate on the Snap Online server
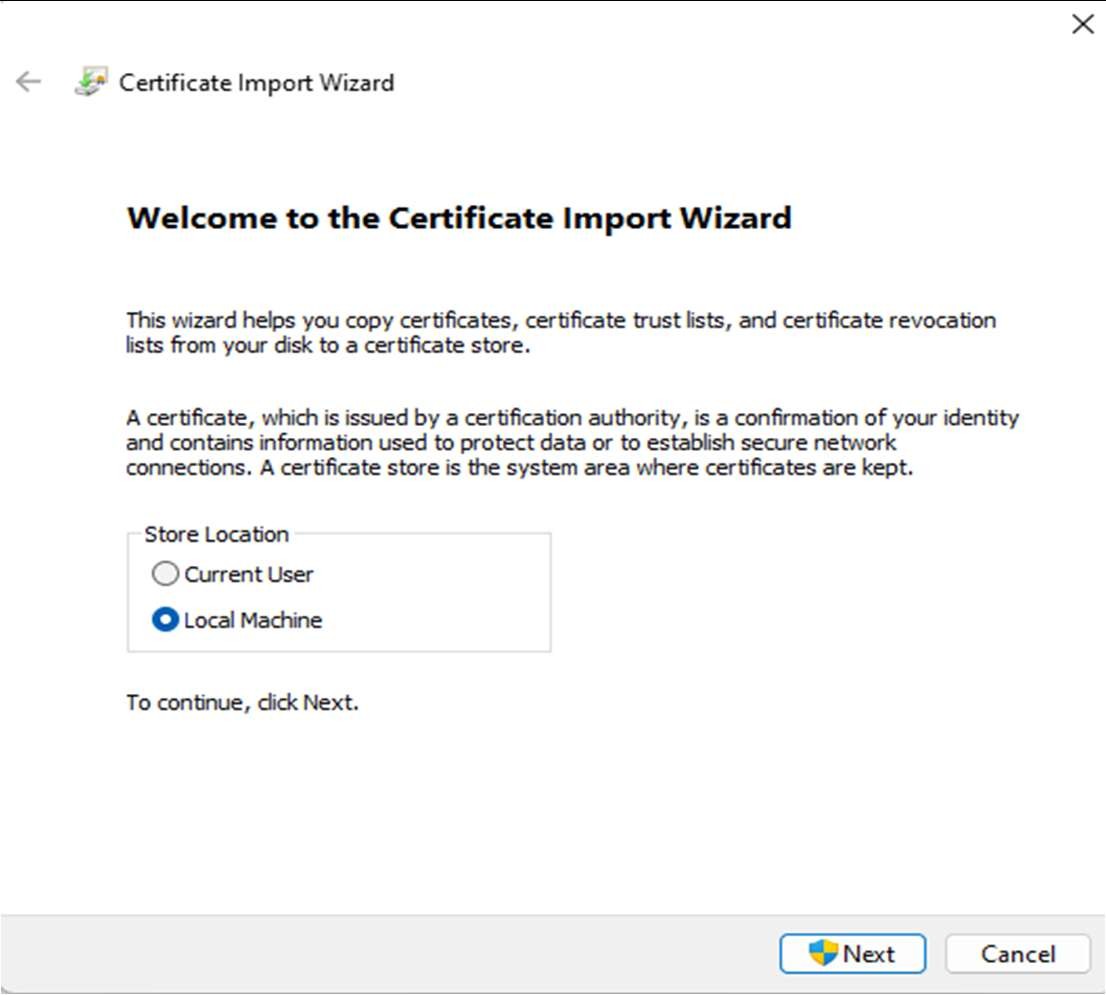
You will need to install the .PFX file on the Snap Online server.
Install the pfx
Copy the pfx file to the Snap Online server.
Open the file with the Certificate Import Wizard.
Select “Local Machine” and then click Next.
If the file name is not there, browse to it and click Next.
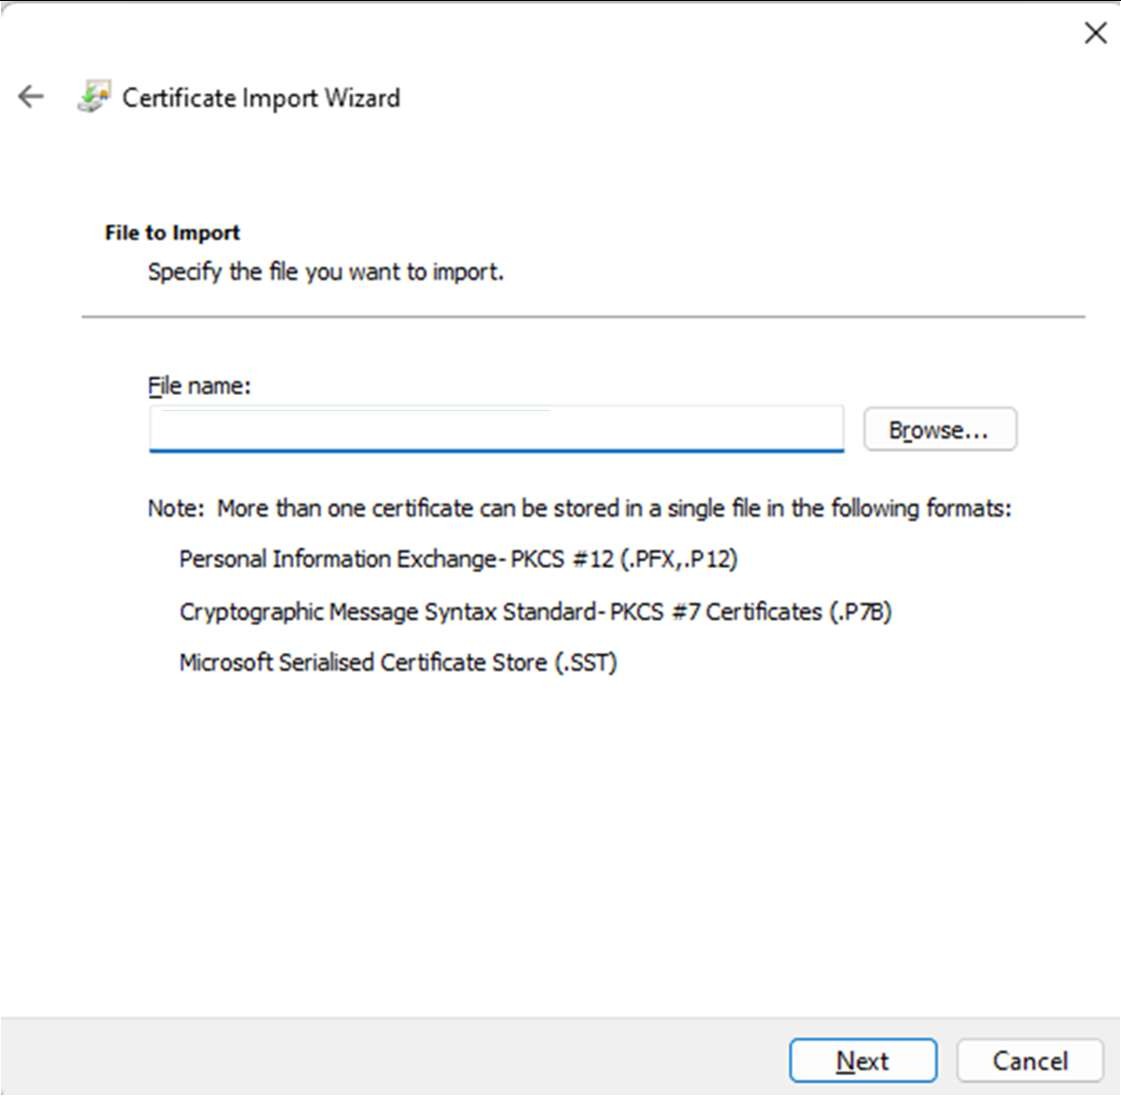
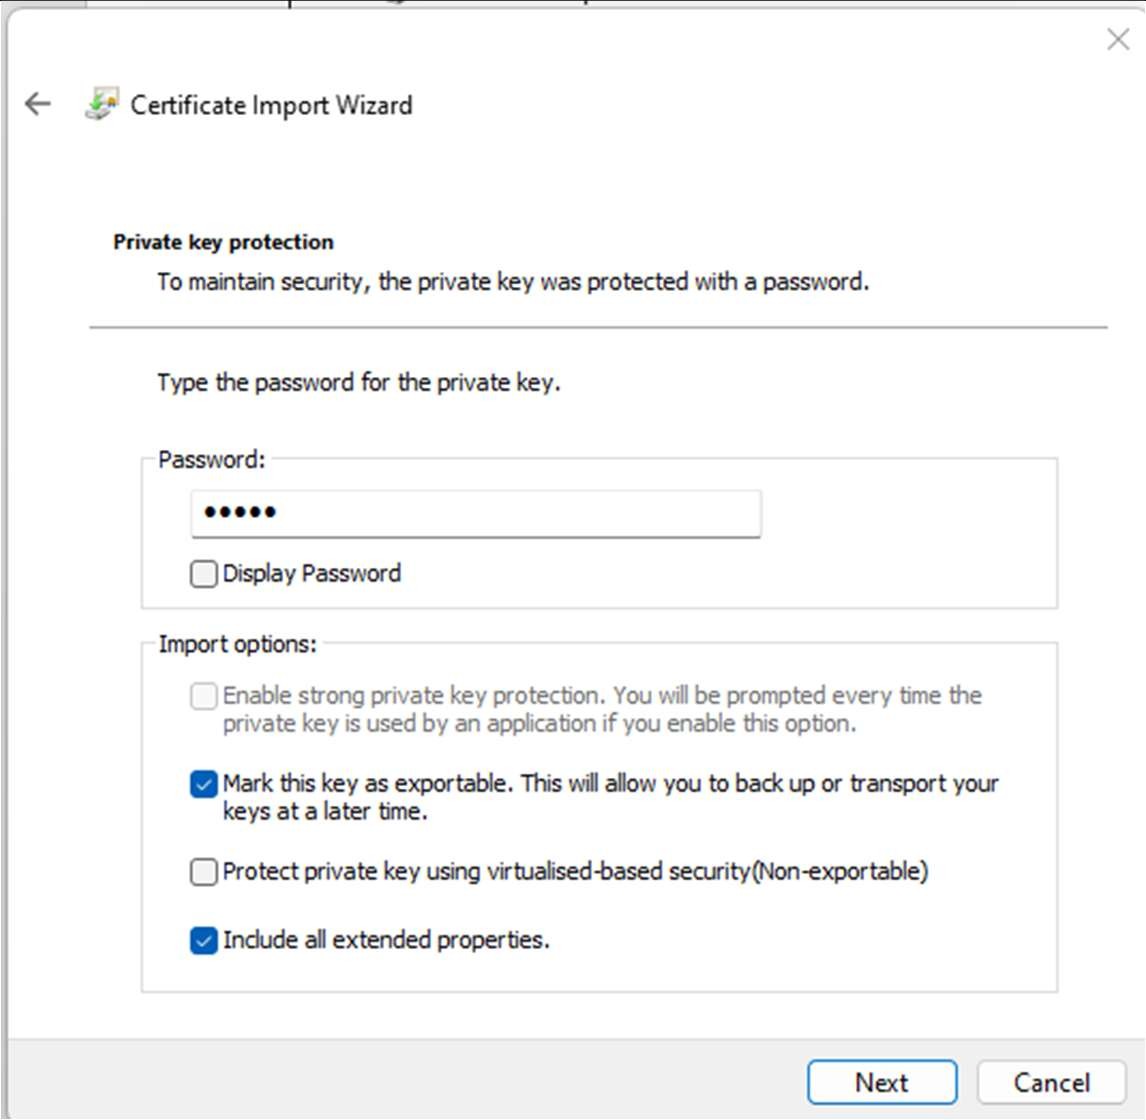
Enter the password, set in your Power Shell script earlier, and make sure that you select the check box for “Mark this key as exportable…”.
Click Next.
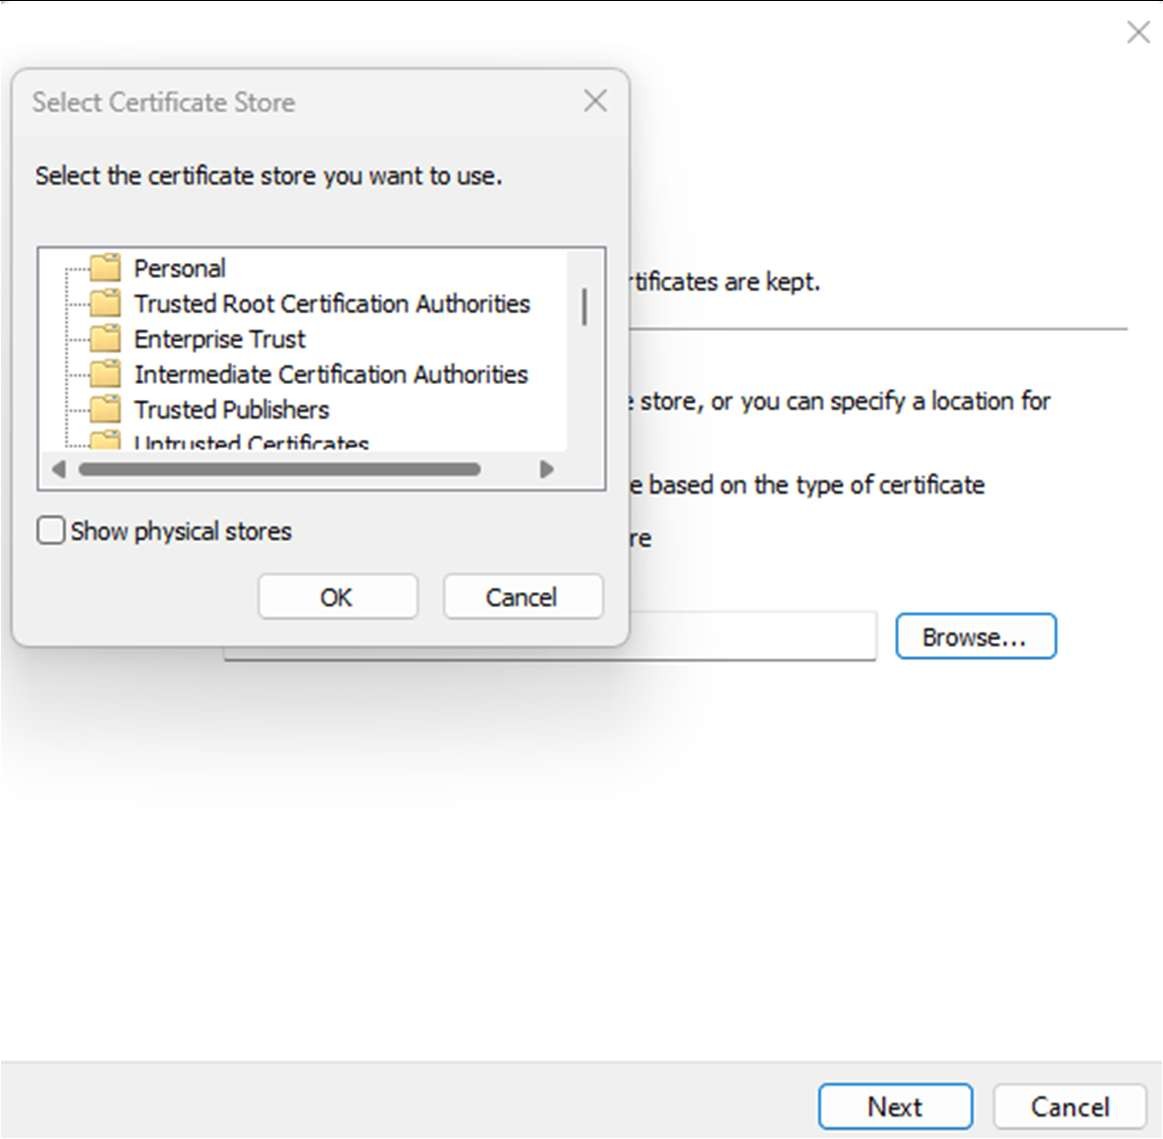
Change the radio button to “Place all certificates in the following store” and click Browse. Select the “Personal” store and click OK.
Click Finish to complete the import.
The Certificate snap in should now be loaded.
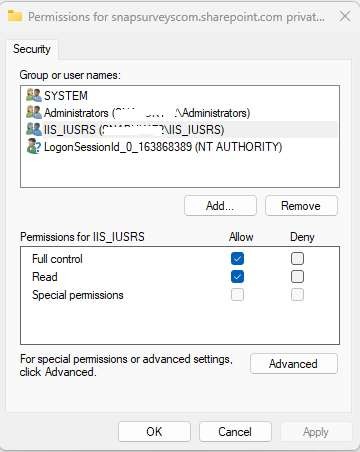
Right click on the certificate you are using for OAuth and choose “All Tasks -> Manage Private Keys…”.
If you don’t see an entry for the IIS_IUSRS group then click the “Add..” button to find it in your Active Directory and add.
You need to give this group “Full control”.
Step 3: Snap Online Admin configuration
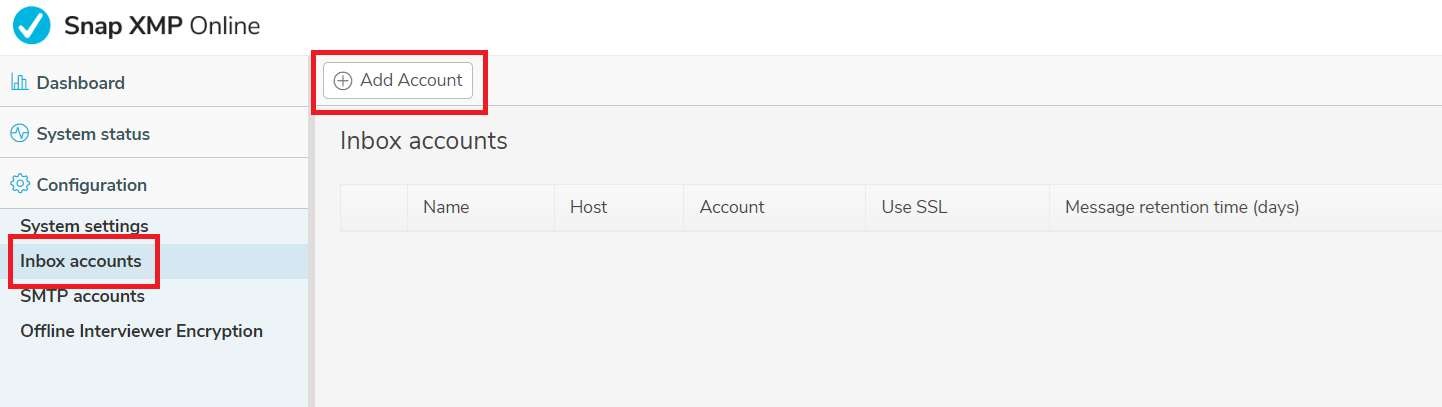
Log in as a Sysadmin account and select Configuration | Inbox accounts. Select the Add account option:
Fill in the relevant fields and select the ‘Use OAuth’ option and the following fields will become available to fill in:
Authority Url
The url of the server that returns the token to the client. For Office 365 mailboxes this is always https://login.microsoftonline.com
Tenant id
The unique identifier for your organisation within Azure AD.
OAuth Scopes
For Office 365 set to: https://outlook.office365.com/.default
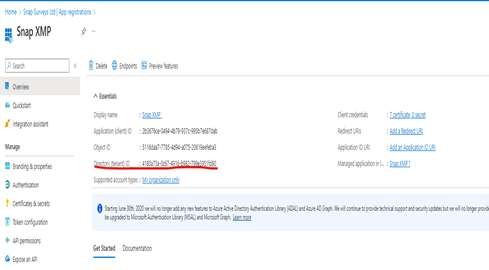
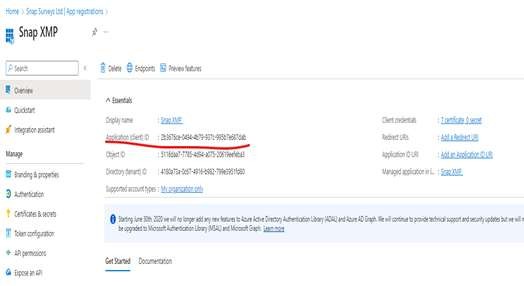
Client id for OAuth
When you create a new app registration, Azure AD will allocate a GUID which is the client id. In Azure AD find your app registration settings and click ‘Overview’. The GUID can be found in the section ‘Essentials’ – ‘Application (client id)’.
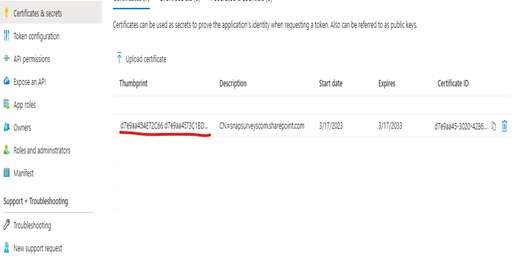
OAuth Certificate thumbprint
Within the application in Azure AD, select ‘Manage’, and then select the link for ‘Certificates and Secrets’. In the main content page, select the tab ‘Certificates’. Your certificate should be listed with the thumbprint in the first column. If you do not have a certificate then you need to create one.