Setting the dashboard layout

The layout of the dashboard is customisable, allowing you to display grid lines, change the number of grid columns and widget padding.
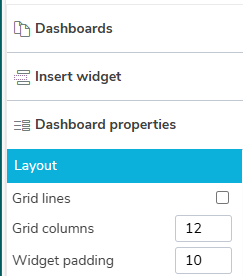
Display grid lines
Grid lines help you to align the widgets that make up the dashboard. These can be turned on or off in the Edit view. They are not shown in the preview or live dashboards.
- Open the survey and click on the Dashboard link in the Summary tab.
- Click on the dashboard that you want to edit.
- Click on the Dashboard properties menu.
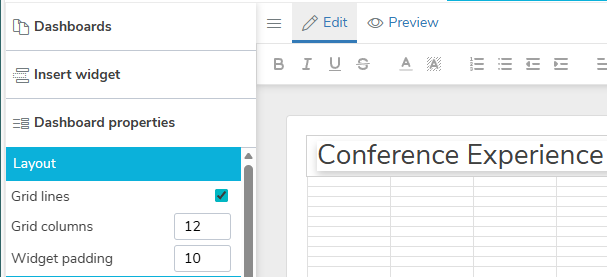
- Select Grid lines to display the grid layout for the selected number of grid columns.
Number of grid columns
When you add a widget, such as a table or chart, the layout snaps to a grid. This lets you easily align the items in the dashboard.
The number of grid columns range from 1 to 12. This determines the maximum number of items you can have in one row. The default is the maximum number, 12.
When the number of grid columns is set to 1, each item added will be the full width of the survey page.

With a higher number of columns, there are more choices of size and quantity of items across the page. For example, if the number of gird columns is 12, you may have 3 charts that are 4 columns wide or 2 charts that are 6 columns wide, etc.


Set the number of grid columns
- Open the survey and click on the Dashboard link in the Summary tab.
- Click on the dashboard that you want to edit.
- Click on the Dashboard properties menu.
- In Grid columns, enter the number of grid columns required, between 1 and 12.
Widget padding
The widget padding sets the margins between the edge of the widget and the display area of the item. The padding applies to tables, charts, tab headings and text.
The padding range is between 0 and 20 and applies to all items in the dashboard. The default padding widget is 10.
Set the Widget padding
- Open the survey and click on the Dashboard link in the Summary tab.
- Click on the dashboard that you want to edit.
- Click on the Dashboard properties menu.
- In Widget padding, enter the padding required, between 0 and 20.