Using scanning validation patterns
Patterns define the sequence of characters that are expected in the answer to an open response variable. This includes: general patterns such as date, telephone number and currency, and organisation specific patterns such as employee numbers or invoice references. Snap XMP Desktop has a range of pre-defined system patterns that can be used to validate scanned responses. You can also create patterns specific to your organisation’s requirements.
There are two types of scanning validation:
- Spelling validation checks a response against a stored dictionary of words, and tries to match responses to words in the dictionary.
- Pattern validation attempts to match a response against the expected pattern of characters. This is often used to validate responses such as dates, telephone number and zip or post codes.
There are different versions of spelling and pattern validation for handwritten and printed characters.
Scanning validation options
Scanning Validation | Application |
None | The default setting. The scanning module attempts to identify the character or digit within the answer box. If the data cannot be interpreted, the data is left as unrecognised. |
Pattern | A handwritten answer is expected that has a pattern applied to it. The pattern used will be the selected Source Pattern. |
Spelling | The scanning module attempts to match the handwritten word scanned in from the questionnaire with a word found within the installed dictionary. |
Keyed | The scanning module does not attempt to detect the responses and will prompt you to enter the replies by hand during the keying/cleaning stage. |
Printed | The scanning module scans the data as a printed entry but does not use any of the pattern or spelling hints to improve its interpretation. |
Printed Pattern | A printed answer is expected, such as a name or address pre-printed on to the questionnaire which adheres to the pattern specified in Source Pattern. |
Printed Spelling | The scanning module attempts to match the printed word scanned in from the questionnaire with a word found within the dictionary |
This tutorial shows how to set the scanning validation pattern for a question and provides instructions on creating your own validation pattern.
Apply a system pattern for scanning validation
- Open the questionnaire in the Questionnaire window.
- Select the question and click Variable Properties. This opens the Variable Properties dialog.
- In the Scanning Validation property select Pattern. This is the pattern for handwritten response.
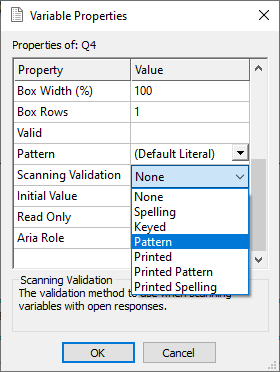
- In Pattern, select the required pattern from the list of available patterns. The patterns in the list will include system patterns as well as your organisation’s patterns that are valid for the variable’s response type.
Alternatively, you can also set up the scanning validation and pattern using the Variable Details window, which is opened from the Variables window.
Set up your own validation pattern
This section shows how to create a simple validation pattern. The example is a pattern for an ID of two letters followed by five digits.
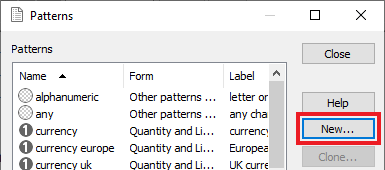
- Select View | Patterns to open the Patterns dialog. (Prior to build 12.10 this was on the Tailor menu.)
- Select New in the Patterns dialog to display the Pattern Properties dialog.
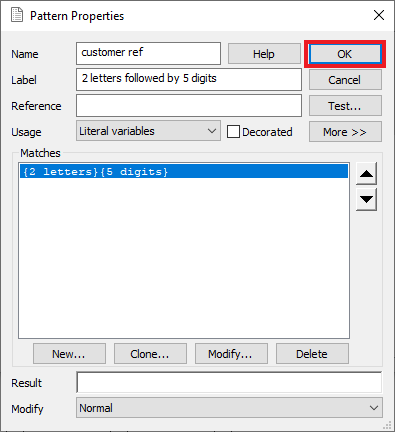
- Choose a name for the pattern and type it in to the Name box.
- Enter a Label giving more information. This will be displayed when the pattern is shown in the Patterns dialog.
- Select the response type that the pattern will be used with from the Usage drop-down list.
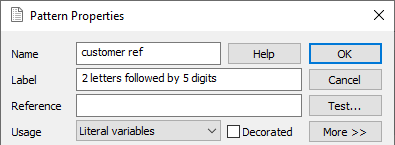
- In the Matches section, select New to create a match. This opens the Match Pattern dialog.
- In this pattern there are two letters followed by five digits. In Global Patterns, double click the pattern ‘letter’. This adds the pattern to the Match.
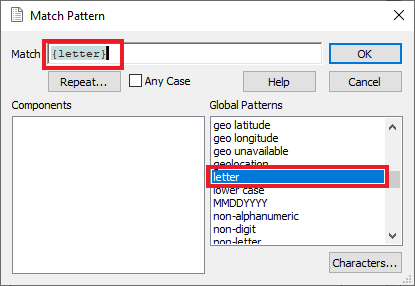
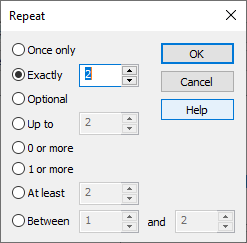
- Click Repeat then select Exactly and click OK. The default number is 2.
- In Global Patterns, double click digit to add the digits to the Match.
- Click Repeat then select Exactly and change the number to 5. Click OK.
- Click OK to save the Match and return to the Pattern Properties dialog.
- Click OK to save the pattern. This pattern can be used in scanning validation.
Further Information
You can find more details on the system patterns and creating your own patterns in Introduction to patterns.
You can find more information on scanning validation in Checking the scanning design recommendations.
If there is a topic you would like a tutorial on, email to snapideas@snapsurveys.com