Scanning a questionnaire created outside Snap XMP
Snap XMP Desktop has the facility to scan in a suitable questionnaire created in software other than Snap XMP. To ensure the questionnaire’s design is suitable for scanning, the following guidelines include the special requirements that are necessary to ensure the smooth and accurate scanning of the forms.
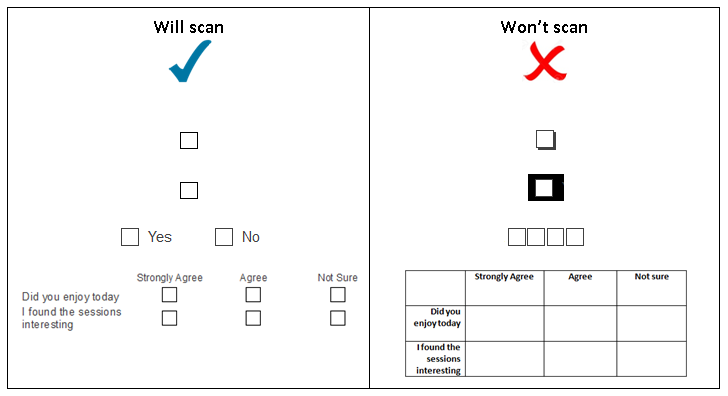
Questionnaire design recommendations
Box shapes | Square or rectangular boxes including those for open ended questions |
Box shading | Flat boxes without shadows |
Box colouring | The area within a surrounding code box must be white or a very pale shade. |
Spacing between and around boxes | A minimum of 0.05″ margin between code leaders and code boxes, a minimum of 0.05″ margin between code boxes and code values and a minimum of 0.05″ vertical margin between code boxes and texts or other code boxes |
Creating the survey
The survey variables need to be set up before the scanning definition process is started. The layout of a questionnaire does not have to match that of the original questionnaire. You do not have to set up variables for every question as there may be some questions, which you do not wish to analyse.
- From the Survey Overview
 window, click Online Surveys
  to show the online surveys.
 - Click
 to create a new online survey.
 - Choose the Scanning survey template, which is supplied with Snap, as a starting point for the new scanning survey and click Next.
- In the New Online Survey dialog, enter a name for the survey and select the location of the survey. Click OK. This creates the new survey.
- You can now enter the questions in the Questionnaire window. There is no need to enter a Title or Sub Title, just select the appropriate question style for each of the questions from the external questionnaire.
- Set your Response types and add any Routing if required. There is no need to customise.
Further details of creating a scanning survey can be found at Setting up the online survey framework for scanning and Designing your scanning questionnaire.
Matching a scanned questionnaire to variables in Snap
The Define external questionnaire process allows you to match questions and codes on a paper questionnaire with appropriate variables in the survey. All code boxes that are to be scanned must be defined using the Define external questionnaire process. Using Define external questionnaire locks the questionnaire for scanning.
Note. If you have used Define external questionnaire to specify the location of the boxes you should NOT, under any circumstances, use Calibration, as this will overwrite the definition you have created.
The next step is to scan a blank copy of the questionnaire from a paper copy of an image file.
-
Open the Questionnaire window
 .
.
-
Click on the Define external questionnaire button
 in the Questionnaire window toolbar. This appears at the end of the toolbar for Scanning surveys.

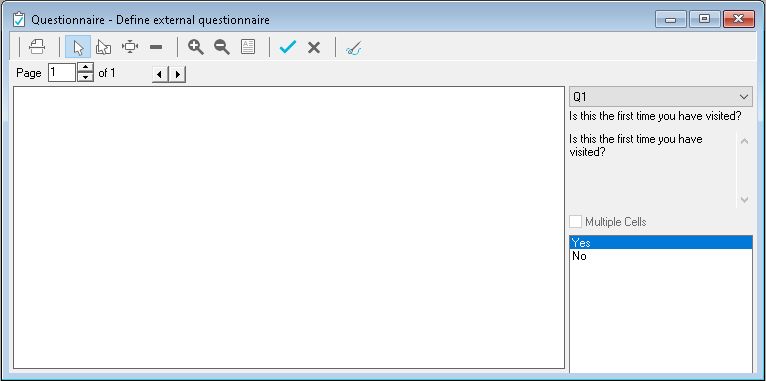
- The Questionnaire window changes to show the Define external questionnaire window with the first variable selected.
-
Click on the Scan button
 . The Acquire window opens.
- Specify the number of sheets for the questionnaire and in which order the sheets will appear; Single Sided, Front then Back or Duplex.
- If you are using a scanner directly attached to the computer, place a blank copy of the questionnaire in the scanner.
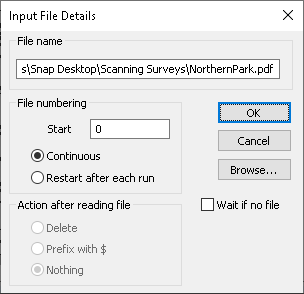
- If you are using an image file, select Read from File then click File Details.
- In the Input File Details dialog enter or browse to the image file. Click OK to save the file details and return to the Acquire dialog.
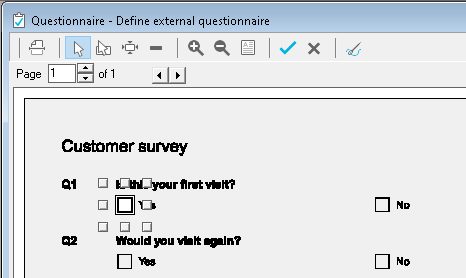
- In the Acquire dialog, click OK. The questionnaire will be scanned and an image of the questionnaire will appear in the definition screen. You now need to define where the box for each question or code is located, to prevent the accidental re-sizing or re-positioning of code-boxes when in the definition screen.
- Zoom In on the first section of the questionnaire, either by clicking on
 or selecting Zoom In from the right-click menu. The mouse arrow becomes a magnifying glass
 .
.
-
If the first box is detected then a field will be created around it otherwise select the Create Field button
 and adjust the field to be larger than the actual area, by dragging to mark the area. The marked area will then appear.
-
To match the box size exactly, click Attach
 .
.
-
If you have accidentally selected the wrong question or code, you can undo the definition by clicking on Delete Field
 .
.
-
To move onto the next question or code, press Enter on your keyboard or click
 .
.
- Repeat this process for each question.
- To see which Code Boxes have been defined select all from the question drop down.
-
To save the definitions you have created click Save
 . To abandon all the definitions you have created select Cancel
 . It is advisable to save your work at regular intervals.
Scanning
- Open the Data Entry window
 and select Interview Mode
  .
. - Click
 for New Case. This will open the Scanning Calibration window, DO NOT CALIBRATE as this will override the manual calibration you have already done.
 - Select Cancel and the Acquire dialog opens.
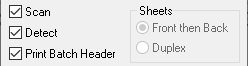
- If you know the number of cases you will be scanning you can specify it here. Ensure Scan and Detect are both ticked.
- Click OK.
- When the scanning and detection process is complete, a message is displayed showing how many sheets have been read and detected.
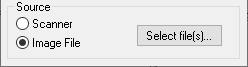
- If you are using a scanner which isn’t connected directly to your PC but on your network, select Image File and then browse to the folder where your PDF/TIFF files are stored.
Once cases are scanned, you will need to clean the data to make sure it has been collected accurately.