Creating a custom login page
When creating a questionnaire that is completed online, participants can be required to log in. Surveys that require a participant to log in have a default login page is shown at the start of the questionnaire where participants enter their log in details to complete the questionnaire. The login details include a unique login ID and optionally, a password. Using Snap XMP Desktop, the login page can be customized to include branding, images and further instructions. The password is not displayed when it is not required.
Prerequisites
Setting up a questionnaire with a login page requires
- A list of participants that must include their unique ID and may include a password and other seeded data. This can be a file or database format.
Step1: Customizing the login page
Surveys that require a participant to log in have a default login page shown as standard, which displays login and password fields. A customised version of the login page can be created to include branding and instructions.
- In Snap XMP Desktop, open the Survey Overview window and open the required online survey.
- In the Questionnaire window, click on Questionnaire Properties.
- In Section, select the Paradata option.
- In System Variables, select Participant then select Display in survey. This adds a question at the start of the questionnaire for the participant to enter their login. Click OK to save the settings.
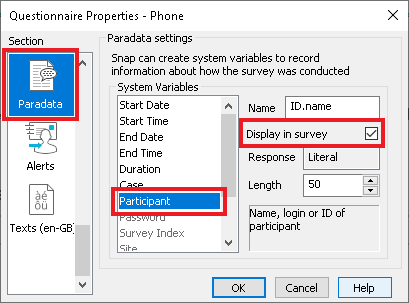
- Using a password to login is optional. To add a password field to the custom login, select Password then select Display in survey. This adds a question for the participant to enter their password. Click OK to save the settings.
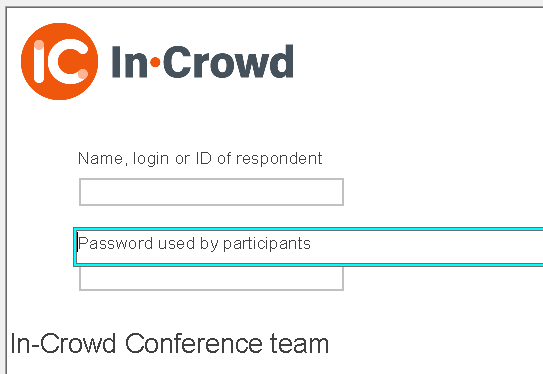
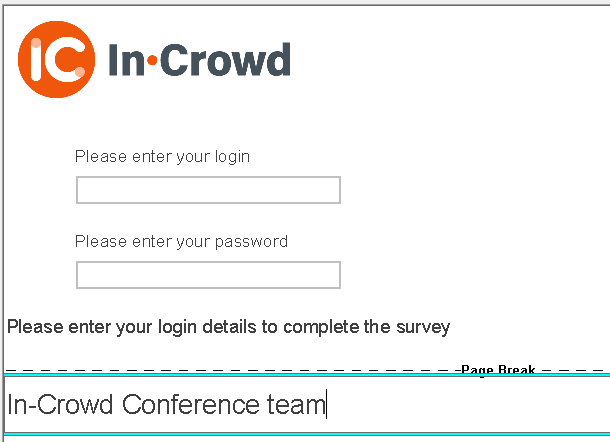
- Select the Participant question and edit the text, as required. Repeat with the Password question if it is used.
- If required, you can hide the question name by selecting the name then selecting Show in the options list and clear the Show checkbox. Repeat this for all the online editions of the questionnaire.

-
Click New Question
 to insert any further instructions or images that are part of the login page.
- Select the first question in the questionnaire then select Break in the options list and select Page Break. This inserts a page break between the login page and the first question. The only questions allowed on the login page are the Participant and Password paradata questions. Repeat the page break for all the online editions of the questionnaire.

- The custom login page is now complete.
Step 2: Publishing the questionnaire
Once you have completed the questionnaire and set up the login page you need to publish the questionnaire. The questionnaire can be published in both Snap XMP Desktop and Snap XMP Online. This worksheet uses Snap XMP Desktop.
-
In the Questionnaire window, click Publish
 to open the publish dialog.
- In Method, select Publish without preview.
- Click Publish to publish the questionnaire.
Further information on publishing in Snap XMP Online can be found at https://www.snapsurveys.com/support-snapxmp/snapxmp/publishing-and-collecting-survey-data/
Step 3: Uploading participants for a logged-in survey
When you have published your questionnaire you need to upload a list of participants from an Excel spreadsheet. The spreadsheet must contain a unique participant login, which may be an email address. In addition, the spreadsheet may contain a password and any data that you wish to seed into the survey. The spreadsheet must contain a data column for each survey variable that you want to seed. These instructions show how to upload the participants in Snap XMP Online.
- Open your survey in Snap XMP Online and from the Summary tab navigate to the Collect section.
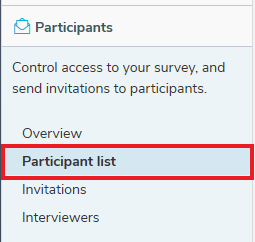
- Select the Participants side menu to view the participants and invitations. The Participants Overview is selected by default.
- Click on the Participant list menu item to view the participants.
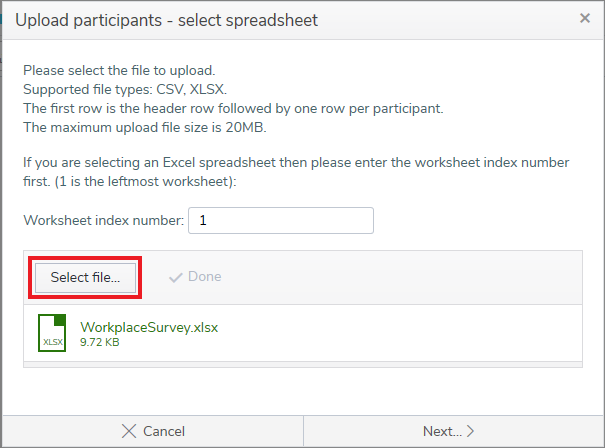
- Click on Upload Participants to open the Upload Participants Wizard.
- On the first page, click Select file to add the file with the participants’ data. The accepted formats are CSV and XLSX. Click Next.
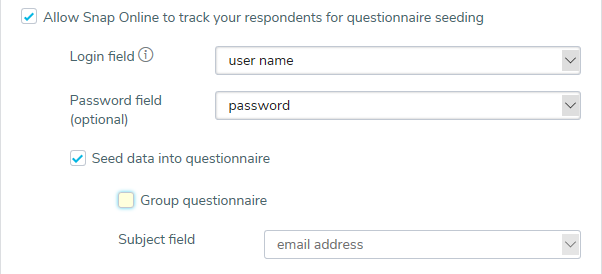
- On the next page, select the survey options for sending email invitations and using logins. In this worksheet, only logins are used.
- To track respondents select Allow Snap Online to track your respondents.
- In Login field, select the spreadsheet column containing the Login for the participants. This field is required and needs to be unique as it is used to track the participant. Snap sets the default as the first column in the spreadsheet.
- If a password is used then in Password, select the spreadsheet column containing the password.
- If you are seeding data, select Seed data into questionnaire to allow any seeded spreadsheet data to default into the questionnaire as the participant is completing it. If you are not seeding data go to instruction number 15.
- Click Next. The next page lets you set up seeding.
- Select a spreadsheet column from the Spreadsheet Column list then select the question to seed from the Snap Variable list
- Click Add which is next to the row. This adds another row below. Repeat for all the columns you need for your questionnaire seeding.
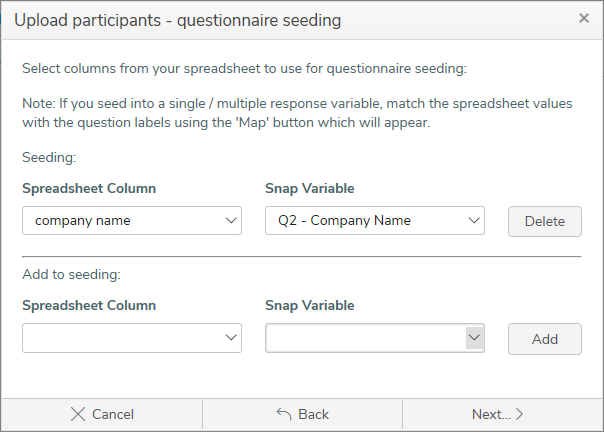
- In Single Choice and Multiple Choice questions you can map values found in Spreadsheet Column to the code labels in Snap Variable. For each Spreadsheet Value select the corresponding Snap Variable Code Label. Click OK when you have finished returning to the wizard.
- Click Next. The overview summarizes the chosen settings for you to review.
- Click Upload to upload the participants to the survey. The results are displayed when the upload is complete.

Step 4: Start Interviewing
You can start the interviewing process manually following publication of your survey. This makes the survey available to your participants.
- Click the Settings section of the Collect tab.
- Click the Start interviewing button to make the survey available to respondents straight away.

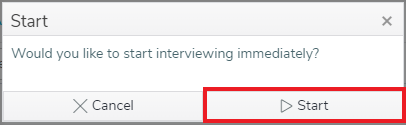
- Click the Start button to confirm that you would like to start interviewing.
- Click the Interview URL to launch an interview. Check that the custom login page is correct. The questionnaire is ready for your participants to log in and complete.
If there is a topic you would like a worksheet on, email to snapideas@snapsurveys.com