Adding notes and questions to your questionnaire
Question styles
In Snap XMP Desktop, you add questions and notes to create your questionnaire. There are a number of pre-defined question types, referred to as question styles. The styles differ in their appearance and type of response. The styles appear different for different outputs, for example, a web questionnaire will look different to a paper questionnaire for scanning, even though the styles have the same names.
There are a large number of different question styles supplied with Snap XMP. They are all available for use in Snap XMP Desktop. We have developed a sample questionnaire that shows the different question styles. You can use this questionnaire to see how the questions behave in a live interview.
Question styles supplied with Snap XMP
Notes
| Style | Description |
|---|---|
| Title | Notes and headings are regularly required in a questionnaire. The title is normally used for the main heading. |
| Sub Title | Other notes are generally required to separate sections in a questionnaire or provide instructions for completion. |
| Instruction | A variation on Title and Sub-title, the instruction style can be used anywhere on the questionnaire as notes for the respondent or the interviewer. |
Questions
| Style | Description |
|---|---|
| Multi Choice | A question with tick or check boxes, where the respondent can either respond with a single answer or a number of answers. This is sometimes known as a “closed” question. |
| Single Choice | A multi-choice question where the respondent can select a single answer |
| Drop down | This displays the options a respondent can select as a drop-down list |
| Map control | This allows you to display the possible options as clickable regions of a picture |
| Slider control | The slider control style allows you to display the possible options as an interactive graphic |
| Grid First | Grid questions are variations on Multi Choice questions, but are laid out in a different format, with headings for each of the boxes presented across the page. |
| Grid Next | In a series of grid questions, the headings across the top are suppressed for all subsequent questions, and just the boxes appear. |
| Open Ended | A question with an answer in the form of free-format text, a number, a date or a time. |
| Open First | To collect series of free format text or numbers in a series, this style provides an initial question heading and then a list of groups, products, services etc. |
| Open Next | The open first questions are continued as Open Next, leaving out the initial question name and question text. |
| Other | Many Multi Choice questions have a list of codes and then an “other please specify”. This style provides free format text as an addition to an existing tick box question. |
| Semantic Scale First | The semantic scale questions are designed to let respondents choose a point on a scale between words with opposite meanings |
| Semantic Scale Next | The semantic scale next allows you to have a grid of semantic scale questions |
Response types
You can set the type of response required from the participant for some of the question styles.
No response
These styles are used to give information. They provide the title, instructions and notes in your questionnaire.
Select a response
People can select one or more pre-defined answers.
Examples can include
- a single question asking what age range the respondent is in
- a grid of questions asking respondents to rate different aspects of a service
These types of questions are also known as coded questions, as the respondent must select one or more question codes as their answer.
They can appear as drop-down lists, lines or grids of response boxes, interactive images or sliders and semantic scales.
Open response
Participants can enter data by writing in a box. The data can be free format text or a number. During a live interview, the data entered can be checked to see if it is in the correct format. You can use or create a pattern to define the expected format, for example, a phone number or zip code. You can specify whether the response is a quantity, a date or time, or free text.
Saving your questionnaire
As you create your questionnaire, make sure that you save your questions and other changes regularly.
- Click Save
 on the Questionnaire window toolbar to save changes to the questionnaire.
Inserting notes in your questionnaire
Notes are questions that provide text information and include
- Title
- Sub Title
- Instruction
You add a note to your questionnaire by inserting text in one of these styles.
Inserting a title or sub-title
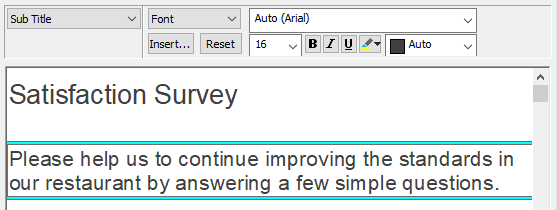
A questionnaire normally starts with a heading together with text to explain its purpose and how it should be completed. As soon as a new questionnaire starts, there are placeholders for a title and then a sub-title.
- In the area marked “Click here for text”, type the name of your survey. The style displayed in the ribbon at the top of the window is pre-set to Title. The default layout and font for the title is black text in Arial font on a white background.
- Press Enter when you have set up your title. This displays a sub-title area automatically. The Sub Title style is on the toolbar.
- Type your sub-title text.
- Press Enter when you have set up your title and sub-title.
The text of the sub-title automatically moves onto the next line as you type. If you want to force a new line as part of the text of the title or sub-title, click on the appropriate location and press Shift and Enter.
Inserting an instruction
An Instruction can appear anywhere in the questionnaire and can be a note to an interviewer or guidelines to a respondent on how to complete the next section of the questionnaire.
- Press Enter to create a new question when you have set up your title and sub-title.
- Change the style to Instruction in the style selection box. This allows you to enter free format text that appears across the entire column of the questionnaire. This is no associated box or line.
- Type your instruction or information text in the box.
Inserting Single Choice questions
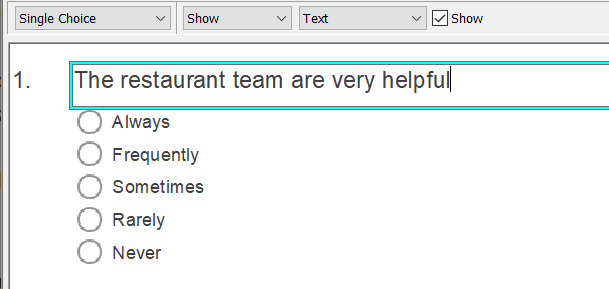
Single Choice questions let the respondent select one response from a list. They are single response questions, by default, and display as radio buttons to show the respondent that they should only choose one answer.
- Press Enter to start a new question after the currently selected question. By default, this is a single response question and the question style is Single Choice on the toolbar, showing radio buttons as the response box style.
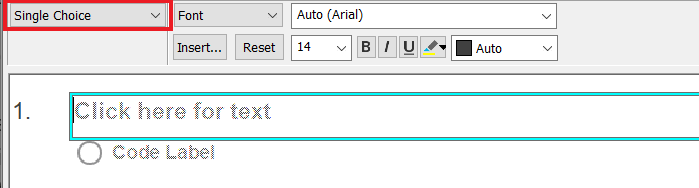
- You can see an area with “Click here for text”. Type your question text here.
- Press the Tab key on your keyboard and the cursor will move into an area by the first box, labelled “Code Label”. Type your first answer code here then press Tab to create and move to the next code label.
- Continue with the text for the other code labels and press Tab after each one.
- When you have finished the question you can press Enter to start the next question.
Showing questions as a drop-down
You can show Single Choice questions, Multi Choice questions and Grid rows as drop-downs.
To switch between the drop-down list or separate boxes:
- In the questionnaire window, select the question that you wish to turn into a drop-down.
- Select Show in the toolbar, then select As Drop-down in the next drop-down list
- Select the Show box to show the question as a drop-down. The question is now shown as a drop-down.
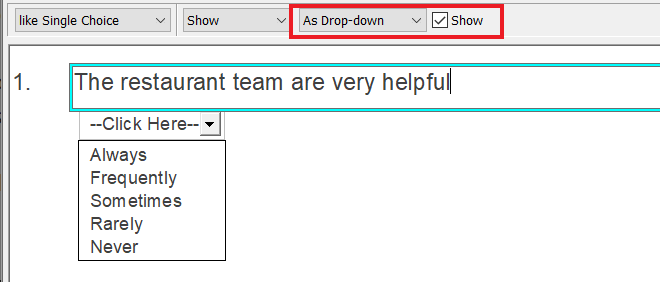
- Clear the Show box to show the question as response boxes.
Inserting Multi Choice questions
Multi Choice questions let a respondent select one or more responses from a list. They are multiple response questions, by default, and display as check boxes to show the respondent that they can choose more than one answer.
- Press Enter to start a new question after the currently selected question. By default, this is a single response question and the question style is Single Choice on the toolbar.
- Select the drop-down list on the toolbar where it says Single Choice and change it to Multi Choice by choosing Multi Choice in the Style selection drop-down menu. The shape of the response boxes changes from a radio button to a checkbox.
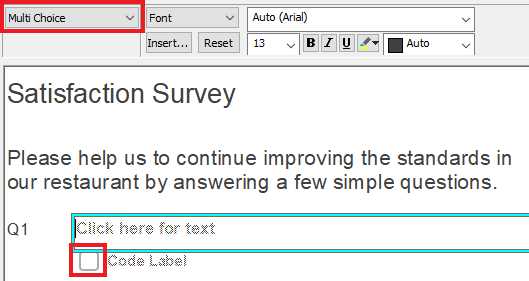
- You can see an area with “Click here for text”. Type your question text here.
- Press the Tab key on your keyboard and the cursor will move into an area by the first box, labelled “Code Label”. Type your first answer code here then press Tab to create and move to the next code label.
- Continue with the text for the other code labels and press Tab after each one.
- When you have finished the question you can press Enter to start the next question or press Ctrl + Enter if you wish to add an “Other” question.
Inserting an “Other” question
When you are creating a list of items it is likely the list will not contain every answer and you may want to collect further information from the respondent. Snap XMP Desktop has a pre-defined style called Other to collect such text, and is designed in such a way that it appears as part of the main question with its list of codes.
- When you complete your list of choices, use Ctrl + Enter to add an Other section to a Multi Choice question. The layout of an Other means that the question number will not appear, the text of the question will move up below the last code and a larger box will appear for a written answer.
- In the area marked “Click here for text”, type your question text.
- To make the box big enough to hold a long response, hold down the Ctrl key and press the + key on the numeric keypad. Press Ctrl and – to make the box smaller.
Inserting a Grid question
A Grid is made up of a series of Single Response questions, which have exactly the same choice of answers, organised in grid rows. Often they ask for people’s attitude towards something. In Snap XMP Desktop, a grid uses the styles Grid First and Grid Next.
- Press Enter to create a new question.
- In the style selection drop down list change the style to Grid First. This will allow you to set up the headings for the first of a series of grid questions.
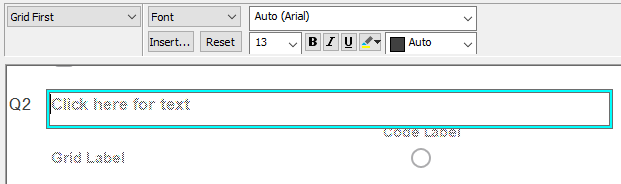
- In the area marked Click here for text, type your question text, for example “How did you rate the following?” Press the Tab key on your keyboard.
- The cursor will now move to the list of codes across the top of the first grid question. Type the first of the possible answers, such as “Good”. Press Tab to create the next code. Type each subsequent answer and follow each by pressing Tab. After the last code press
 instead of Tab.
 - The cursor will move to the text of the first Grid Label. Type the first item, such as “Speed of service” and press Tab.
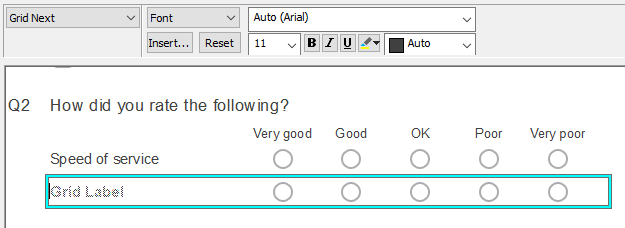
- This creates the next grid row automatically changing the style to Grid Next for the second and subsequent rows. Type the next Grid Label.
- Press Tab to create another grid row or press Enter to complete the grid and move to a new question.
Inserting a semantic scale
Semantic scale questions allow you to measure people’s attitudes towards contrasting adjectives or objects. Each pair of items is at opposite ends of a bipolar scale. You can insert a group of semantic scale questions together.
- Press Enter to create a new question.
- In the style selection drop down list change the style to Semantic Scale First. If it is not available in the list, select More Styles and scroll to Semantic Scale First in the Style Picker dialog, then click OK. This creates an empty question with two codes.
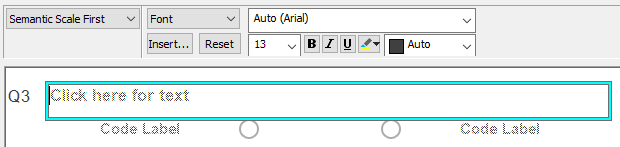
- Type your question text, for example “How would you describe the product?” Press the
 key to move to the first label. Type the adjective at one end of the scale, such as “Cheap”.
 - Press the
 key to move to the first code in the question.
 - Press Tab to add further codes
- Press the
 key to move to the second label and type the adjective at the other end of the scale (such as “Expensive”).

- Press Tab if you wish to create a grid of semantic scale questions or press Enter to create a new question.
Inserting an Open ended question
You can use an Open question to collect free format text, numbers, dates or times. There are three alternative styles to use
- Open Ended is for a single free format response.
- Open Grid First and Open Grid Next are for free format responses for a series of similar questions, which can come under the same overall question heading.
Inserting Open Ended (literal) questions
Use an Open Ended question to collect free format text, number, date or time. A common use is to provide space for general comments.
- Press Enter to create a new question.
- In the style selection drop down list change the style to Open Ended, which allows the respondent to enter free format text.
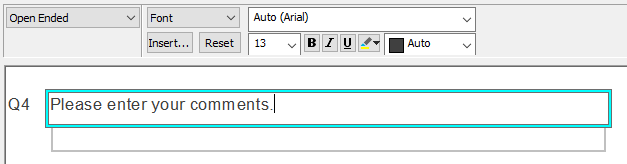
- Use Click on the box that reads Click here for text and type in your question text.
- To make the box bigger hold down the Ctrl key and press the + key. Press Ctrl and – to make the box smaller.
Creating a grid of literal questions
You can create a grid of open ended questions where respondents can enter their own answers.
- Press Enter to create a new question.
- In the style selection drop down list change the style to Open Grid First. This will allow you to set up the heading for the first of a series of questions, each of which can contain numbers or text.
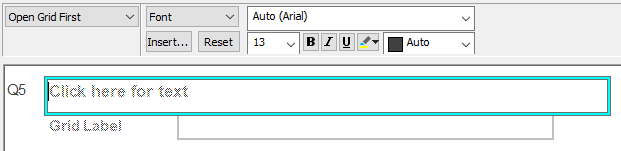
- Click on the box that reads Click here for text. Type your question text and press
 or Tab.
 - The cursor will move to the Grid Label of the first row where you can enter your text. Use Ctrl and + to make the box larger if necessary.
- Press Tab and type the next question text in the next line of the question.
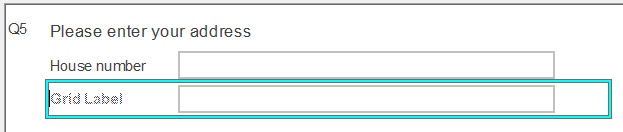
This is an Open Grid Next question. Its question box (and all subsequent boxes) will be the same size as the first box in the question.
- If you need more questions press Tab again and repeat the process.
If you wish to change the responses to quantities, dates or times, select Responses in the toolbar topic. Following questions will keep the new response type and box size.
